 Belgium
 Canada
 Germany
 Italy
Italy France
 Spain
Spain United Kingdom
Preparing for Bare Metal Disaster Recovery
Perform regular backups with BackupAssist on a daily basis

Using either one of the standard rotation schemes within BackupAssist, or your own customized backup schedule, setup BackupAssist to perform a regular backup of your critical data files, system state, Microsoft Exchange Server and Microsoft SQL Server.
For some people it is not always popular or convenient to backup every day of the week, however the golden rule is 'the more regularly you backup, the more secure you are in the event of a disaster.
Perform an ASR backup regularly and after major system changes
ASR backups are a crucial part of your backup plan that will save you both time and money. You should perform ASR backups on a regular basis, even daily, to maximize your level of protection. It is also recommended that you always perform an ASR backup after major system changes.
An ASR backup allows you to fully restore your system quickly and efficiently in the event of a disaster or complete system failure.
a. Open the BackupAssist administration console
b . Create a new NTBackup job
c. Go to Files and Folders link from the side menu and click on Local System Selections
d . Select the option for ASR backup
e. Ensure a floppy disk is in the floppy drive
f.IMPORTANT: Store both the ASR Floppy disk and the ASR Backup media ina safe location
Restoring Your System
In the event of a disaster/system failure, perform an ASR restore
IMPORTANT: Before you start, ensure you have the following resources:
- The ASR backup media - Tape or File.
- The ASR floppy disk.
- The Windows Operating System Installation CD.
Once you have all these critical resources, you can then commence a complete restore of your entire system through the ASR restore process:
- Boot the machine from the OS installation CD. Note: you may need to reconfigure your BIOS settings to achieve this.
- strong>Press F2 when prompted and insert the ASR floppy disk to commence the ASR restore process.
- The process is entirely automated so you are not required for further involvement in the restoration once you have pressed F2.
Your drive will be formatted and a quick installation of the Windows Operating System will take place. The ASR restore will then automatically commence and restore your complete system.
Once the ASR restore completes and Windows boots up
Restore your data with NTBackup from your daily backup stores that were created with BackupAssist - use the steps outlined under Restoring Individual Files on the last page of this Success Blueprint.
Restoring Individual Files
1 . Ensure your backup media is available
If you backup to Tape, place your tape in the tape drive.
If you backup to File, ensure that the disk drive or partition is available to be restored from.
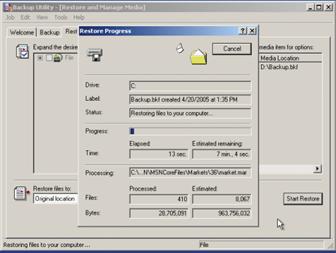
2 . Launch the Windows Backup Utility, NTBackup
- Run NTBackup (Start Menu > Run > ntbackup).
- Switch to the Advanced Mode if necessary.
- Access the Restore Tab.
- Expand the desired backup media set you wish to restore from (eg. Tape or File).
- Select which folder and files you wish to restore.
- Choose where you would like the files to be restored to.
- Start the restore process.
- Manually ensure that the data files were restored to your desired location using
- Windows Explorer (Start Menu > Run > explorer).

