Backing up a Remote SQL Server with BackupAssist™
How to Backup your Remote SQL Server using BackupAssist™
If you want to backup a remote SQL server from a machine with BackupAssist installed you will need to carry out the following steps:- Install the SQL server client tools on both the SQL server machine and the Backup server machine
- The client tools can be installed from the SQL Server Installation CD:

- Choose to install the database server:

- You may receive an alert message if your Operating System does not support the SQL Server installation - just click 'OK'
- Choose to install the client server tools:
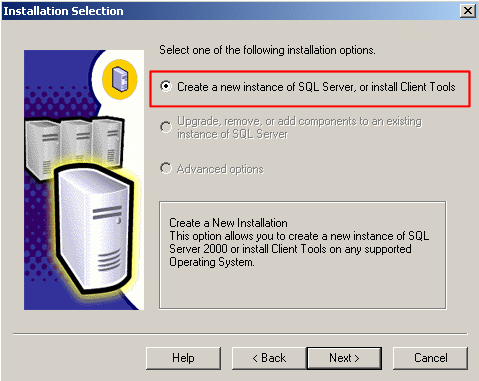
- Input your SQL server license key information
- Select the type of installation - if you are installing on the backup server, you only need to install the client tools
- The client tools can be installed from the SQL Server Installation CD:
- Create a network share that both the SQL server and Backup server have access to
It is best to create the network share directory on the actual SQL server itself to avoid any authentication issues between the SQL server and the Backup server.
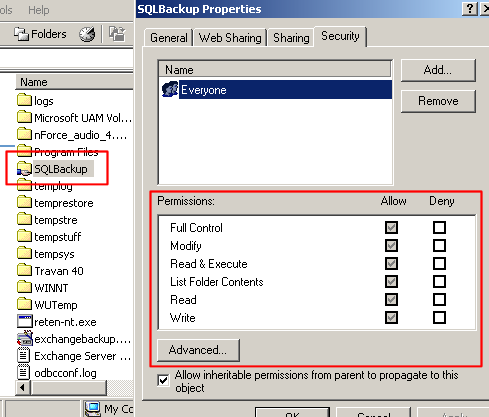
For example: create a new directory on your SQL Server in C:\SQLBackup, and then share that directory with the share name of SQLBackup. Assign your backup user full permissions for that share, and full NTFS file permissions as well.
Since a Backup User Identity is defined with BackupAssist which is used to logon and perform the backup, as long as that user has permissions/access rights to write and read from the SQL shared directory you will have no problems backing up to and from this directory.
Below is an example of a network share that was created on the SQL server itself called 'SQLBackup':
Tip: If you're concerned about security, and creating an extra share for your SQL server backups, then you can make the share hidden by adding a $ to the end of the share name. For example, a share called SQLBackup$ will be hidden, meaning that people viewing your server in the Windows Explorer won't be able to see that share.
- Now setup BackupAssist to backup your remote SQL server
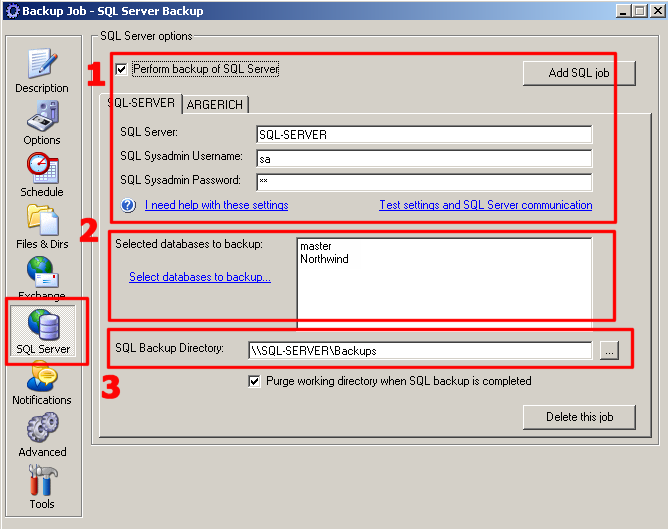
Access the SQL server tab of BackupAssist
- Enter in the server details and authentication information of your SQL server (eg. the name of the remote server you are backing up from)
- Select the databases you wish to backup
- Enter in the network share directory you defined earlier that both your Backup server and SQL server have access to into the SQL Backup Directory field
- Ensure that you enter the directory in UNC format as follows:
\\ServerName\ShareName
In this case: \\TEST-2000-SVR\SQLBackup
- Your remote SQL server backup should now work as long as the correct permissions were set on the SQL Backup Directory