Tape drive options: configuring basic tape drive settings
Accessing tape drive options
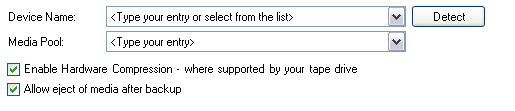
To access the Tape drive options shown above:
- Click
 Jobs in the navigation bar
 - Select the job to be edited and click
 Edit at the bottom of the window.
 - Click
 Destination on the left menu.
 - Click
 Tape drive options to expand the section.
Your tape drive(s) should have already been detected with the correct Device Name and Media Pool when the backup job was created.
- If your tape drive(s) was not automatically detected click Detect.
- If you have multiple tape drives installed on the machine you can choose a specific drive for backup using the Device Name drop-down menu. Also ensure that the media pool selected is appropriate to the drive.
- If one or more of your tape drives are still not detected, or detected incorrectly, you can manually type the correct Device Name and Media Pool into the available fields. To obtain the correct values, view them in the Windows Removable Storage Manager (RSM).
- If you have multiple tape drives installed on the machine you can choose a specific drive for backup using the Device Name drop-down menu. Also ensure that the media pool selected is appropriate to the drive.
Enabling tape drive hardware compression
Enabling hardware compression on your tape drive means that more data can be fit on each tape, provided that the data can be compressed. For example, a DDS 3 drive provides 12 Gb of space, native (without compression). With compression, this capacity increases. Most tape drive manufacturers overestimate the effectiveness of compression, and quote a 2:1 compression ratio, suggesting that a DDS 3 tape will hold 24GB of data. Generally, however, you can expect a compression ratio of 1.4:1 or 1.5:1 - around 16 to 18 Gb on a DDS 3 tape.
Most Travan tape drives do not support hardware compression and this often forces users to purchase backup software that supports software compression, which is often far more expensive than the drive itself. While BackupAssist does not provide software compression for tape drives, it is generally more cost-effective to purchase a drive with hardware compression than backup software with built-in compression capabilities to tape.
To enable hardware compression:
- Check Enable hardware compression
You can setup BackupAssist to automatically eject your tape after each backup has been completed. This will ensure that the tape will not be overwritten the next day.
To enable media eject:
- Check Allow eject of media after backup.