Remote selections: selecting remote files and folders for backup
Accessing remote file selections
To access the Remote file selections shown above:
- Click
 Jobs in the navigation bar.
 - Select the job to be edited and click
 Edit at the bottom of the window.
 - Click
 Files and folders on the left menu.
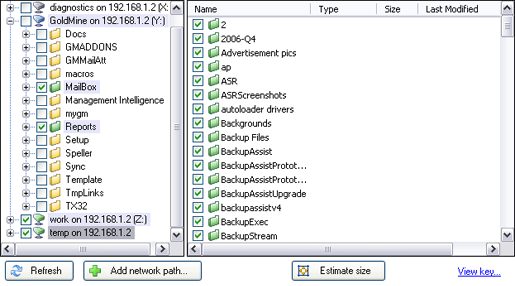
 - Click the Remote files tab at the top of the window.
BackupAssist will display a list of mapped network drives currently configured in Windows. If any network drives appear to be missing or have been recently mapped, click ![]() Refresh at the bottom-left of the window. It is also best to ensure that the backup user identity in BackupAssist has access to data selected on any mapped network drives.
Refresh at the bottom-left of the window. It is also best to ensure that the backup user identity in BackupAssist has access to data selected on any mapped network drives.
![]() Configuring the backup user identity
Configuring the backup user identity
To select remote files for backup:
- Check tick-boxes to the left of any network drives, folders, sub-folders you wish to backup
- Check tick-boxes to the left of any individual files within network drives or folders you wish to backup
- Click Apply changes at the bottom of the window to save your selections or Cancel to cancel any file selections you have made.
- Network drives and folders will appear with different colored icons depending on how they have been selected for backup. Click View key at the bottom-right of the window to view a detailed key of the color differences and their meanings.
 Fully selected: The entire drive/folder is backed up, including all sub-folders and files.
  Partially selected, new items are included: All sub-folders and files selected are backed up, as well as any sub-folders or files that are created in the future.
  Partially selected, new items not included: Only sub-folders and files selected are backed up. No new files or folders created in the future will be backed up.
If you wish to backup data on a remote machine that is not part of any mapped network drives, you can add network paths to backup from.
- Click Add network path at the bottom of the window.
- A dialog box will appear where you can input the network path directly or Browse for it in My Network Places.
- Network paths must be entered in the form \\Servername\Sharename (eg. \\SBS-SERVER\accountdata)
- Click OK once you have input the network path.
- BackupAssist will then attempt to connect to the network path using the username and password of backup user identity. If the backup user identity cannot access the network path, you will be asked to supply a different username and password that has access.
- The new network path will now be displayed in the remote file selection list where you can expand it and make the appropriate folder and file selections.