Please note: the instructions outlined here are available in the Windows Server Backup help file.
To restore volumes with Windows Server 2008 Backup:
- Click
 Restore in the navigation bar.
 - Click Imaging restore. Windows Server Backup will then launch. Click Recover under the Actions pane.
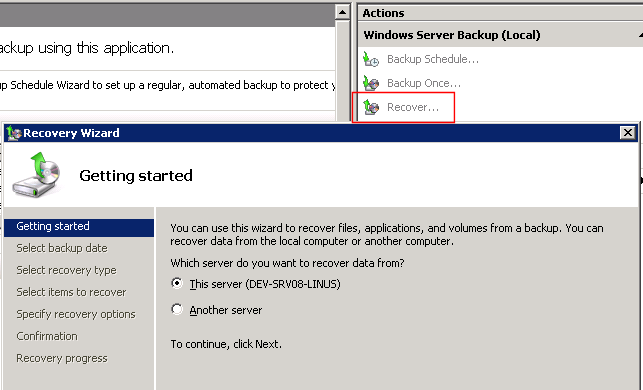
- Specify whether you are restoring from a backup created on this computer or another computer, and click Next.
- If you are restoring from a backup stored on another computer, complete the following:
- Specify whether the backup that you want to restore from is on a local drive or a remote shared folder (eg. NAS device).
- If you are restoring from a local drive, select the location of the backup from the drop-down list. If you are recovering from a remote shared folder, type the path to the folder that contains the backup. In the folder, the backup should be stored at
\\<RemoteSharedFolder>\WindowsImageBackup\<ComputerName>\<YourBackup>.
- If you are restoring from a backup stored on another computer, complete the following:
- If you are restoring from a backup created on this computer, select the location of the backup from the drop-down list, and click Next.
- Select the date from the calendar and the time from the drop-down list of the backup you want to restore from. If you are recovering from this computer and the backup you select is stored on a DVD or removable media drive, you will be prompted to insert the relevant media. Then click Next.
- Click Volumes, and click Next.
- Select the check boxes associated with the volumes in the Source Volume column that you want to recover. Then, from the associated drop-down list in the Destination Volume column, select the location that you want to recover the volume to. Click Next.
- Important: Any data on the destination volume will be lost when you perform the restore. Make sure that the destination volume is empty or does not contain information that you will need later.
- Review the details, and click Recover to restore the specified volumes.
- You can then view the status of the recovery operation and whether or not it was successfully completed.