In this example we go through three steps to perform the restoration of the Exchange Information Store.
We assume that your system is functioning properly - that all your files and registry have been restored where needed - and you need to get your Exchange Server Information Store working again.
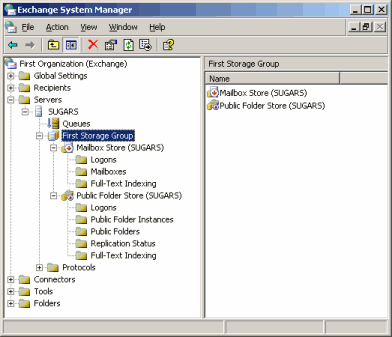
Step 1: Dismount your Exchange Server Stores

Exchange server manager
Run the Exchange System Manager from the Start menu, and navigate down to find your server and storage group (as shown in the screenshot). Then on your Mailbox Store and Public Folder Store (and any other stores that may be listed), right click and select "Dismount Store".
Once dismounted, your stores will have an icon with a red arrow pointing down, as shown in the screenshot below. This indicates that they have been dismounted.
Exchange server manager
Step 2: Run Windows Backup, and perform the restoration
Start Windows Backup as shown in the screenshot below.
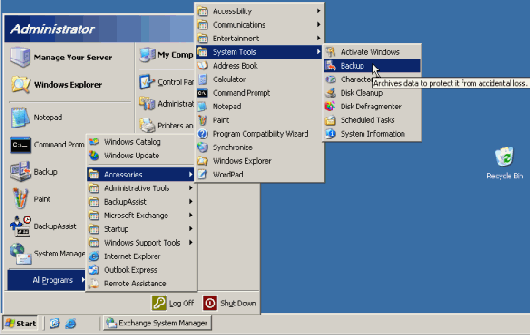
Launch Windows Backup
You should then click the "Restore and Manage Media" tab, and locate the file or tape that you wish to restore from. Expand the tree under that media until you find the Exchange Server Information Store listed, and select it.
In the example screenshot, we are restoring from a file called "BA.bks" and the Exchange Server is SUGARS.
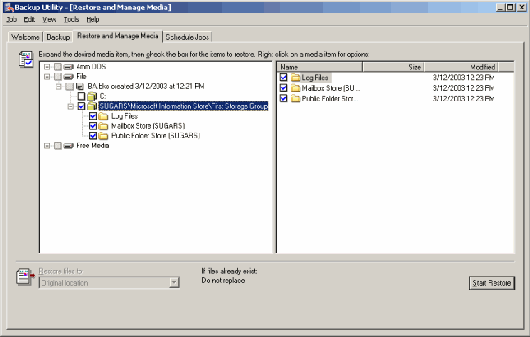
Ntbackup Restore Tab
Click the Start Restore button. You'll be asked several options, as shown below. Because we are restoring to the same Exchange Server, the Restore To field is filled with "SUGARS" The temporary location for log and patch files should be any directory with enough free space to perform the restore to (Windows Backup will create the directory if it doesn't arleady exist.)
Since we are restoring from a full backup, we also check the last two checkboxes on the window, and then click OK.
If you are restoring an incremental or differential backup, you should refer to the Additional Resources listed at the start of this white paper.
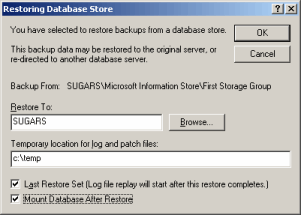
Restoring Database Store
Step 3: Check the logs
Once the restore is complete, you should see the following window. Click on the Report button to view the logs.

Restore Complete
The backup log will show the results of the restore process, as shown below:
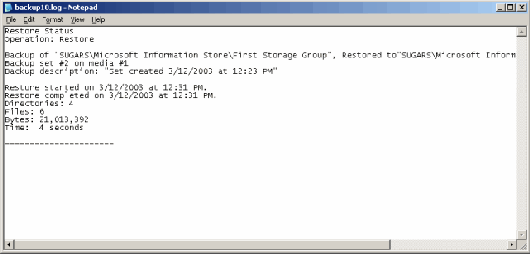
Restore Logs
At this stage, you may also choose to reboot your server.
Your Information Store should now be restored and mounted, and operational.