
One of the neat new features of Windows Server 2016 is the ability to hot add and remove memory from your Hyper-V Guests. Officially known as ‘Runtime Memory Resize‘, this trick saves you a lot of time.
This feature is different from Dynamic Memory, which we’ve had since Windows Server 2012. The key difference is:
- Dynamic Memory monitors the memory you use in a virtual guest, then adds and removes it depending on your usage. This is not suitable for some scenarios where you don’t want constantly changing memory (E.g. A hoster).
- Runtime Memory Resize allows you to change a VM’s memory resource to a specific value without restarting the guest OS.
You can also hot add other virtual hardware such as a network adapter in Hyper-V 2016. We’ve written a how-to on doing both, so read on!
How to Hot Add and Remove Memory in Windows Server 2016 Hyper-V
Requirements
The requirements to use Runtime Memory Resize are as follows:
• You must be running either Windows 10 or Windows Server 2016. The reason for this is the changes to the kernel mode memory manager that is not present before Windows 10 and Server 2016. These changes allow ram to be removed (unplugged) and added (plugged) from the OS. As a side-note, certain versions of Linux also support hot-adding memory, but not removal.
• You can’t be using Dynamic Memory for the VM.
• You can use this feature with either a Generation 1 or Generation 2 VM.
• Unlike Dynamic Memory, Runtime Memory Resize supports vNUMA.
Step 1 – Hot Add the Memory in VM Hardware Settings
First, open the Hyper-V Management Console. Select the Virtual Machine you want to alter. Right click, and select setting.
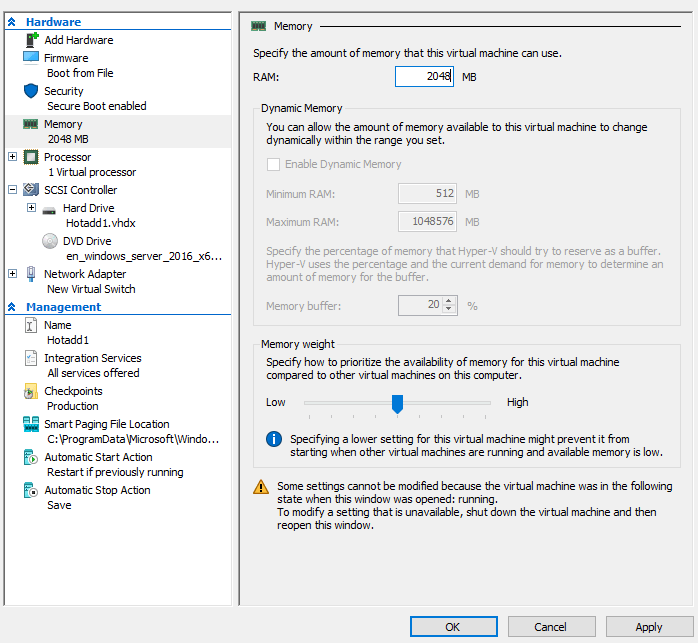
Then, select the Memory tab under Hardware, and specify the required additional memory. You should be seeing a screen like the one below.
Step 2 – Verify the Memory has been Added in the OS System Settings
After adding the memory to your VM, click Apply and OK. The additional memory should have been added to the running VM without restarting it.
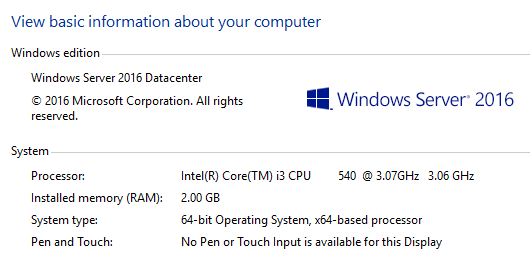
To check that this is the case, go to the OS System Properties. The amount of RAM should have changed proportionately. Easy, right?
Step 3 – Hot Remove Runtime Memory
For Hot-Remove, it’s just as easy. Open the Hyper-V Management Console again, select the VM, right click, and select settings. Select the memory tab under Hardware once more.
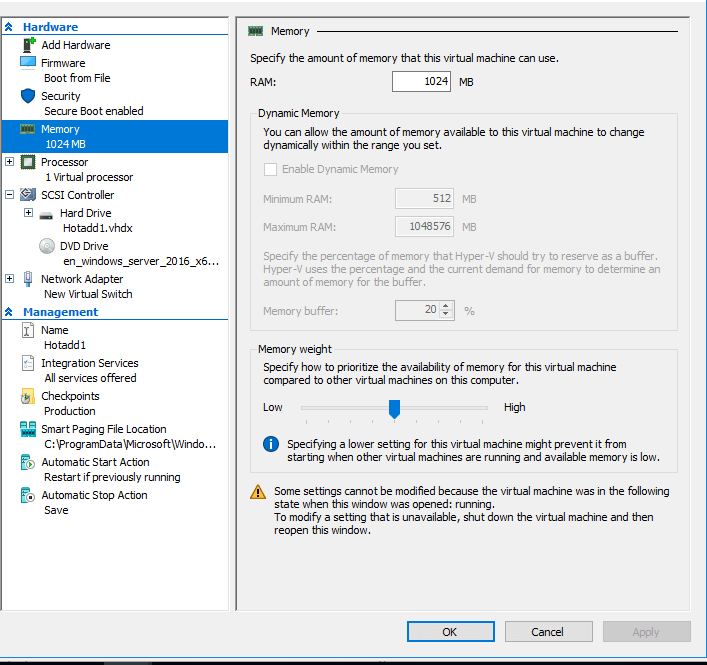
When you’re there, just select run-time memory size. Specify the required amount of memory, and click okay. You’ll want to verify this by opening the OS System Properties again.
Hot Adding and Removing Network Adapters in Windows Server 2016 Hyper-V
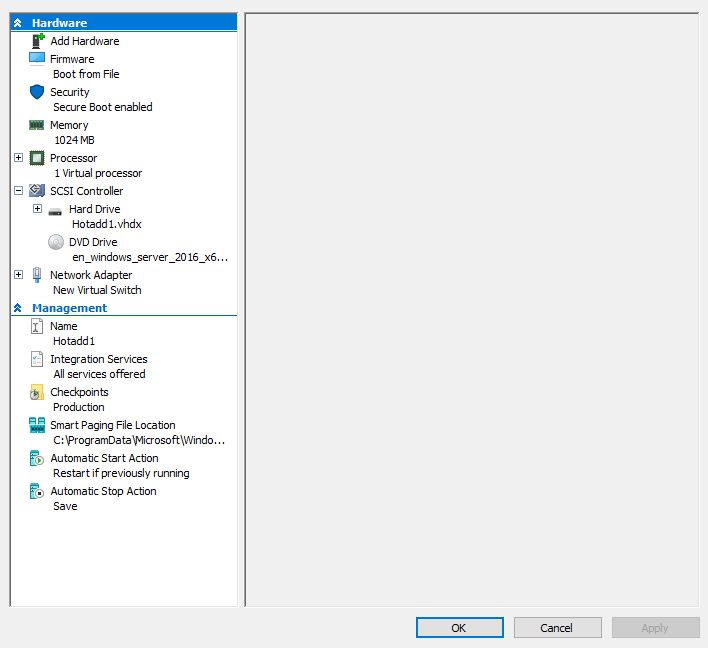
Step 1 – Go to the Network Settings
The steps for this are really simple.
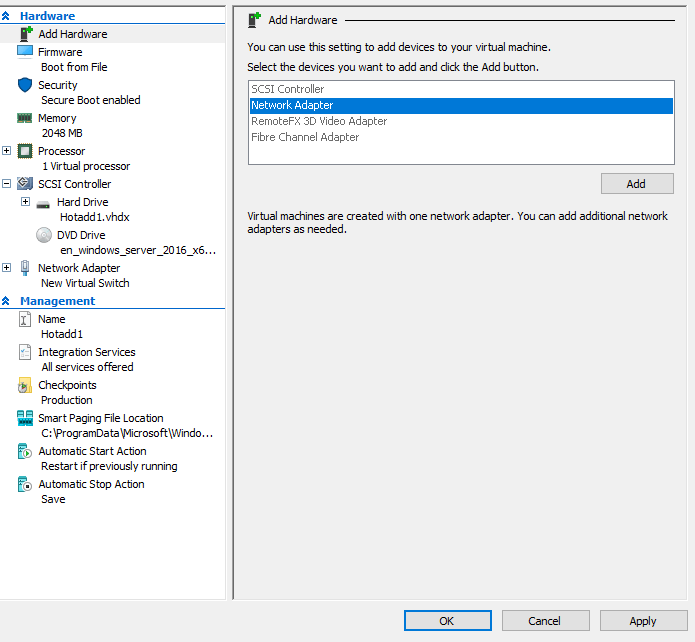
Open File->Click settings->Click Add Hardware->Choose Network Adapter->Click Add.
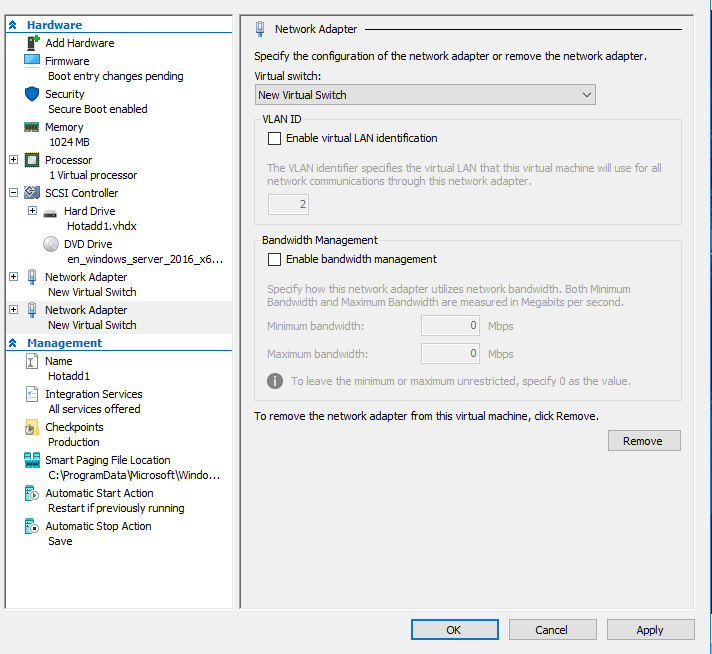
Step 2 – Assigning a Virtual Switch for the new NIC
Now that you’ve created a new NIC, you’ll want to assign a virtual switch to it so it can communicate with the Hyper-V Host’s NIC.
All you have to do is select the ‘New Virtual Switch’ option. Click Apply, then OK.
Step 3 – Hot Remove Network Adapters
All you have to do is go to the same settings place while the VM is running, and click Remove.
Conclusion
Hot adding and removing virtual hardware in Windows Server 2016 is an awesome feature, so you can start dynamically allocating resources where they’ll make maximum impact. While VMware has had the vSphere hot add feature for some time, Microsoft has now caught up and then some.
This feature is particularly useful when it comes to backup software. Since you want backup jobs to complete as fast as possible, you can properly allocate RAM to help speed up this process.
If you don’t have backup software already, we highly recommend BackupAssist. BackupAssist is the #1 Ranked Backup and Disaster Recovery Software for Windows Servers, used by Fortune 500 companies and other organizations such as NASA, MIT, and Cessna, but priced for small and medium businesses.
You can download the 30-day free trial here, or read more about its features. If you’re using another sort of OS, you can also check out this free backup buyer’s guide to see what’s the right fit for you.