Belgium
 Canada
 Germany
 Italy
Italy France
 Spain
Spain United Kingdom
RecoverAssist Whitepaper
RecoverAssist consists of two main components, the RecoverAssist Recovery Environment and the RecoverAssist Builder.
The RecoverAssist Builder is used to create a RecoverAssist Recovery Environment. It allows the user to add custom drivers to the Recovery Environment that may be needed during the restore.
The RecoverAssist Recovery Environment is a superior replacement for the Windows Recovery Environment. It can be used to perform bare metal system recovery from Windows Imaging backups that have been created using BackupAssist. It supports recovery from many different types of backup device. The RecoverAssist Recovery Environment automatically adjusts the appropriate Windows settings when recovering to dissimilar hardware. This avoids many 'Blue Screen of Death' (BSOD) problems often encountered when using the standard Windows Recovery Environment.
Using RecoverAssist Builder
The RecoverAssist Builder allows you to create bootable Recovery Environments on DVDs or removable drives, such as USB thumb drives or SD cards. You can also use the RecoverAssist Builder to create an ISO Image file that can be burned to disk or mounted for virtual environments.
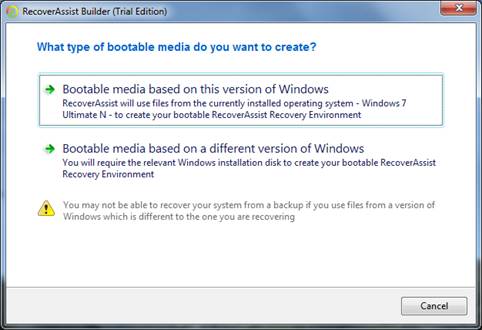
Selecting a Windows Version
The first step to using RecoverAssist Builder is to select whether to create a Recovery Environment from the local Windows system or from a Windows installation disk.
Recovery Environments can be built from 32- and 64-bit versions of the following operating systems:
- Windows Vista
- Windows Server 2008R1
· Windows Small Business Server 08
- Windows 7
- Windows Server 2008R2
- Windows Small Business Server 11
However, due to a limitation in Windows Vista, Windows Server 2008R1 and Windows Small Business Server 08, recovery environments for those operating systems must be created from the installation disk. They cannot be built from the currently installed operating system.
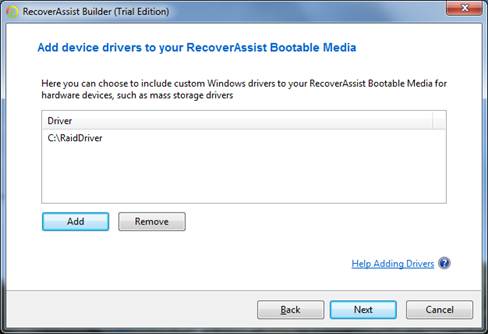
Adding Hardware Device Drivers
RecoverAssist Builder allows the user to include their own drivers within the RecoverAssist Recovery Environment. This is useful to ensure that the Recovery Environment has the ability to support the user's hardware at restore time. It is easy to include drivers downloaded from websites such as DriverPacks.net or from manufacturers' disks.
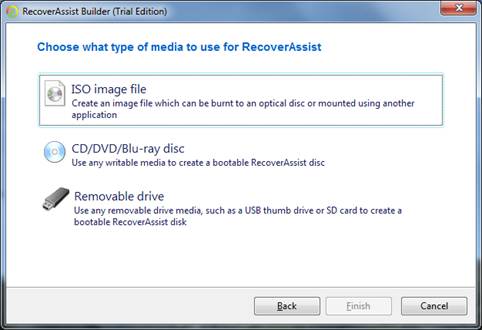
Selecting Boot Media
After adding custom Windows Drivers, the user then selects whether to create an ISO Image file, a CD/DVD/Blu-ray disc, or a bootable RecoverAssist disk on a removable drive. Depending on their choice the user then selects the drive letter of the RecoverAssist disk to be created, or the filename and location to create the ISO image file.
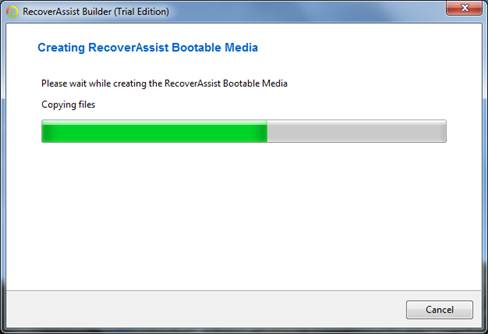
Then RecoverAssist will proceed with the creation of the Recovery Environment.
Using the RecoverAssist Recovery Environment
To perform a system recovery on a server or workstation first boot into the Recovery Environment. The system may need the appropriate boot device to be configured in the BIOS. Alternatively on some systems the boot device may be able to be selected from within a menu in the pre-boot environment.
Recovery Environment Menu
Once the machine has completed booting into the Recovery Environment the RecoverAssist menu will be displayed.
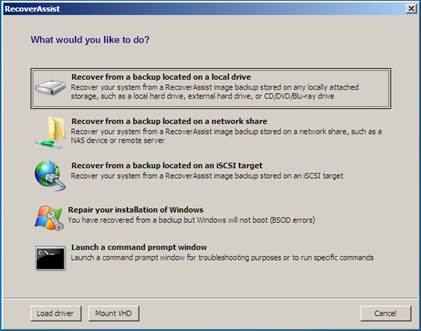
The user may then choose to recover from a backup located on a local drive, a network share or an iSCSI target. The user may also repair existing systems that were recovered using the Windows Recovery Environment but will not boot due to blue screen of death errors. Using the repair function is not necessary for systems that are recovered within the RecoverAssist Recovery Environment. The last option allows the user to launch a command prompt in order to run the various command line tools included with RecoverAssist, such as diskpart.exe, bootsect.exe, regedit.exe, etc.
From this screen the user may also load any additional device drivers they did not include when creating a the recovery environment. They may also mount any VHD such as a Hyper-V Virtual Hard Drive or Windows Backup images. This means that after mounting they will be able to access the files using a local drive letter.
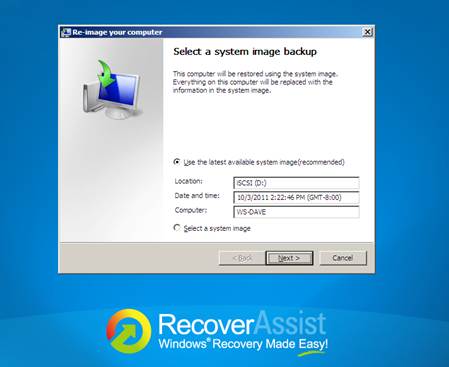
Selecting a Windows Image
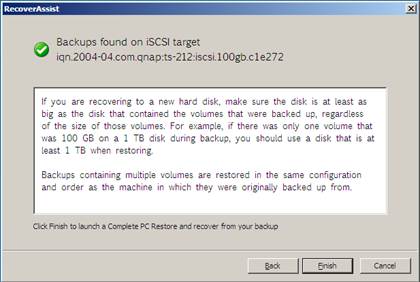
To begin a recovery the user should select the option that suits the location of their backup. If they select a local backup, then the Recovery Environment will scan all local drives for Windows Backup images. If they select a network based backup, the Recovery Environment will open a screen that allows the user to configure their network card. Network drivers, including custom drivers added by the RecoverAssist Builder, are loaded automatically as part of the boot process. The user is able to modify any TCP/IP network settings, or review the automatically assigned settings, before advancing to select the location of their backup on the iSCSI device or network share. RecoverAssist will search the specified network location for Windows Backup images and display any images found to the user.
Recovering with the Windows Backup Image
The user then clicks the 'Finish' button, which will open the backup in the standard Windows Recovery Console. If multiple backups are found, the user will be given a chance to choose which backup to use for the recovery. The remainder of the restore process is identical to the standard Windows Recovery Environment.