Ransomware is malware that encrypts files and demands payment to provide the decryption key so you can access those files again. The only way to clean infected computers is to recover them from a backup. It is therefore important that your backups are not infected, which is why CryptoSafeGuard is such an invaluable feature. CryptoSafeGuard protects your backups from ransomware using two features: the CryptoSafeGuard Detector and the CryptoSafeGuard Shield.
CryptoSafeGuard Detector - prevents infected files from being backed up.
When a backup job starts, BackupAssist ER scans the data being backed up. If there is any sign of a ransomware infection, all jobs are blocked from running, and SMS alerts are sent to inform you of the detection.
CryptoSafeGuard Shield - protects your existing backups from ransomware.
The CryptoSafeGuard Shield prevents unauthorized processes from creating, deleting or updating data in your backups. This feature runs automatically in the background when CryptoSafeGuard is enabled.
Note: CryptoSafeGuard detects signs of a ransomware infection. It does not protect the actual computer from ransomware or remove ransomware.
In this guide, we will look at:
- How to use CryptoSafeGuard for the first time.
- How to use the options available in the CryptoSafeGuard tab.
- How to respond to an alert.
Using CryptoSafeGuard for the first time
First run
The first time a job runs, it will scan all files modified in the last 3 months. This may take some time depending on the amount of data being backed up. Subsequent scans will check files that have changed since the last backup, with minimal impact on the jobs’ run times.
Grace Period
If CryptoSafeGuard detects a potential infection, all backup jobs are blocked from running. However, there is a grace period for new jobs and jobs with selection changes, during which potential infections will not block jobs from running. If any jobs are blocked, your system administrator should check if the computer was infected with ransomware. If the files that triggered the warning are safe, they can be whitelisted or deleted and the backup jobs will be allowed to run at the next scheduled time.
The purpose of the grace period is to give you time to whitelist safe files that cause alerts (false-positive detections) for new backup jobs and existing jobs that have had selections changed. This is important because backup jobs usually run at night, and an infection detection would block all jobs, meaning no backups for that night.
Since the grace period warning does not block jobs, any jobs that run during this state do not trigger an SMS alert.
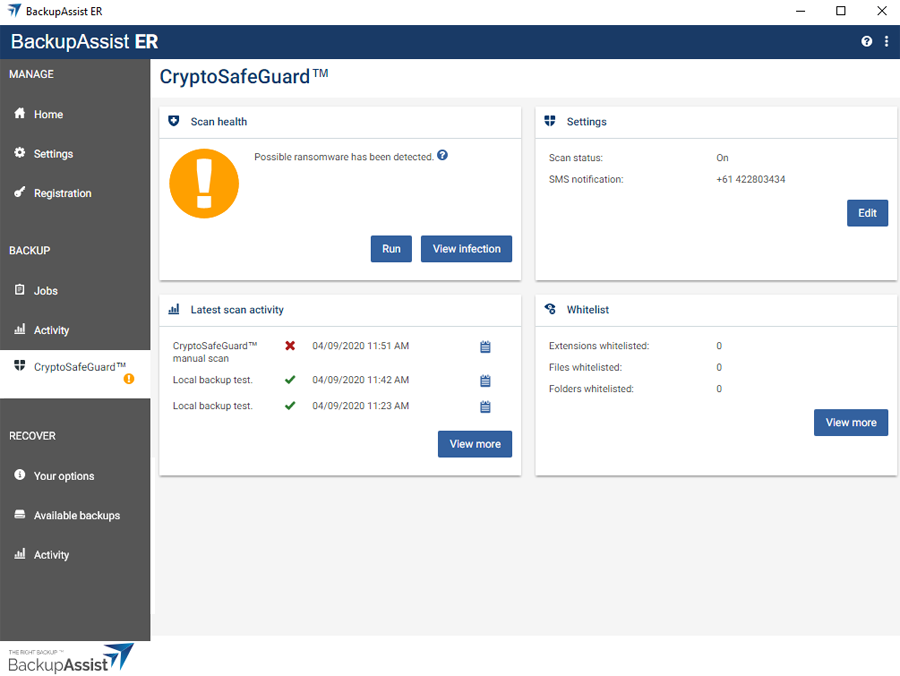
During the grace period, the warning icon will be yellow.
Three consecutive safe scans are required before the grace period for a job can end. A failed scan performed during a grace period will reset the grace period and a further three consecutive safe scans will be required before the grace period can end.
After a job's grace period ends, any failed scans will result in a red warning icon and all jobs will be blocked.
Summary of how the grace period works across backup jobs:
- Three consecutive safe scans are required before a backup job's grace period can end. For example, if there are 2 safe scans and then 1 failed scan, the grace period would reset and require 3 consecutive safe scans.
- If a job is within its grace period, any ransomware detections during the running of that job will not result in jobs being blocked.
- If a job is out of its grace period and it detects ransomware, all jobs will be blocked.
- If the yellow warning icon is displayed, and a job that is out of its grace period runs, the yellow icon will change to a red icon and jobs will be blocked.
- If a job’s selections change, the grace period for that job is reinstated, but other jobs that are out of their grace period will remain out of their grace period (and will block jobs if they detect ransomware).
Note: CryptoSafeGuard Shield prevents you from manually deleting backups and changing files in the backup destination. If you need to manually delete backups, disable CryptoSafeGuard, make the deletion, and then re-enable it again.
CryptoSafeGuard tab
The CryptoSafeGuard tab is used to manage the whitelist, configure SMS notifications, enable / disable CryptoSafeGuard and respond to alerts. These functions are performed using four tiles and the screens they open, as described below.
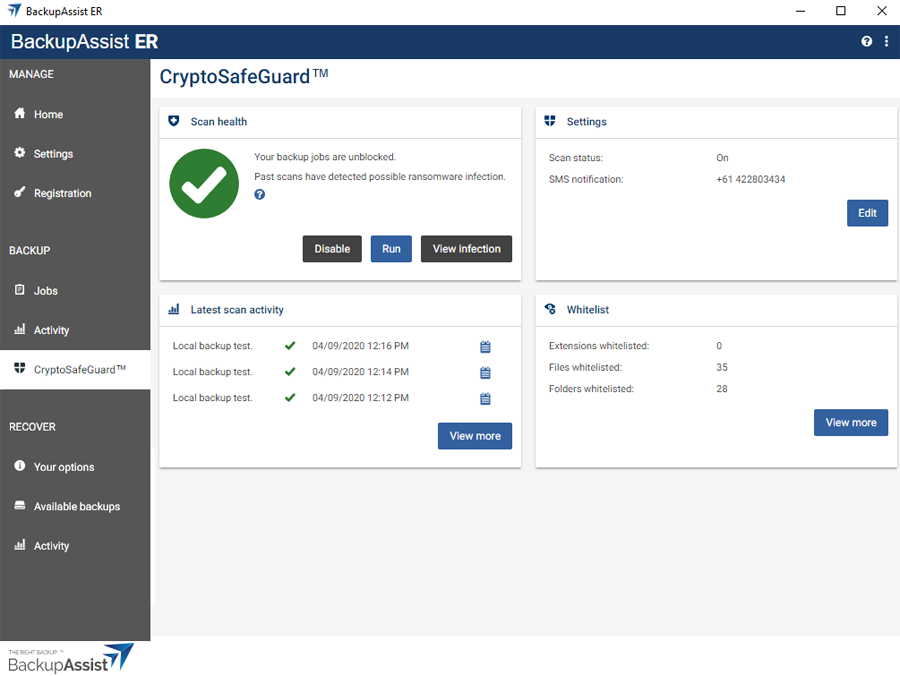
Scan health
This tile shows if CryptoSafeGuard is enabled. It can be used to Enable / Disable CryptoSafeGuard and to Run it manually. If there is an infection alert, the role of this tile changes and it is used to take action on the alert.
Enable (Disable)
Select this button to enable or disable CryptoSafeGuard for all backup jobs.
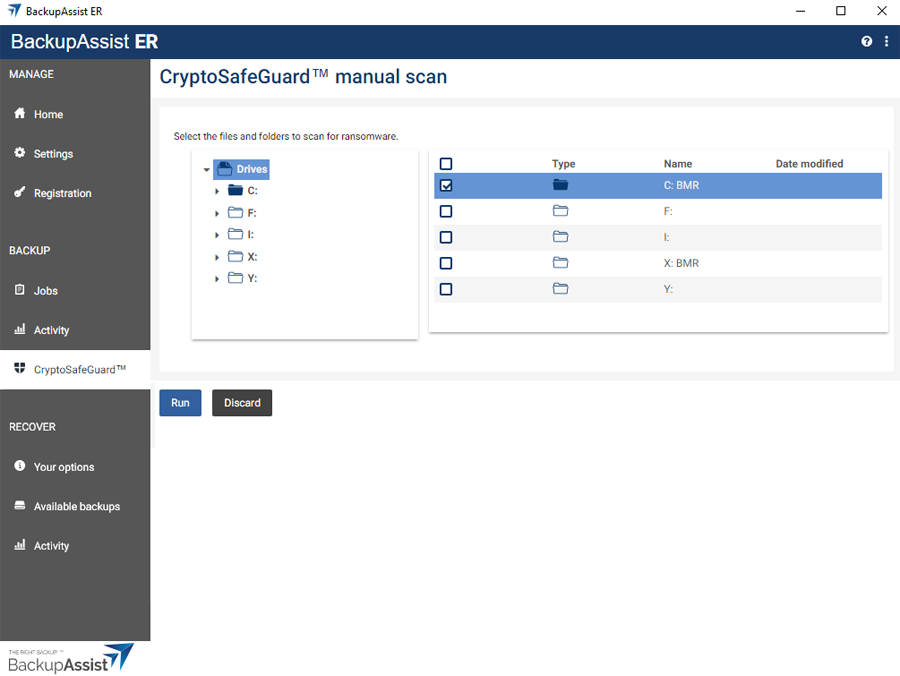
Run
Select this button to run a manual scan of any files or folders on your system. This can be useful when making new backup jobs or using CryptoSafeGuard for the first time, as you can scan the files that your jobs back up and perform whitelisting without running the individual jobs.
If there is an infection alert
The Scan health tile's functions and buttons will change and are used to respond to the alert. If there is a ransomware alert a View infection button will appear and open the Possible ransomware infection screen. How to use the Possible ransomware infection screen is explained in the How to respond to an alert section below.
Latest Scan activity
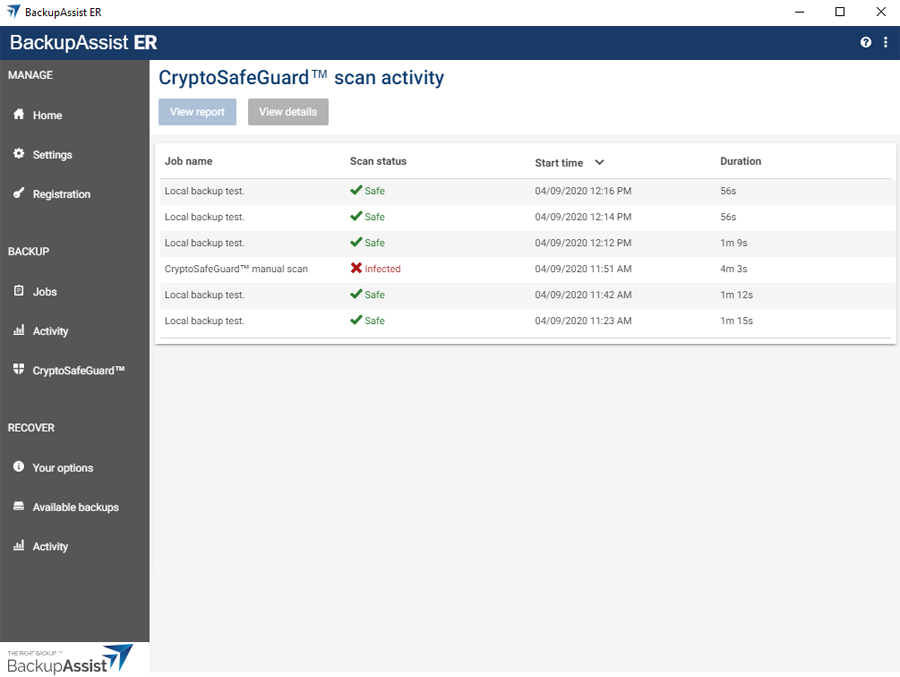
This tile shows the last scan results for each backup job. The View more button allows you to view all past scan results.
Selecting View more will take you to the CryptoSafeGuard scan activity screen, which lists all previous scans. The View report button will open the backup report for the selected backup job.
Settings
This tile shows if CryptoSafeGuard is enabled and phone number that SMS alerts are being sent to.
The Edit button allows you to change the status of CryptoSafeGuard, and set up or modify the SMS notifications.
Enable CryptoSafeGuard protection.
If this option is ticked, CryptoSafeGuard is enabled. Removing the tick will disable CryptoSafeGuard protection for all backup jobs.
Notifications
To set up SMS notifications, fill in the following fields:
- Phone number - enter the phone number that you want to receive the alert. Use the standard international phone number format “+<country code><mobile phone number>”. This feature currently supports one phone number.
- Additional message - Enter a text identifier or description for this machine so you can easily identify what BackupAssist ER installation the alert came from.
- Send SMS - use this button to check that the details you have provided work correctly.
SMS notifications are sent when transitioning between alert states:
- Unblocked (no warning icon) => Warning (yellow warning icon)
- Unblocked (no warning icon) => Blocked (red warning icon)
- Warning (yellow warning icon) => Blocked (red warning icon)
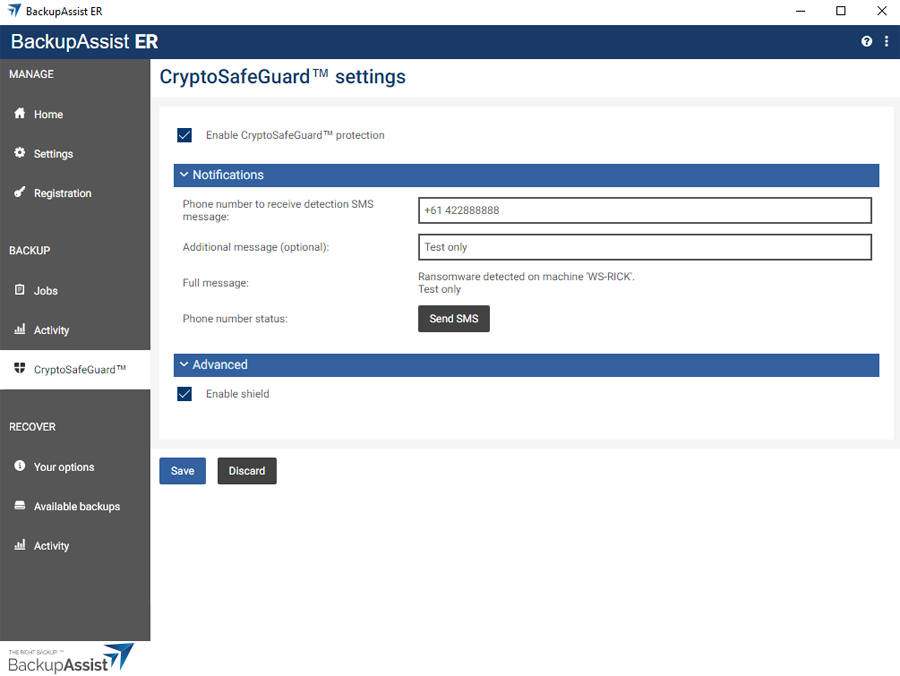
Advanced
Enable shield is ticked and enabled by default. The CryptoSafeGuard Shield prevents unauthorized processes from creating, deleting or updating data in your backups.
Removing the tick from Enable shield will disable CryptoSafeGuard protection for all backup destinations used by this installation of BackupAssist ER. Enable Shield should only be disabled temporarily to troubleshoot a problem or make changes to data in the backup destination.
Whitelist
This tile shows the number of entries for each whitelist category. The View more button opens the screen shown below.
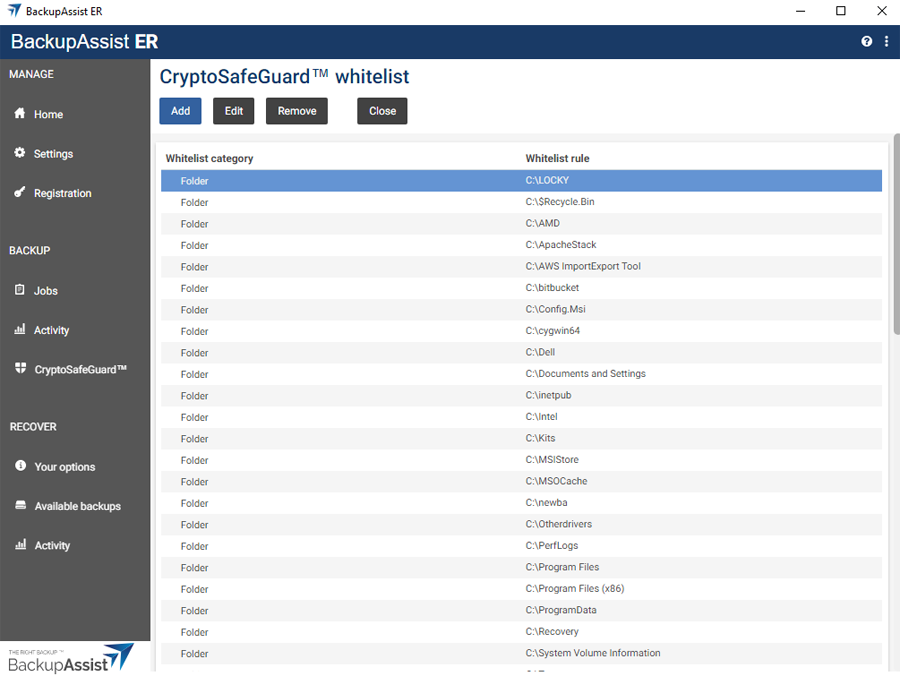
The CryptoSafeGuard whitelist screen shows every whitelist entry, and the menu allows you to update the whitelist.
The Add button is used to add new entries to the whitelist.
To use the Add button:
- Select Add
- Select the whitelist category: extension, folder or file.
- For files and folders, browse to the item and select it.
- For file extensions, do NOT include periods or wild card symbols. E.g. enter txt. Not .txt or *.txt.
- Select Add to save the change.
- Repeat this process for each folder, file or file extension. Do not enter multiple extensions as a single entry.
Selecting a folder will whitelist all files inside that folder as a bulk process.
Note: When you have an infection, files are whitelisted using the Possible ransomware infection screen.
The Edit button is used to modify existing whitelist entries.
To use the Edit button:
- Select the item you want to change.
- Select Edit.
- Make the modifications.
- Select Save.
The Remove button is used to remove entries from the whitelist.
To use the Remove button:
- Select the item you want to change.
- Select Remove and the selection will be removed from the whitelist.
Note: Adding files and folders to the whitelist means they are excluded from CryptoSafeGuard’s scan when a backup job starts. It is important to only whitelist files that create, or are expected to create, false-positive responses when the scan runs.
How to respond to an alert
In most cases, it is obvious when a system has an infection due to ransom demands on the desktop, locked screens and encrypted files. In these cases, it is clear that your system is infected and that you need to perform a bare-metal recovery from your last successful backup.
If there are no such indications, then the CryptoSafeGuard alert could be a false-positive. However, you still need to check the files that triggered the alert, and whitelist them if they are safe or delete them if they are not needed.
When you open BackupAssist ER with an active alert, the CryptoSafeGuard tab's Scan health tile is used to take actions for the alert.
Confirm infection
If you have a grace period alert (yellow warning icon) the backup jobs will not be blocked and this button will be available. If you believe you may have an infection, selecting this button will block all jobs from running and elevate the warning to a red alert. You can then investigate and review / whitelist files as required.
Dismiss warning
If there is a grace period warning, this button can be used to remove the alerts. However, any flagged files will still trigger a warning the next time the job runs.
Unblock jobs
This button replaces Dismiss warning if there is an alert and jobs have been blocked. For example, after confirming an infection or getting an alert outside of the grace period. If you unblock the jobs without deleting or whitelisting the flagged files, the alert will re-block all jobs the next time a job runs. You will also be prompted if you have any unsaved whitelisted items as these would be lost if you select Unblock Jobs.
Note: Deciding if your system is infected by ransomware will involve checks that are outside the scope of BackupAssist ER and may involve using anti-malware software. A ransomware infection will often display a message on the screen and if files are encrypted they may appear as a different file type, and you may not be able to open them.
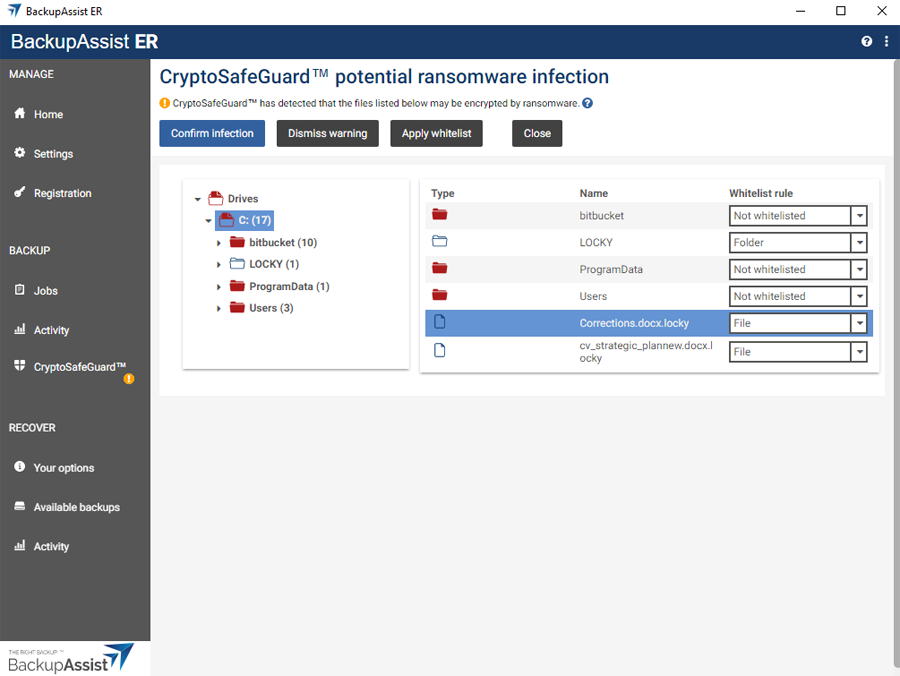
To locate the files that triggered the alert and take action on them:
- Select the View infection button.
- The Potential ransomware infection screen shows the folders containing the files that triggered the alert. The folders have numbers next to them, to show how many suspect files are in that folder's tree.
- Locate and select the file.
- Select a rule from the Whitelist rule> drop-down, and the file will automatically be added to the whitelist with that rule.
- Once you have finished whitelisting files, select Apply whitelist, and the whitelist will be saved and those files removed from the alert.
This will take you to the Potential ransomware infection screen.
Browse through each folder to locate each file, and determine if it is safe. If you do not need the file, you can delete it using Windows Explorer. If you want to keep a file, you can whitelist it as explained below.
How to whitelist files
How to unblock backup jobs
Selecting the Unblock jobs button will allow your jobs to run as scheduled. If you have taken manual steps to resolve the infection (such as deleting files or restoring files from a backup), you will need to click Unblock jobs to manually unblock your backup jobs.
Warning: Do not click Unblock jobs unless you have either whitelisted, deleted or restored each listed file. If you use Unblock jobs without taking these actions, the jobs may be blocked again next time the job runs.