Backing up your Office 365 to a Network Share
Using a network share as your backup storage location is a convenient way to protect your data. These are our current best practice procedures for using a network share as your backup location.
General security considerations
While a network share is convenient, if it is not set up with adequate security measures, it can pose a data breach risk. Our procedure described in this document is based on these principles:
- If possible, avoid using a Domain user to connect to the network share. Instead, create a new local user that is only used for BackupAssist 365. Use a complex password that never expires.
- If your share is hosted on Windows, apply policies to Deny logon locally and Deny logon via RDP for that new user, so that it poses no security threat.
WHY? This is to avoid a breach of domain user logon from being able to potentially access the backup data.
If you are backing up to a domain controller, then using a domain user cannot be avoided. Other mitigations can be used instead.
Part 1 – creating the network share
Using a Network Attached Storage (NAS) device
Due to the vast array of different NAS devices, we will provide some guidelines here.
- Where possible, do not join your NAS to the domain. Keep it standalone, for the purposes of backup only.
- Create a local user for your share, while using a complex password.
- Remember to secure the administration console of your NAS appliance with a complex password for the administrator user.
Using a share on a domain controller
You may choose this option if you are running server backups, and wish to use BackupAssist 365 to pull down Office 365 data to include in your server backups.
Create the share as you would normally, and:
- grant read/write privileges for your designated user,
- disable all other access for other users, and
- disable guest access.
Using a share on a non-domain controller
In the Appendix, we have included our step-by-step instructions for creating a local user to use when connecting to the share.
Part 2 – setting up BackupAssist 365
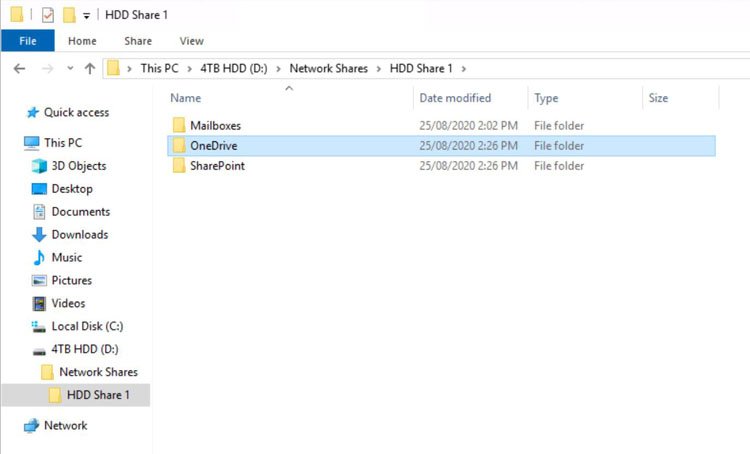
Step 1: Create subdirectories for each task
It’s likely that you’ll have multiple backups – for example, for SharePoint sites, for Mailboxes, and OneDrive for Business.
We recommend that you create subdirectories for each backup under your share. For example:
Step 2 – configuring BackupAssist 365
Set up and configure your backup task as normal.
Under the “Save to…” tab, choose the “Network folder” options.
You’ll then need to complete the path and credentials to get things to work:
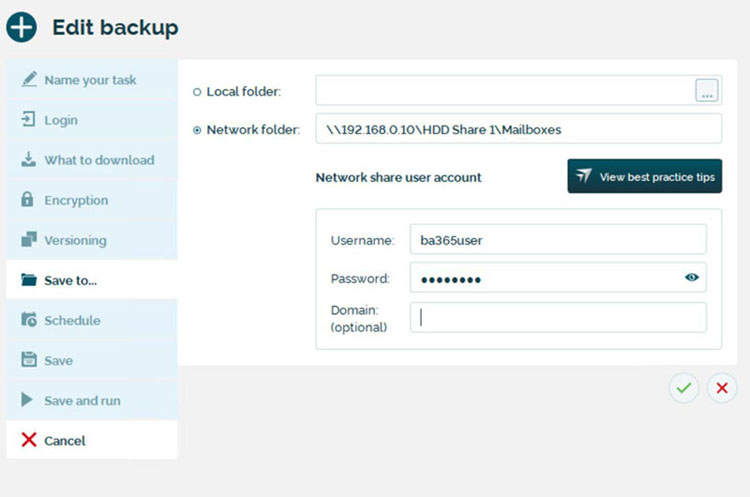
The network folder is in the UNC format: \\Server_Name\Share_Name\full_path\under_the\share
In the example above, we use: \\192.168.0.10\HDD Share 1\Mailboxes
Where “Mailboxes” was a subdirectory created earlier in Step 1.
When you click the Tick button, BackupAssist 365 will perform validation for that path and credentials.
Note: any existing drive mappings you may have as the logged-in user will not be available to BackupAssist 365, because it runs as a service. User drive mappings remain private to the user, so that is why you’ll need to type in the full UNC path.
Step 3: Run the backup and check your network share
Run the backup. Then after it completes, navigate to your network share to check that the backup files have been created there:
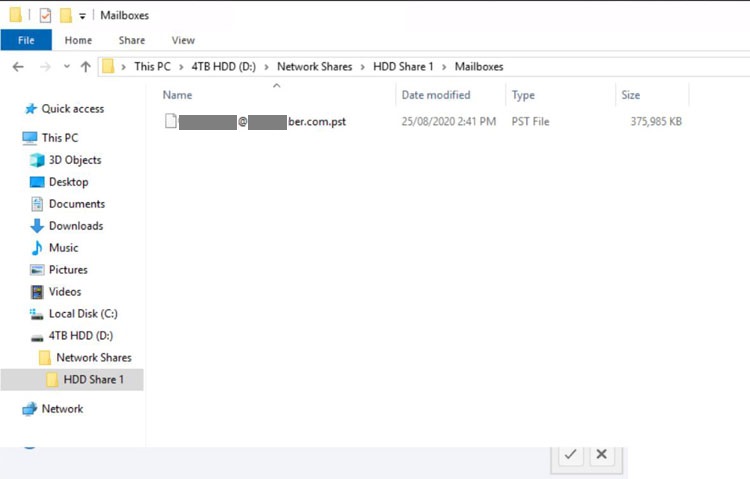
Congratulations! You’re all set up.
Appendix – creating a network share on standalone Windows machine
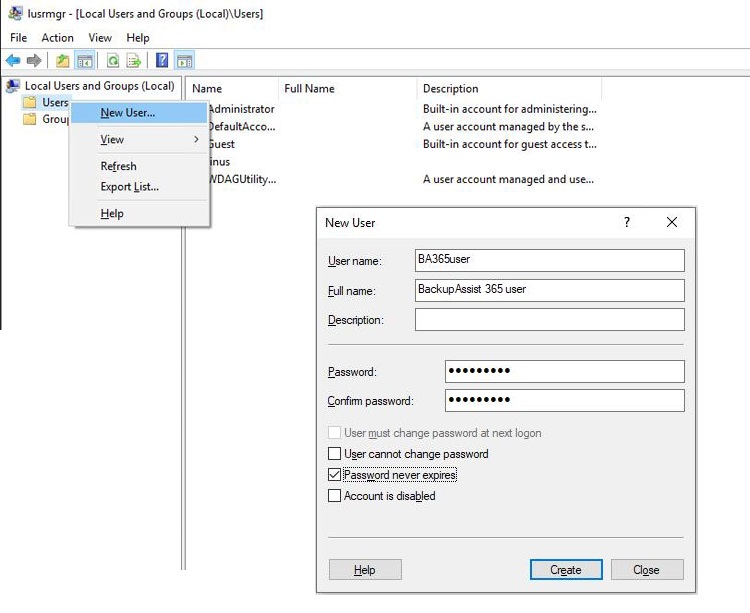
Step 1: Create a user
If you are hosting the network share on a domain controller, create a new user on the domain. However, for licensing reasons, you may choose to reuse an existing user.
If you are hosting the network share on a machine that is not the domain controller, we recommend creating a local user.
- Run local user manager – lusrmgr.msc
- Right click on Users, select New User, and create a unique username / password combination.
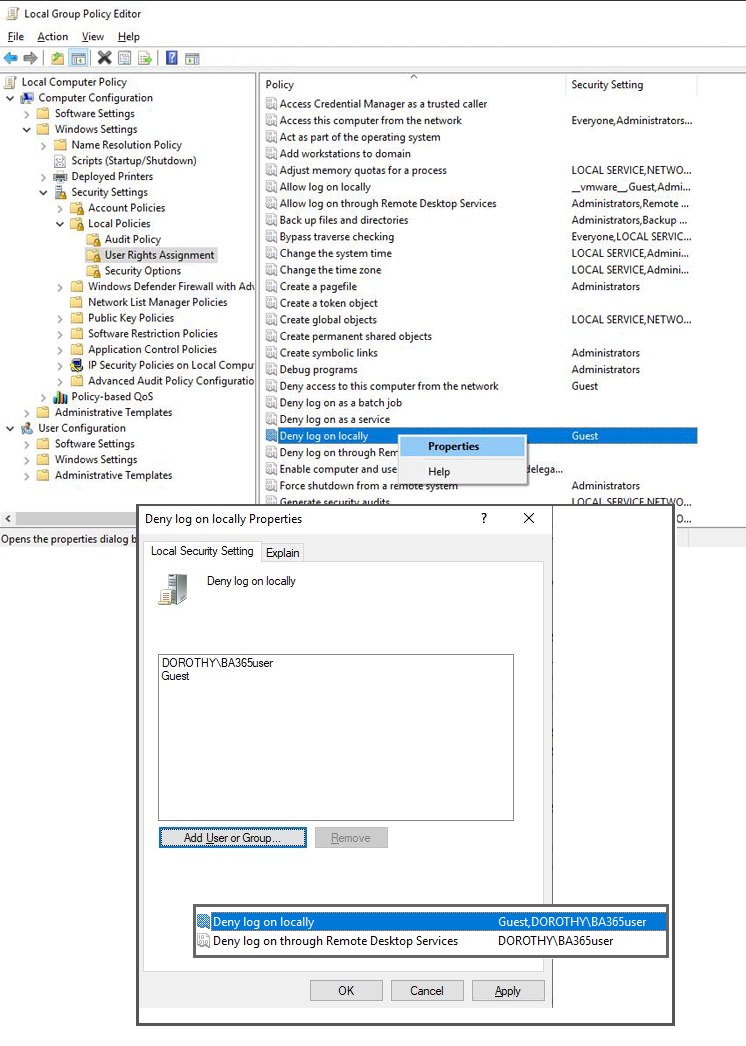
Step 2: Disable local logon for the newly created user
- Run group policy editor – gpedit.msc
- Navigate to Windows Settings\Security Settings\Local Policies\User Rights Assignments\Deny logon locally. Add in the name of your newly created user. Repeat for “Deny log on through Remote Desktop Services”.
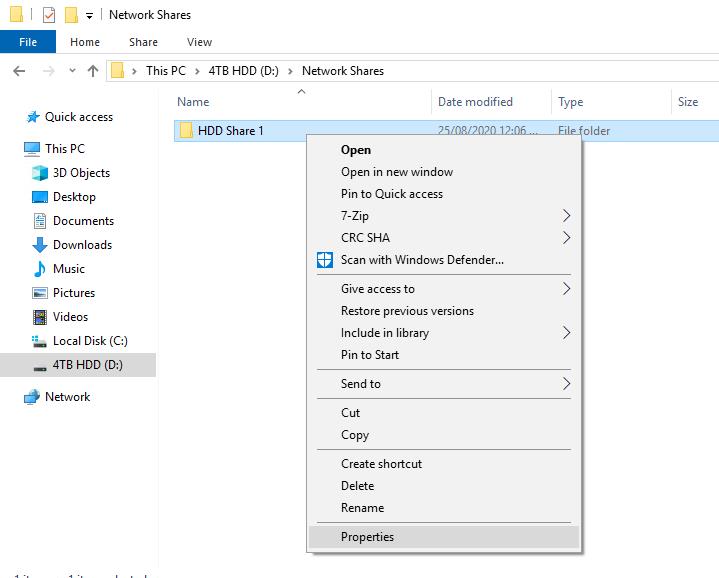
Step 3: Share the backup directory and apply access controls
- Start Windows Explorer, and navigate to the directory you want to share
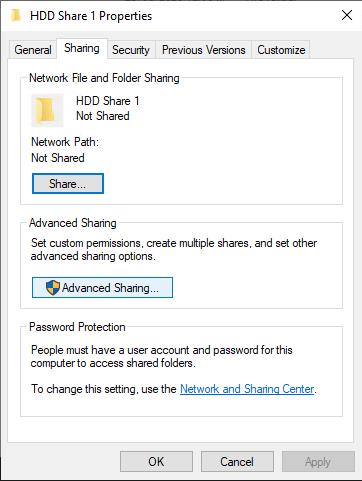
- Right click, and click on “Properties”
- Click on “Advanced Sharing…”
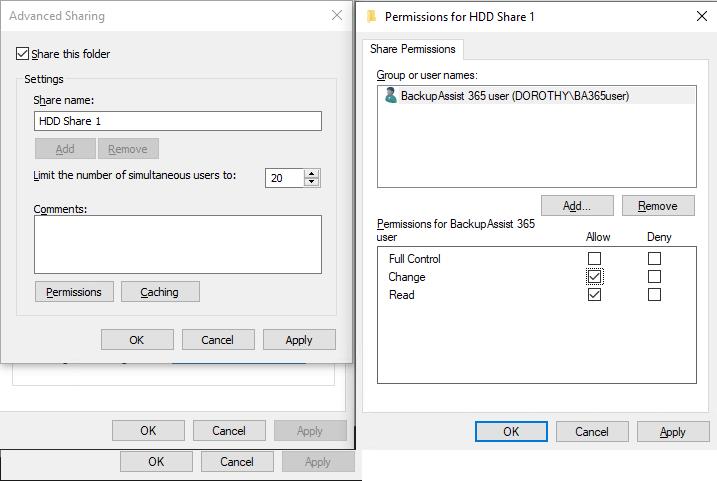
- Click on “Share this folder”. Then click on “Permissions”
- Add permissions for the newly created user, and click the checkbox to “Allow” permissions for “Change”.
- Remove the default “Everyone” entry.
- Click OK to confirm the changes, three times.
Did you find this helpful?
Sorry about that
Why wasn't this helpful? (check all that apply)
Thanks for your feedback.
Want to tell us more?
Support requests are not logged from this dialog. If you require technical assistance, please contact support.
Great!
Thanks for taking the time to give us some feedback.
Great!
Thanks for taking the time to give us some feedback.
Still need help?
Contact us via phone or email to get the support you need.
Our business hours are Monday - Friday 9am-5pm US Eastern Time.


© 2025. BackupAssist™ and the intellectual property contained
within this document is the property of Cortex IT Labs Pty Ltd.