Setting up a Backup User for BackupAssist 365
This is our current recommended procedure to back up Mailboxes (Exchange), SharePoint Documents and OneDrive for Business in Microsoft 365 (Office 365) using a single login.
It is recommended that you create a special “backup user” login in Microsoft 365 and use it in BackupAssist 365.
This is preferred because:
- Better security – the backup user can be assigned a special complex password that is only used in BackupAssist 365 and is never given to users.
- No licence is required for the backup user – therefore it won’t cost anything.
A full discussion on the advantages of this is available at our blog article. This document gives you the “HOW TO” steps.
If the above hyperlink does not work, manually paste this URL into your browser:
https://www.backupassist.com/blog/why-use-a-dedicated-backup-user-login-for-backing-up-microsoft-365-and-office-365
How to set up the backup user account
Follow these instructions:
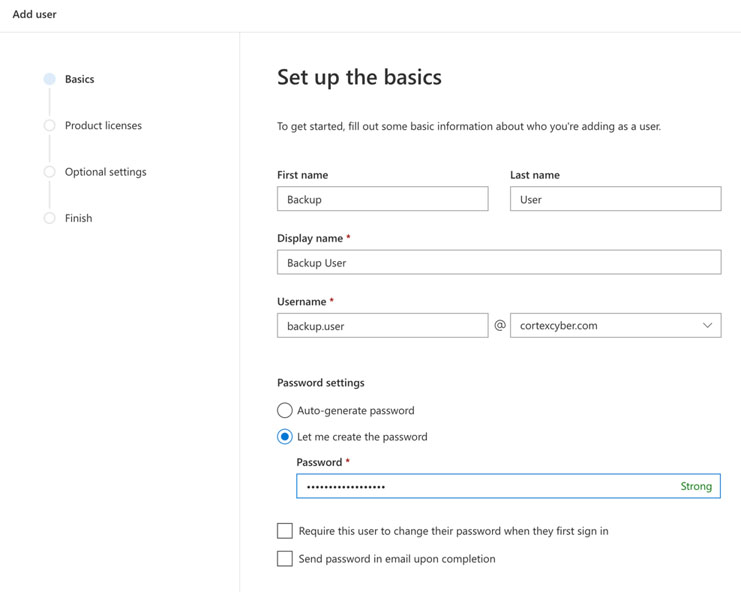
- Log into Office 365 as the administrator for your tenant. Create a new user in Office 365, as shown in the screenshot below. You can call the user anything you want, but we recommend something that will be easy to remember.
- Create a password at the time of setting up this user.
- Make sure both checkboxes at the bottom are unchecked. If you require the user to change the password, BA365 will be unable to login.

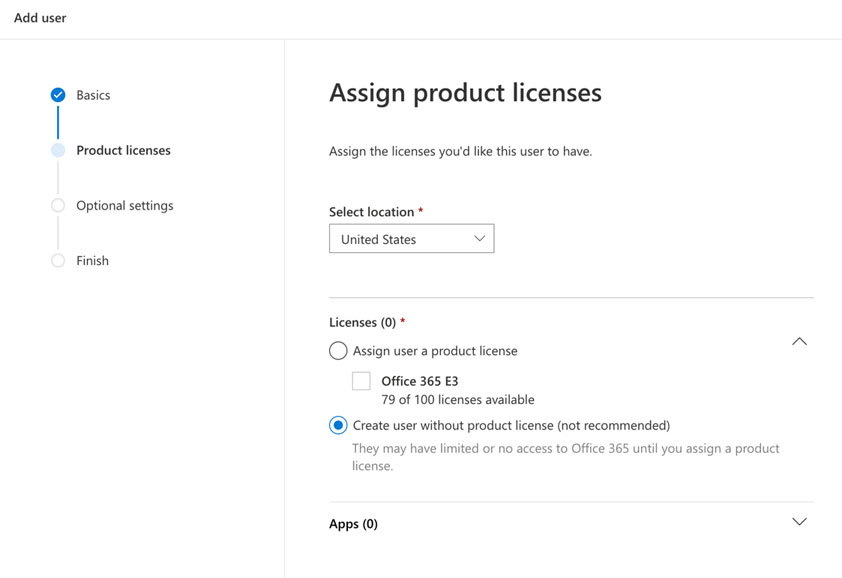
- Create the user without a license. This is so you don’t have to pay for an unnecessary license.
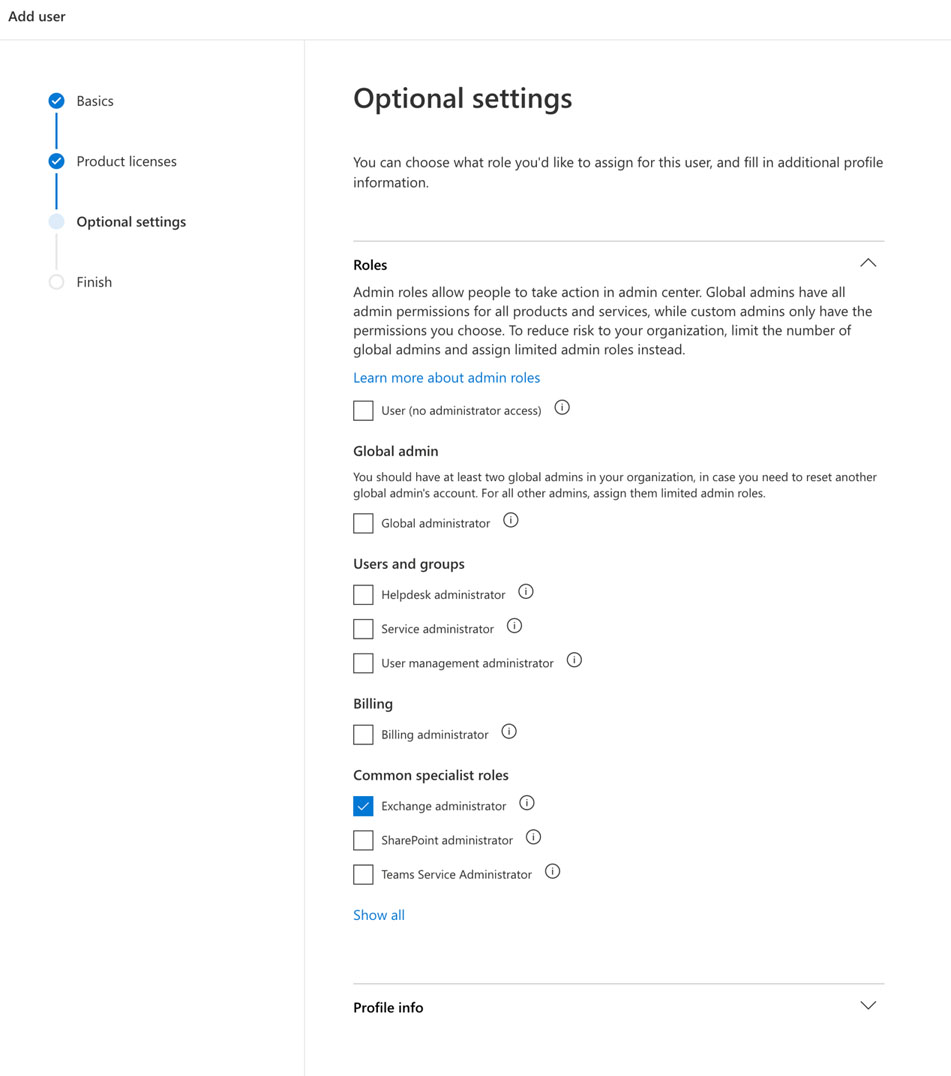
- Set the roles to include permissions depending on what you want to back up.
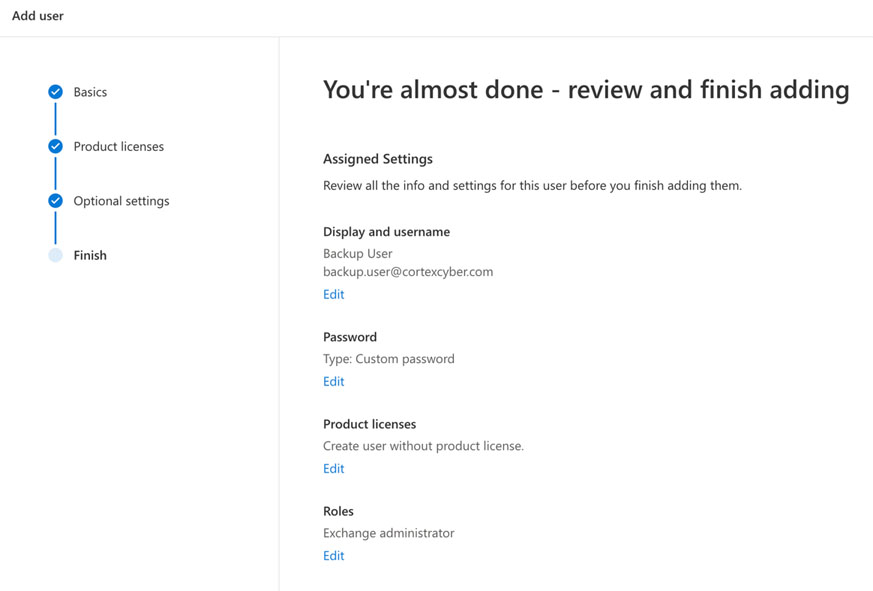
- Confirm the settings as shown.

| To back up | Roles required |
| Exchange mailboxes (user + shared) | Exchange Administrator |
| SharePoint | SharePoint Administrator + Application Administrator |
| OneDrive for Business |


Sometimes changing permissions on the backup user can usually take 10-15 minutes to propagate. So if you receive permissions problems in BackupAssist 365, we recommend waiting a few minutes and trying again.
Propagating permissions changes to SharePoint seems to be slowest of all – we once saw it take some 20 hours, although this is not typical.
Congratulations – you can now use this logon identity in BackupAssist 365.
Note: do you need to back up Public Folders?
Only a licensed user can access Public Folders.
Therefore there are two options:
- Assign an Exchange license to the backup user – but this may incur extra costs if you have to purchase an extra license
- Use a regular user login for Public Folders.
If you choose Option #2, we recommend that you set up an additional task to only back up the Public Folders in that task.
Did you find this helpful?
Sorry about that
Why wasn't this helpful? (check all that apply)
Thanks for your feedback.
Want to tell us more?
Support requests are not logged from this dialog. If you require technical assistance, please contact support.
Great!
Thanks for taking the time to give us some feedback.
Great!
Thanks for taking the time to give us some feedback.


