Backing Up Your SQL Server
Contents: |
|---|
SQL Server Configuration with BackupAssist™
To backup your SQL Server using BackupAssist™ you need to supply some database logon and naming information and can be carried out as follows.
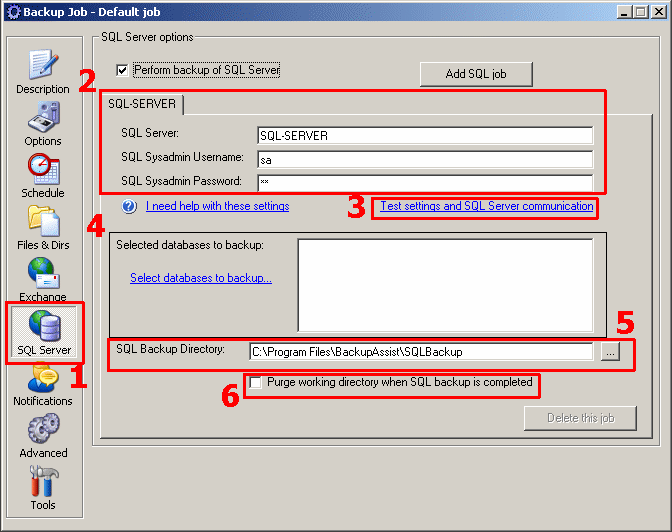
Figure 1: SQL Server Setup in BackupAssist™
1. Access the 'SQL Server Tab' in BackupAssist™
2. Enter Your SQL Server name and authentication information
Click the 'I need help with these settings' or here for assistance with these settings.3. Test these settings to ensure you can authenticate
4. Select the databases you wish to backup
5. Determine where you would like the SQL Backup Files (.bak files) to be stored
BackupAssist™ will log into your SQL Server and perform a backup to a backup file (.bak). This file is then transferred to your backup device (tape, hard drive, network server, etc.)This design gives you maximum flexibility when you need to do a restoration, because your SQL Server does not need access to your tape drive (or other backup device).
6. Select whether you would like the .bak SQL backup files to be deleted after each backup is performed
back to top
Simply click the 'Add SQL Job' [See Figure 2] button and fill in the SQL server details for each instance of SQL server that you would like to have BackupAssist™ backup
All of these SQL server instances will then be appended to your overall backup job in BackupAssist™
Backing Up Multiple SQL Server Instances
With BackupAssist™ you can add as many additional SQL servers to your backup job [either remote or additional local instances] that you require.
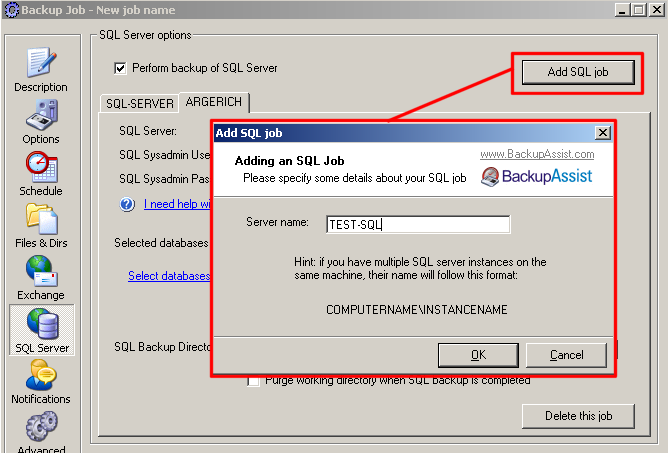
Figure 2: Multiple SQL Server Instances