Cloud backups are stored safely offsite and provide a reliable recovery option if your local backups cannot be used. This means if you have a hardware failure, natural disaster, ransomware infection or cyber-attack, you can still perform a predictable and successful recovery.
How to download a cloud backup
This section explains how to download a cloud backup so that it can be used in a bare-metal recovery.
To download a cloud backup:
- Open BackupAssist ER.
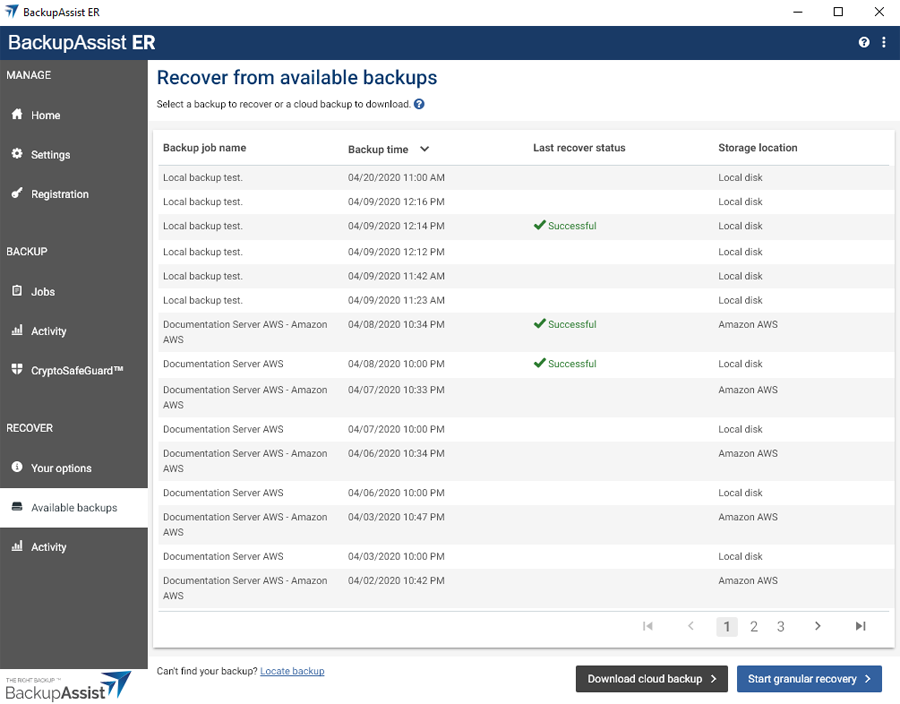
- Choose the Available Backups tab.
- Select the backup that you want to recover from.
- Click Download cloud backup.
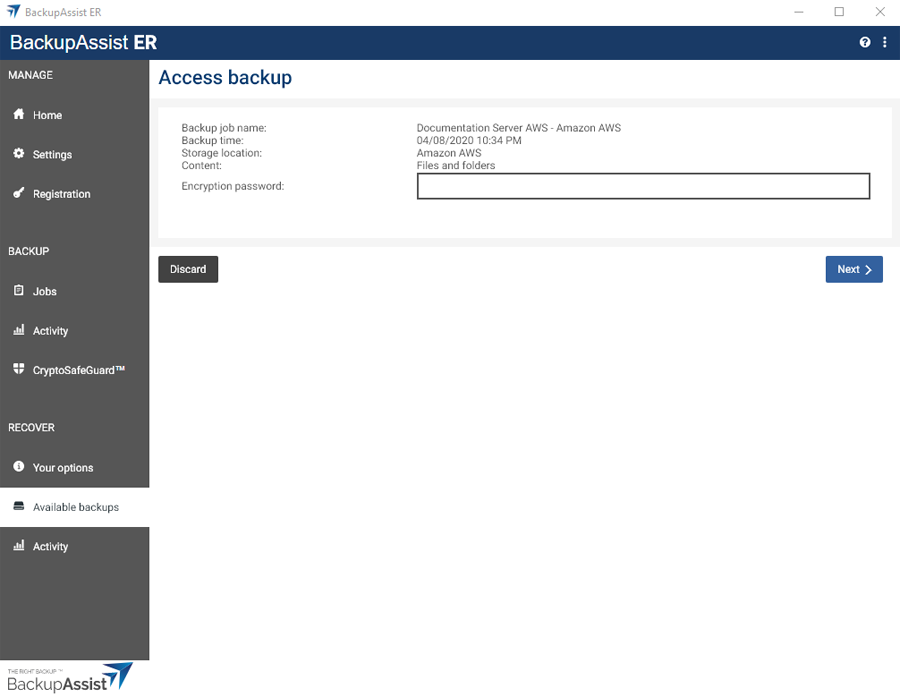
- Enter the Encryption password into the field provided.
- Click Next.
- Click the Where to download tab.
- Review and update the Location options.
- Specific location – enter the location that the backup is to be download to by using the browse button.
-
- Overwrite behavior
- Overwrite existing files – restored files will overwrite files with the same name.
- Do not overwrite existing files – restored files will not overwrite files with the same name. This means those files will not be restored.
- Only overwrite older files – if a source file has changed since the backup was made it will not be overwritten.
- Throttle speed – Selecting this option displays the Throttle speed field. You can use this field to set the average data transfer speed. This allows you to manage the impact the recovery may have on other network users.
Use the drop-down field to select one of the following overwrite settings:
Warning: Special consideration should be given to the overwrite behaviors when recovering an Exchange Server or SQL Server. In most cases, the recovery would be run to replace the existing files.
- Click the Download now button.
If the backup is encrypted, the Access backup screen will open.
This is the password you entered in the General tab when the backup job was created.
This will open the Download cloud backup screen and display 2 tabs.
The General tab displays information about the backup you selected.
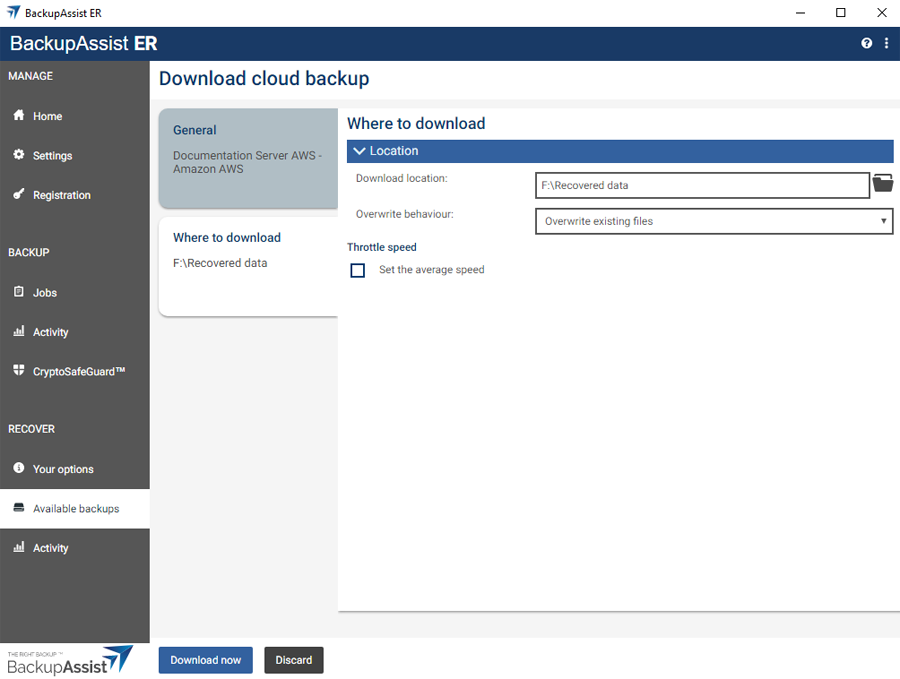
The following Location options are available:
This should be the location that will be used in the bare-metal recovery. For example, the removable USB drive that will be attached to the server that you plan to recover or a network location that your recovery environment can access.
The Activity screen will open so you can view the progress.
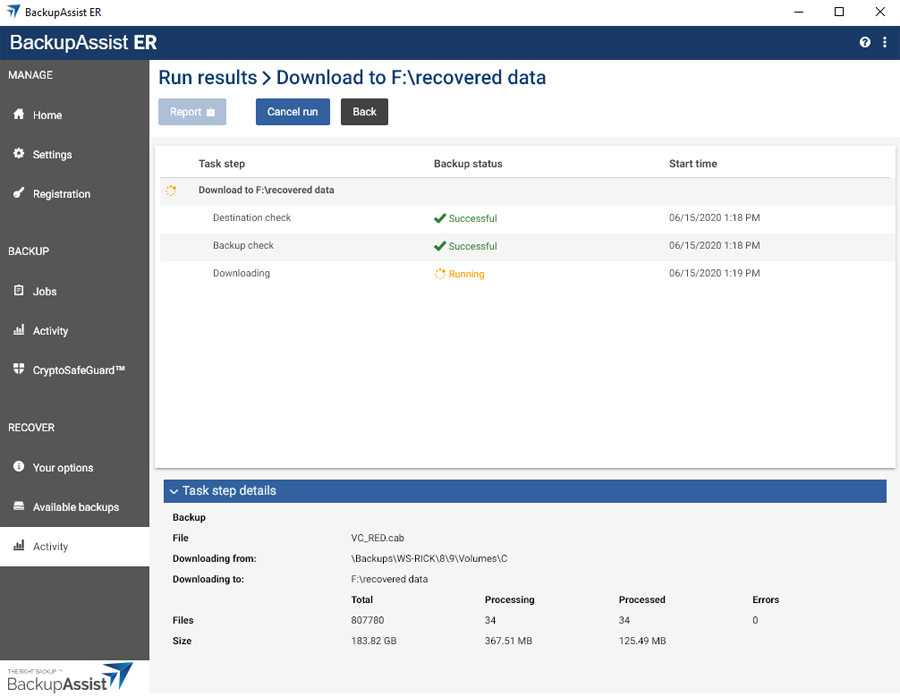
The cloud backup has now been download to the location you provided.
Note: A backup cannot be downloaded if a backup job or recovery is running, or if a CryptoSafeGuard scan is running.
Using the downloaded backup in a bare-metal recovery
Once the backup has been downloaded, it must be stored in a location that the Lifeline Recovery environment can access. Lifeline Recovery will start the server that is being recovered and provide options to locate the backup.
The options are:
- A locally attached drive - for example, a removable USB drive that you downloaded the backup to and then attached to the server.
- A network location - for example a network share or a NAS device that the recovery environment can be configured to access from the server being recovered.
When the recovery environment locates the backup, it will use the backup to recover the server. This process is explained in detail on the Bare-metal recovery page.