This guide explains how to perform a bare-metal recovery and get your server back online after a hardware failure, natural disaster, ransomware infection or cyber-attack.
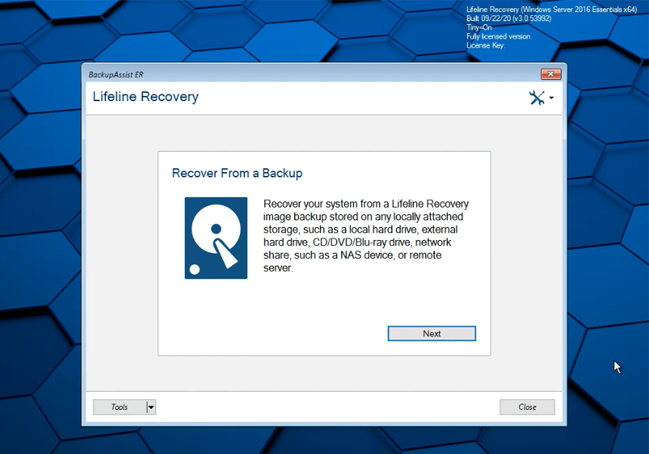
This critical task is made easy with Lifeline Recovery, which uses a bootable media to start a server and open a recovery environment, so you quickly locate the right backup for the recovery process.
Recovery requirements
To perform a full server recovery, you will need:
- A physical server to recover to - This can be a new server or the original server. An original server should have new disks if you are recovering from ransomware.
- A bare-metal backup - This backup must be accessible to the server that is being recovered. For example, a removable USB drive that can be attached to the server or a network location that your recovery environment can access. If you need to use a cloud backup, it must first be downloaded as explained in the Bare-metal recovery using a cloud backup guide.
- A bootable Lifeline Recovery media - This media starts the server and launches the Lifeline Recovery environment. It is created using the Your options tab, and the process is documented on theCreating Lifeline Recovery media page.
Recovery considerations
Before performing a bare-metal recovery, you should check that the disks and firmware on the physical server you are recovering to are compatible with your backup.
Hard disk considerations:
- If the backup contains data from multiple disks, the server being recovered to must contain at least the same number of disks.
- If you backed up a 1TB drive and plan to recover to a 1TB drive, check the manufacturer’s specifications as different models of the same size disk can have minor size differences.
Note: To avoid disk size complications, we recommend recovering to a larger disk.
Firmware compatibility considerations:
- Backups of servers that use BIOS cannot be restored to servers that use EFI, and backups of servers that use EFI cannot be restored to servers that use BIOS. Some EFI servers let you choose EFI or a legacy BIOS option when selecting the boot device.
- The bootable media and backup must both be created from either BIOS or EFI firmware.
- A backup of a server that uses BIOS, may not work if you are recovering to a server that has disks formatted with Advanced Format (4k sectors).
Recovery process
This section guides you through the process of recovering a server using a backup and Lifeline Recovery.
To perform a bare-metal recovery:
- Attach the bootable Lifeline Recovery media to the server.
- Start the server.
- Wait for the Lifeline Recovery environment to open.
- Select Next.
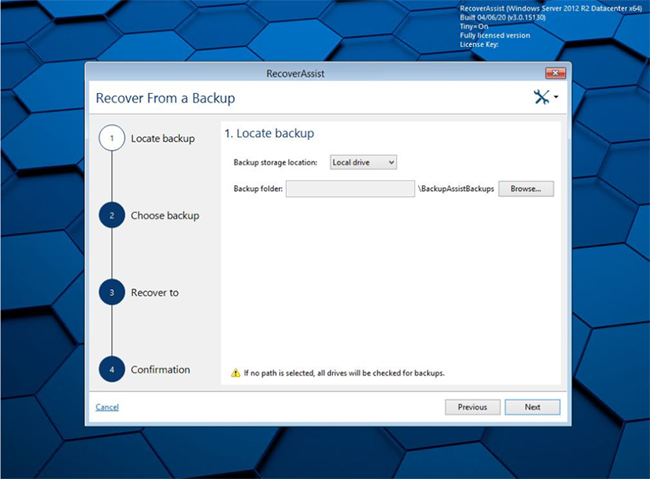
- Locate the backup.
- Lifeline Recovery will scan the drive for backups. A confirmation dialog will confirm if any backups were found.
- Select Next.
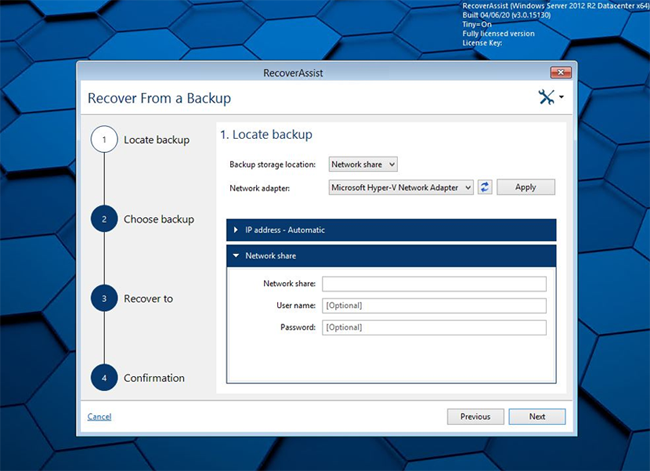
- Check that the Network adapter field has the correct adapter selected. This is important if the server has multiple adapters.
- Select Next.
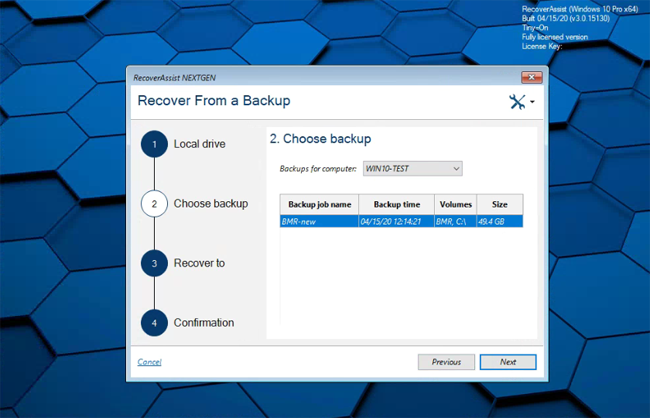
- Choose the backup.
- Click Next.
-
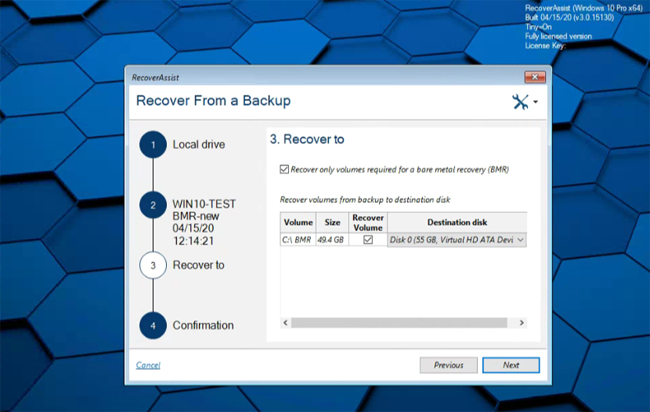
The Recover to step displays information about the drive that will be recovered.
Check that the disks being recovered are large enough. See the Recovery requirements above for guidance.
Ticking the Recover only volumes required for bare-metal recovery (BMR) box means volumes that contain data or applications, but are not needed by the operating system, will not be recovered. This allows you to recover faster and removes the need for additional disks. The data on these volumes can be recovered at a later date.
- Click Next.
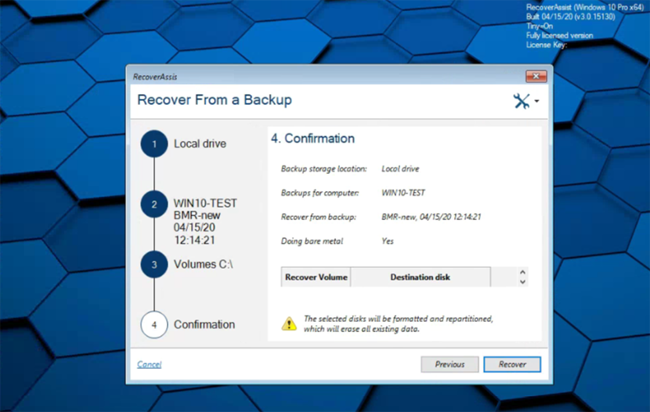
- The Confirmation step displays a summary of the recovery settings.
- Click Recover.
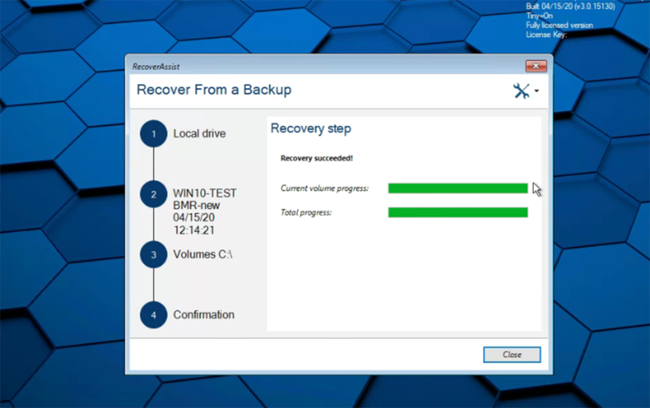
- Disconnect the bootable media from the server. This prevents the recovery environment from reloading when the server reboots.
- Click Restart now once the recovery has completed.
When the server starts, it should detect the bootable media and start the boot process.
Understanding the boot process can help if any problems are encountered.
Note: Servers use BIOS or EFI firmware to access critical hardware. When a server starts, this firmware checks the hardware and beeps once if the checks are successful. Additional beeps indicate a hardware problem. Once a server has successfully checked its hardware, it looks for an operating system using a device list provided by the BIOS or EFI . The bootable media must appear in this device list before media that may load a failed operating system. To access the BIOS/ EFI settings, press the required function key, which will be displayed on screen. E.g. F8 or F12.
When the server boots from the Lifeline Recovery media, you will see a progress bar and a Windows logo. The Lifeline Recovery environment will then load.
Note: The bottom Tools menu allows you to open a command prompt or install your own drivers. The Tools icon at the top allows you to collect diagnostics, start a remote session and contact support. Both of these menus are explained in the Tools menus section at the end of this page.
Select the type of destination the backups are stored on: Local drive or Network share.
If you chose Local drive:
If you chose Network share:
If you cannot find the network adapter, you may need to go back to the previous screen and use the Tools menu's Install drivers option to add the adapter's drivers.
IP Address section
This field can be left set to Automatic.
Network share section
Use the Network share field to enter the DNS name or IP address of the share that the backups are on.
Enter a User name and Password if the network share requires authentication. For example, a Windows account with access to the network location where the backups are stored, or a NAS device account with access to backups stored on a NAS.
The destination will be checked and a dialog will confirm if any backups were found.
If there is one backup, it will automatically be used in the recovery.
If there are multiple backups available, click the one that you want to use.
Encrypted backups
Lifeline Recovery will prompt you for a password if the backup is encrypted. Enter the password used by the backup job to encrypt the backup. This is the password entered in the General tab when the backup’s job was created.
Note: BackupAssist Technical Support cannot retrieve the password if it is lost or forgotten.
The bare-metal recovery will begin and display the progress.
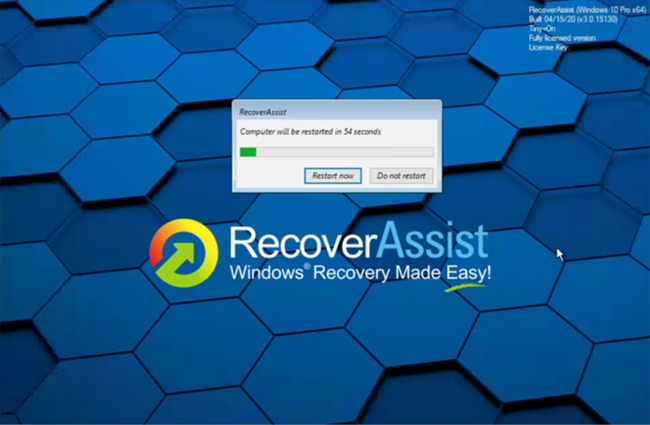
When the server reboots, it will start on its own and load Windows.
Congratulations – your server has been recovered.
Tools menus
The Tools menus give you access to features that can assist with the recovery.
Tools menu
This menu is located on the bottom left of the Lifeline Recovery UI, and it includes tools that can be used at the start of the recovery process.
Show command prompt
Clicking this option launches a Windows command prompt that can be used to run the command-line tools included with Lifeline Recovery. The tools include diskpart.exe, bootsect.exe and regedit.exe.
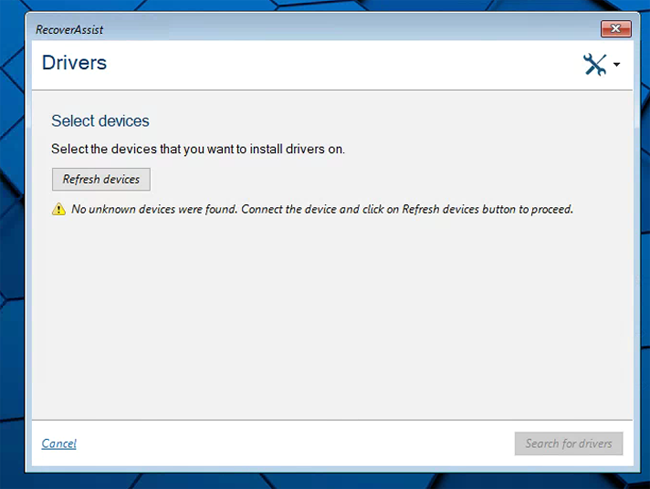
Load drivers
Clicking this option launches the Drivers dialog. A list of detected devices will be displayed. You can select a device and then locate and add the driver that you want that device to use. For example, if a disk has a SCSI adapter, you can add the manufacturer's driver and Lifeline Recovery will use that driver when accessing the disk.
Click Refresh devices if you add another device.
Tools menu icon
This menu is located at the top right of the Lifeline Recovery UI and includes tools that can be used at any point during the recovery process.
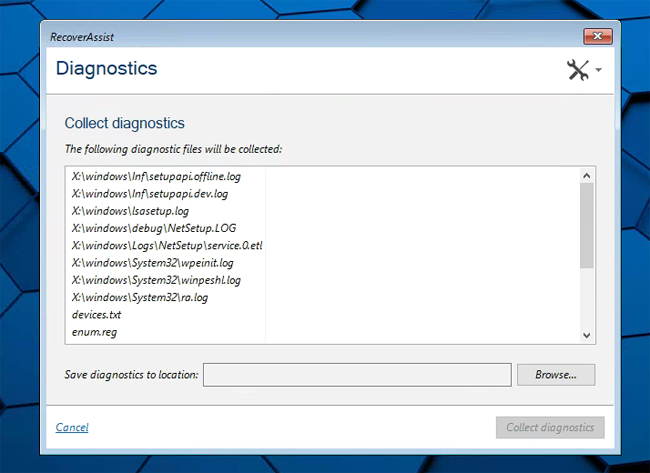
Collect diagnostics
If you encounter problems, Lifeline Recovery can create a diagnostics file that will help BackupAssist Support troubleshoot the problem.
To create a diagnostics file:
- Click Collect diagnostics.
- Click Browse and select a location to save the diagnostics file to.
- Click the Collect diagnostics button, and confirm the Collect diagnostics message.
- Once the file has been created, click the Done button to go back to the first screen.
You should save the diagnostics file to a USB stick or a separate virtual drive, and not to a location that is compromised or will be written over by the recovery.
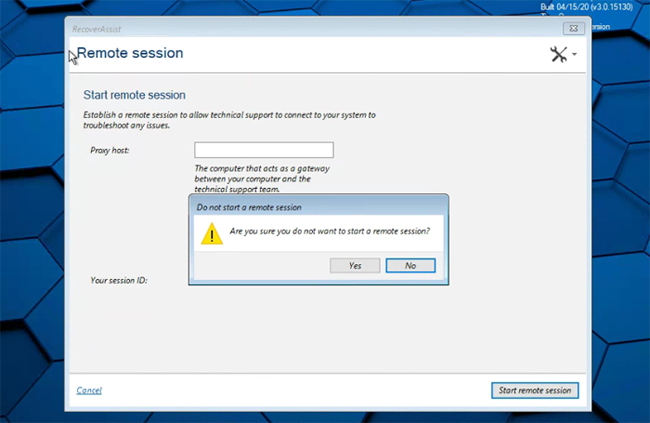
Remote session
If you get into trouble and need help, BackupAssist support can open a remote connection to the recovery environment. To do this, you need to set up the session using the Remote Sessions tool.
To enable a remote session:
- Click on Remote sessions.
- Enter the IP address of the server that provides a gateway from the server being recovered and the internet.
Contact support
If you encounter any problems, you can call or email BackupAssist Support.
To contact BackupAssist Support:
- Click Contact support.
- Contact the BackupAssist Support Team using any of the options provided.
A dialog will display contact information for BackupAssist Support.