Wasabi is an S3-compatible cloud storage solution that can be used as a backup destination by BackupAssist ER. This may be an attractive option if you're looking for a low cost cloud storage solution. Wasabi does not have the same feature set as AWS S3, but it does provide a simple, accessible cloud destination that is ideal for small and medium businesses.
Wasabi account
To use Wasabi storage, you will need to create a Wasabi account. There is a 30-day free trial option and once you have your account, you can log into the Wasabi console to manage your storage.
Wasabi storage
Wasabi uses cloud containers called buckets. Each BackupAssist ER Cloud Backup job will access your Wasabi account and create its own bucket using the name that you provide.
Access keys
You will use the Wasabi console to create an Access key ID and a Secret Access Key that BackupAssist ER will use to create buckets from which it will back up to and recover from. How to create these keys is explained below.
Creating a Wasabi account
To create a Wasabi account:
- Got to the Wasabi website https://wasabi.com/.
- Click the TRY or BUY now button, and complete the trial registration form.
- Open the invitation email sent to the address you provided and create an account.
Creating an API Access Keyset
For a BackupAssist ER Cloud Backup job to use your Wasabi storage, it will need a set of access keys. These keys will be noted down and entered into the backup job.
To create an API Access Keyset:
- Log into the Wasabi console.
- Click Access Keys on the left menu.
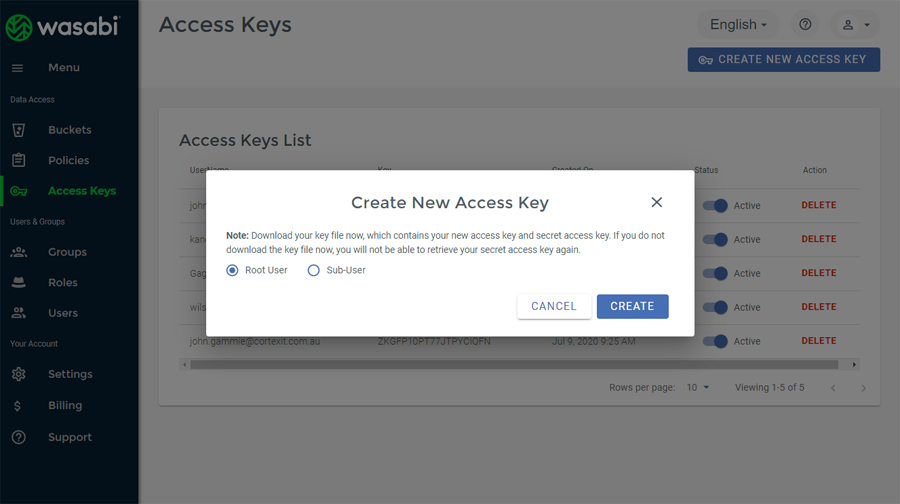
- Click the CREATE NEW ACCESS KEY button.
- Leave the default Root User selection.
- Click CREATE.
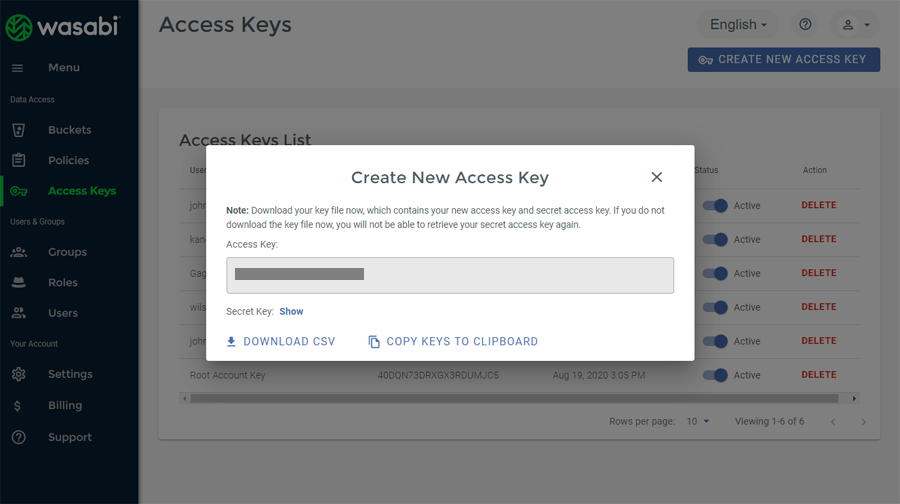
- An Access key ID and a Secret access key will be created. You need both keys for BackupAssist ER. The Access Key will be visible. To view the Secret Key, you will need to click Show. The Secret Key cannot be viewed in the console after you leave this screen.
- Select DOWNLOAD CSV to save the key in a CSV file.
This will open the Create New Access Key dialog.
To learn more, see the official Wasabi documentation.
Backing up to Wasabi with BackupAssist ER
To create a BackupAssist ER Cloud backup job using Wasabi storage, follow the steps in the Create a local and cloud backup guide.
When filling in the Storage location tab, select Wasabi for Storage location 2.
Fill in the Storage location 2 fields as follows:
- In the Bucket field, add a name for the bucket. The name must be globally unique.
- In the Region field, select the region from the list provided.
- In the Access Key ID field, enter the Access Key ID you generated.
- In the Secret Access Key field, enter the Secret Access Key you generated.
- Click Check account. BackupAssist ER will use the security keys to access your Wasabi account and create a bucket using the name provided.
BackupAssist will use this name to create a bucket in your Wasabi account.

Managing container access
The account you logged into Wasabi and created the access keys with will have access to the bucket. You can create a Wasabi account specifically for backups to restrict access to your backup buckets. The account that you signed up to Wasabi with is your administration account, and it can be used to create more accounts using the Users menu.
The Groups menu can be used to create groups with defined levels of access, and users can be added to a group to inherit its access. For example, the users will get access to the buckets that the Group has access to.
To review or modify the user and groups that have access to a bucket, go to the Bucket page and select the Setting option from the Actions menu. Then select the ACCESS CONTROL page to view and review the users and groups that have access.