The BackupAssist Test Restore engine allows you to test System Protection (legacy and advanced), Cloud and File Protection backups to ensure they function as intend for data restores and system recoveries.
A Test Restore job can be created when setting up a the backup job and will run as a separate, scheduled task.
Before creating a Test Restore job, review the Test Restore overview page to see the features supported for different backup types.
Creating a Test Restore job
- Select New Test Restore tab from the JOBS menu in the main navigation section.
- Use the Selections step to configure the job's options.
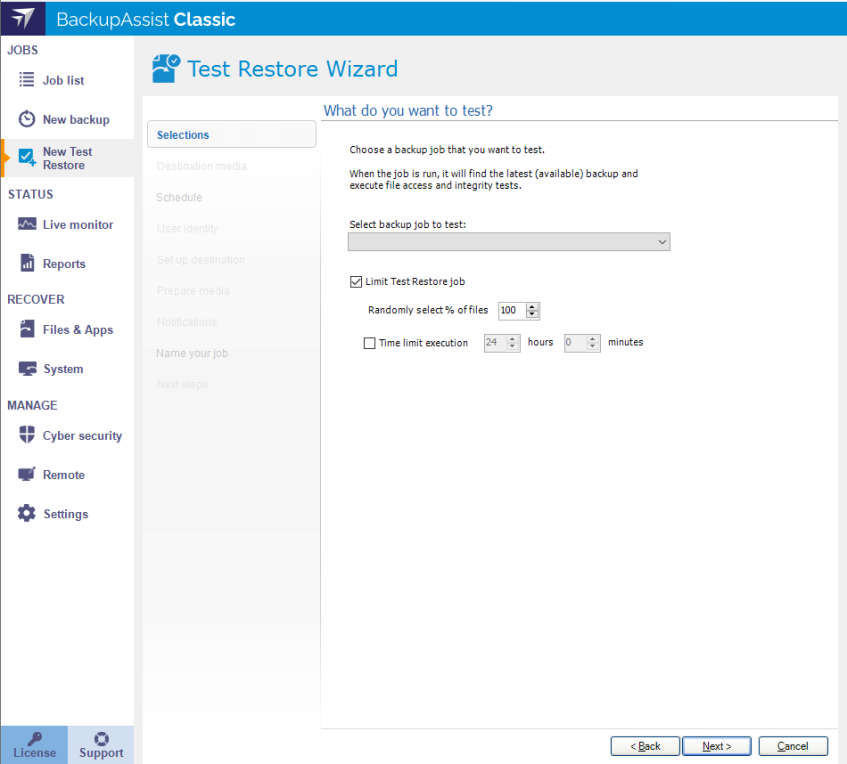
- Select backup job to test using the drop-down list of supported backup jobs.
- Select any files and time limit you want to apply to the test. We recommend experimenting with these settings to get an optimal outcome.
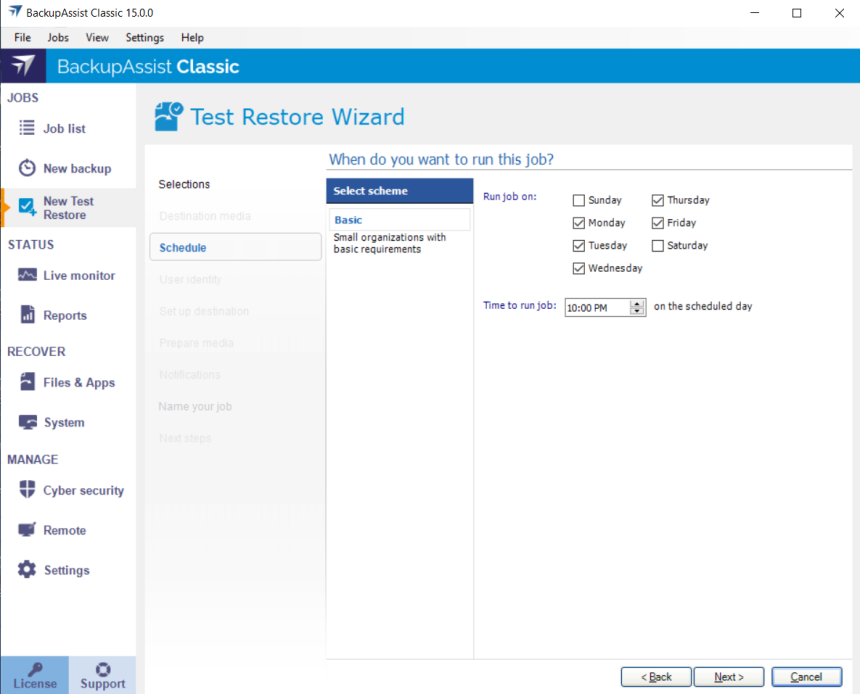
- Select the backup schedule.
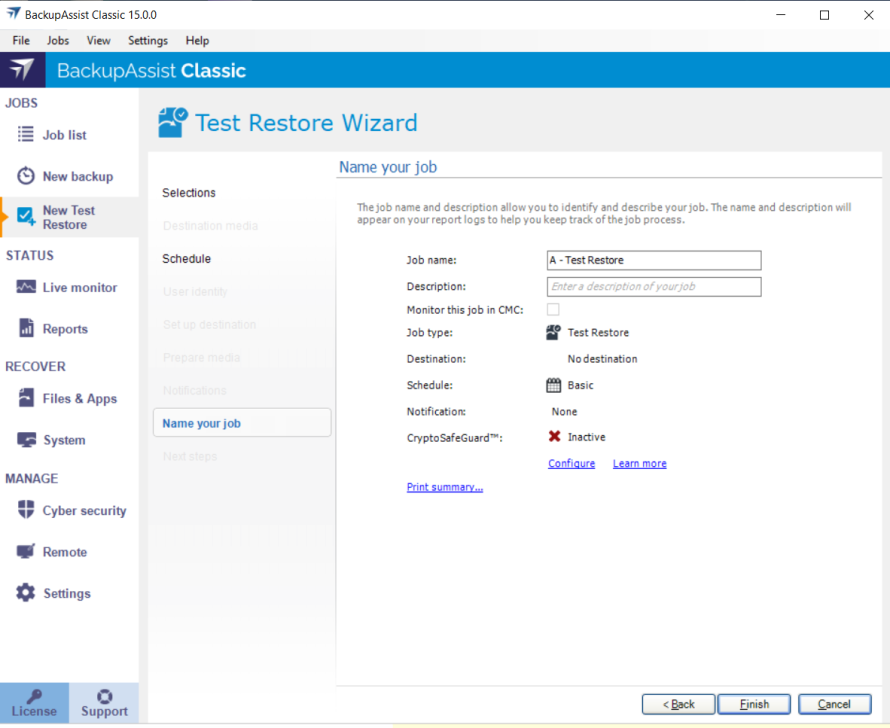
- Name your Test Restore job
- Select Finish.
- Once the job has run, go to the Jobs > Report screen and open the Test Restore job.
- Review the Verification Report.

Limit Test Restore job options
A Test Restore can take as long as a full backup of all files in the backup job. The Limit Test Restore job option gives you control over the test's duration by allowing you to set a percentage-based sample size of files to be tested, and these files will be randomly selected each time the job runs. You can also set the Time limit execution, which will stop the test once that time limit is reached.
For example, if you have a backup of 1000 files, you could set the limit to 10% of the files with a 1 hour time limit. This means 100 files will be randomly selected and tested each time the job runs, and if 80 files have been tested at the 1 hour mark, the tests will end.
A Basic backup scheme is provided by default. It will run the job on selected day and time. For example, select Saturday (or Sunday) if you only want to test the backups once a week.
We recommend giving your Test Restore jobs names that associate them with the backups they are testing.
The job will be saved and run at the scheduled time.
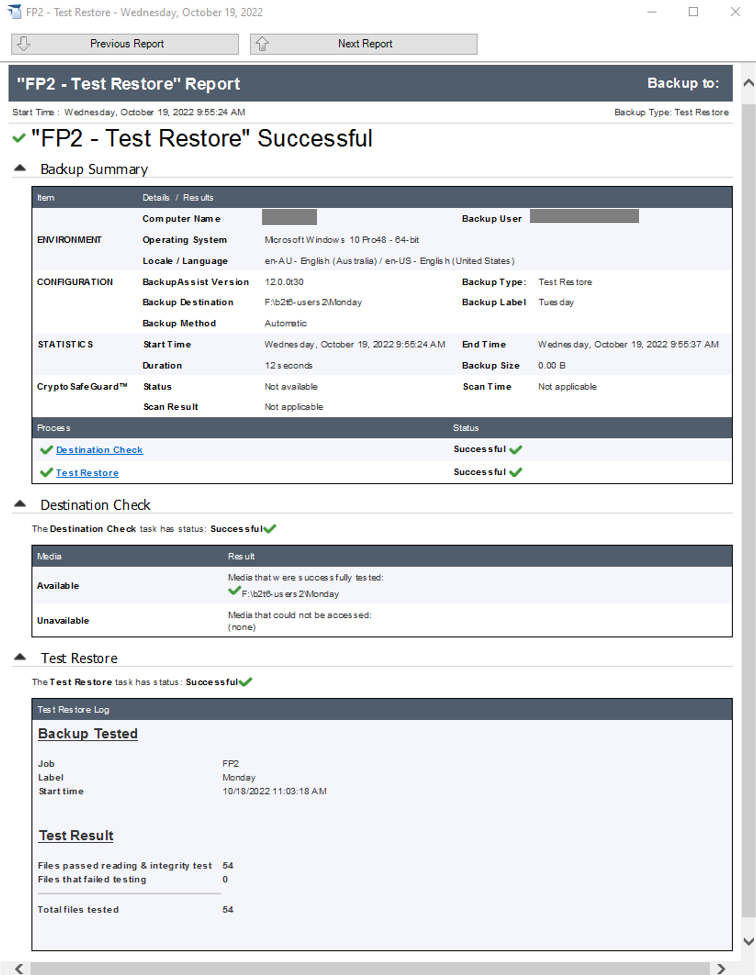
The Test Result section of the report shows if there were any failed tests.
Take any required actions to troubleshoot the errors and wait for the next Test Restore job to run or run the test manually to confirm any issue were resolved.