BackupAssist Cloud Backup jobs include an option to back up to S3-compatible storage. The storage can be a cloud service or your own private cloud. This guide explains how to back up to your own private cloud using MinIO cloud storage running on a Microsoft Windows machine
The steps are divided into three sections that will guide you through the process of downloading MinIO and running it on a Windows machine, using Windows Task manager to automatically start MinIO server after the Windows machine boots up and creating a BackupAssist S3-compatible backup job.
The following technologies will be used
- A Microsoft Windows desktop or server will be used to run MinIO and provide storage for the backups.
- The MinIO application will be used to host an object storage server on the Windows machine
- BackupAssist Classic will be used to create cloud backups and save them to the S3-compatible cloud storage.
Set up MinIO server on a Windows machine
The following steps explain how to set up and configure a private cloud destination using MinIO on a Windows machine.
To set up MinIO on Windows:
- Download the latest MinIO executable for Windows from https://docs.min.io/docs/minio-quickstart-guide.html.
- Store the executable in a local folder.
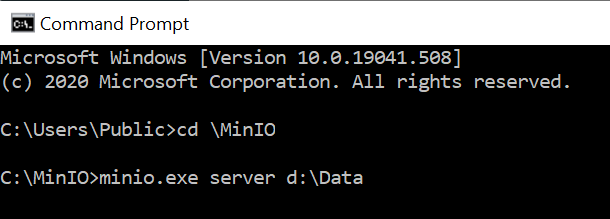
- Start MinIO by opening an elevated command prompt, navigating to the folder with the executable and running the following command:
minio.exe server <storage location>.
The screenshot below shows the command run with D:\Data as the location where the backups will be stored.
When the command executes, a pair of keys are generated. One is an access key and one is a secret key.
Take note of these keys and save them securely. You will use them when creating the backup job.
Note: By default, MinIO will run on port 9000, and you can access and manage the MinIO server through a browser by going to http://localhost:9000/minio/login and entering the key and secret key to log in.
Configure MinIO to start automatically after the Windows machine boots
There is more than one way to ensure the MinIO server starts automatically. In this section, we explain how to start it automatically using the Windows Task Scheduler.
To start MinIO using Windows Task Scheduler:
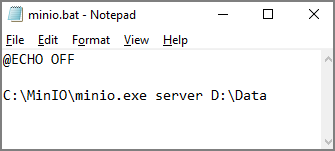
- Create a batch file with a meaningful name. In the example below, we have called it minio.bat.
- Add the following commands to the batch file:
- Open Task Scheduler by clicking the start button, typing Task Scheduler and selecting the application.
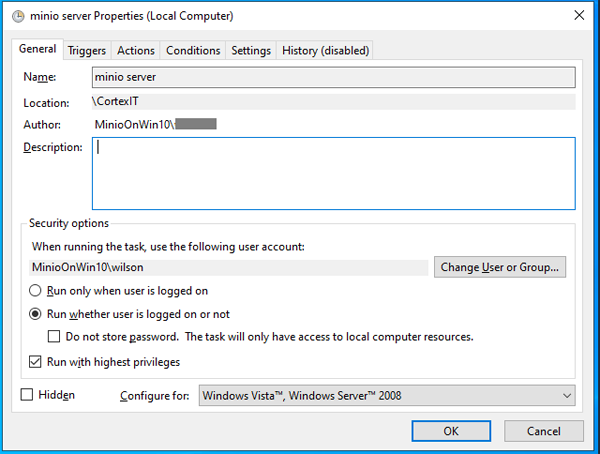
- Select the General tab.
- Type a name for the task into the Name field.
- Check Run whether user is logged on or not.
- Check Run with the highest privileges.
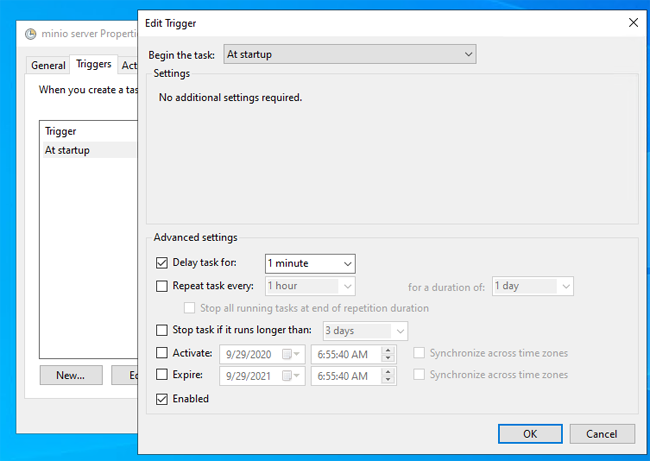
- Select the Triggers tab.
- Open the Edit Trigger screen.
- Select At startup from the Begin the task drop-down field.
- Tick the Enabled checkbox.
- Click OK.
- Select the Actions tab.
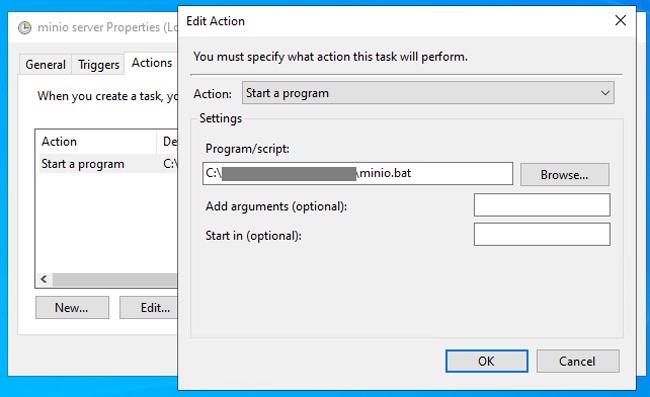
- Open the Edit Action screen.
- Use the Browse... field to set the location of the batch script you created. This field should include the name of the batch file.
- Click OK.
- When prompted, provide credentials for the user account that will be used to run the task.
@ECHO OFF
<your exe path>\minio.exe server <your data path>
The screenshot below provides an example.
Make sure the MinIO.exe and destination folder paths match what was set previously.
You can now create a task to run the batch files using the Windows Task Scheduler.
MinIO will now run every time the computer is restarted.
Create a BackupAssist Cloud Backup job
Now that you have a Windows machine with MinIO managed cloud storage, you can back up to it using BackupAssist.
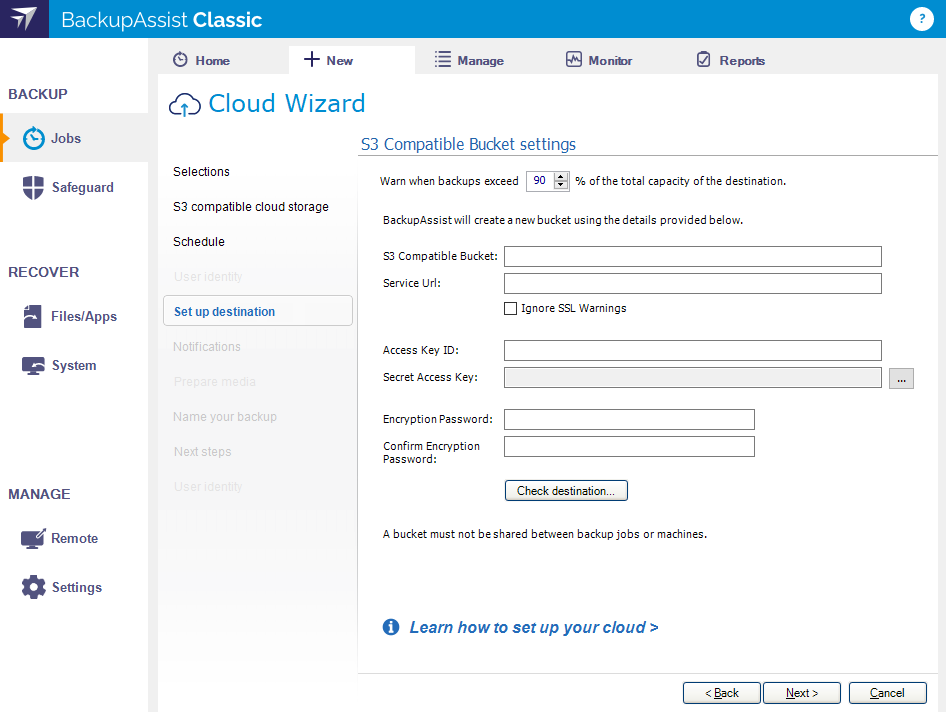
Create a Cloud Backup job as documented on the Cloud Backup page, and select S3-compatible cloud storage in the Destination media step. Then use the Set up destination step to enter the Amazon S3 Compatible Bucket settings as explained in the Cloud backup page.
Use the MinIO settings as follows:
- Enter the MinIO server's IP address and port into the Service Url field. For example: https://192.168.1.3:9000. MinIO will use the backup destination (folder) that you configured.
- Copy the Access key into the Access Key ID field.
- Copy the Secret key into the Secret Access Key field.
