Microsoft Azure seeding
This page explains Microsoft Azure's seeding process for a BackupAssist Cloud Backup. Before following this process, you must create a Cloud Backup job and use the Cloud Seeding Tool to copy that backup's data to a removable drive. To learn more see the Cloud Backup and Cloud Seeding Tool pages.
Azure import (seeding) process
Azure uses a tool called the WA Import / Export tool to check the drive and prepare a journal file that will be used by an import job that you will set up in the Azure portal. We are using version 1 of the tool.
This process is designed and supported by Microsoft Azure and the steps are explained in detail in the Azure documentation.
Below is an overview of this process.
- Check the seeding drive
- Download the WaImportExportV1 tool
- Run the WaImportExport command
- /j: The name to be given to the journal file. You should give it your own name instead of JournalTest and it is recommended that the disk's serial number is used. A journal is generated for each drive you want to seed, so if you have more than one drive to seed you should use the disk serial number as the journal file's name.
- /sk: Enter the Azure Storage Account key for the Storage Account that the backup job created. Go into the Azure Portal and under Storage Accounts, select the Storage account then select Access keys. Select the Copy icon next to Key1, and past the key into the script. The format is "/sk:<key>=="
- /t: Enter the drive letter of the disk to be shipped as it appears in Windows Explorer. For example, D = “/t:D”
- /bk: is the bit locker key of the drive. To get this code, open the text file you saved when you encrypted the drive. Inside will be a heading “BitLocker Recovery Key:” followed by a key in the format 111111-222222-333333-444444-555555-666666-777777-888888. Copy this key into the script with no space after /bk:
- /srcdir: Enter the drive letter of the disk to be shipped as it appears in Windows Explorer. For example /srcdir:D:\
- /dstdir: Enter the name of the Azure container (blob) that the backup job created. This is the container that the backup job uses and that the data on the seed disk is to be imported into.
- /skipwrite – leave this as it is.
- Create an Import Job
- Log on to https://portal.azure.com/
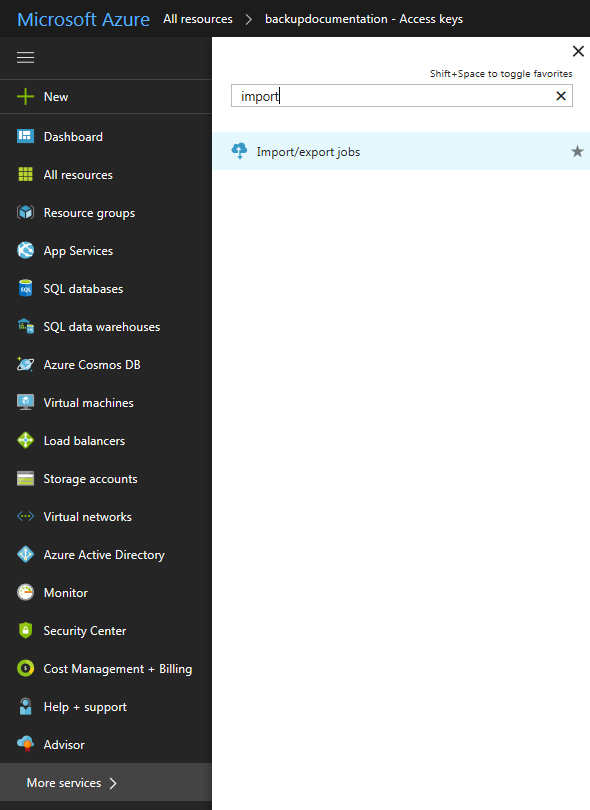
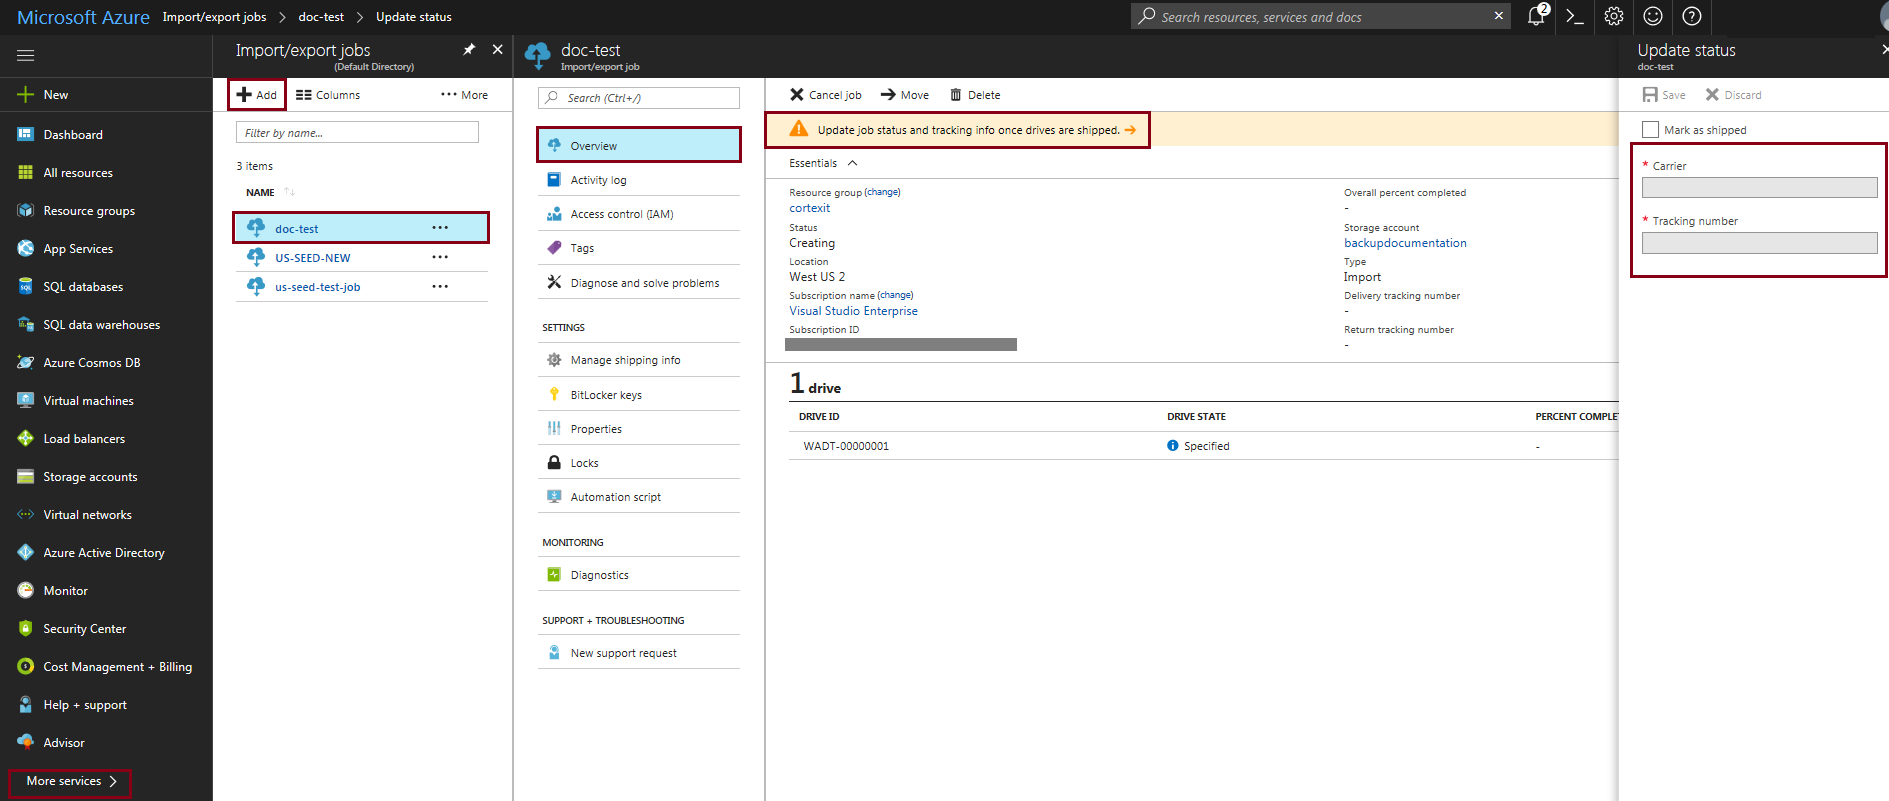
- Select More services at the bottom of the menu.
- Type Import into the search field to bring up the option Import / export Jobs.
- Select Import / export jobs.
- Select +Add from the top menu
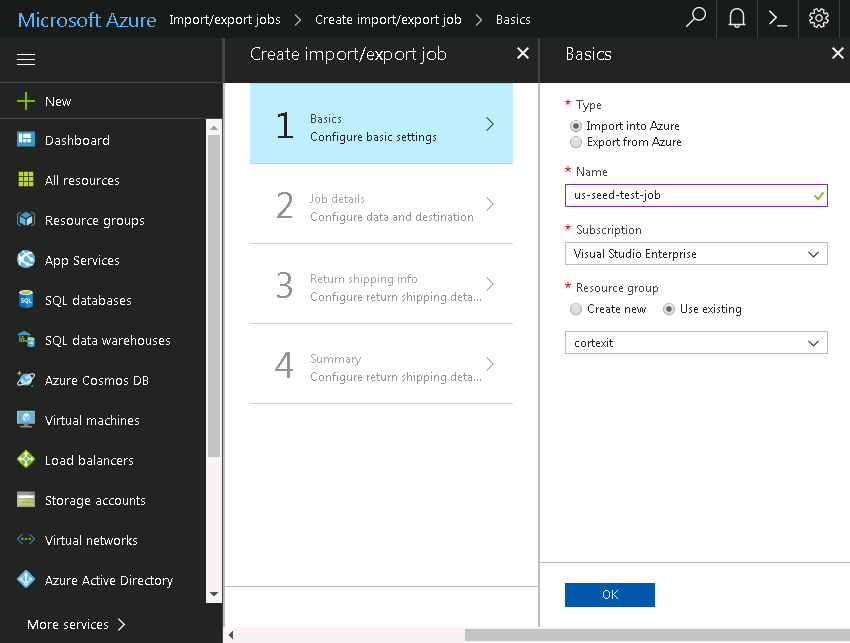
- Fill in the Basics page
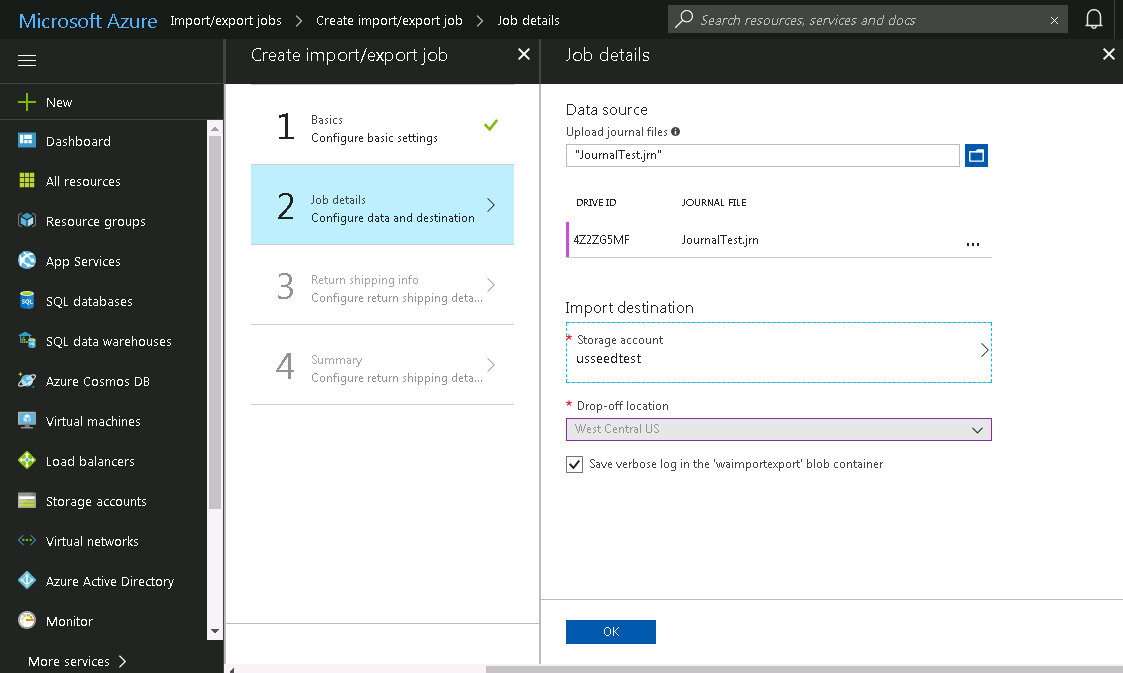
- Fill in the Job details page
- Data source: Browse to and select the .jrnl journal file in the C:\WaImportExportV1 directory. This will add the Drive ID and the journal file to the job. The drive ID is identified by the WAImportExport script when it runs and added to the journal file.
- Import destination: Select this field, and then select the storage account you created from the list on the right.
- Drop-off location: This field may be selected for you, based on your location.
- Select OK.
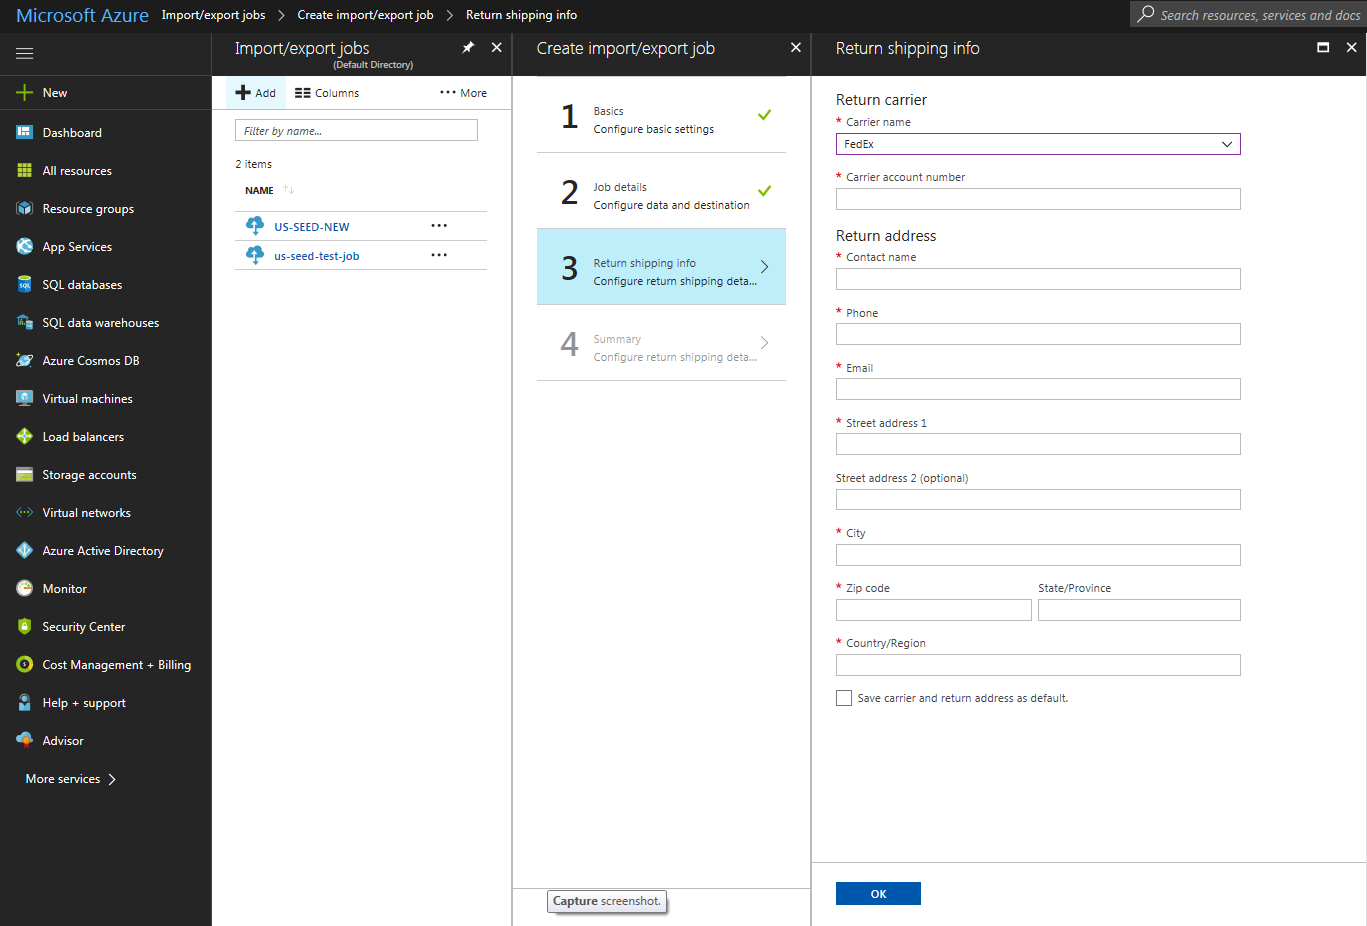
- Fill in the Return shipping info page
- Return carrier: Select the carrier that you will use to ship the drive.
- Carrier account number: Enter your own account number for the chosen carrier. If you do not have an account, you will need to create one with the carrier selected for your region. Microsoft will use this account to ship the drive back to you once your import (seeding) job is finished.
- Enter a complete and valid contact name, phone number, email, street address, city, zip, state / province and country / region. These details will be used to deliver the drive back to you.
- Select OK
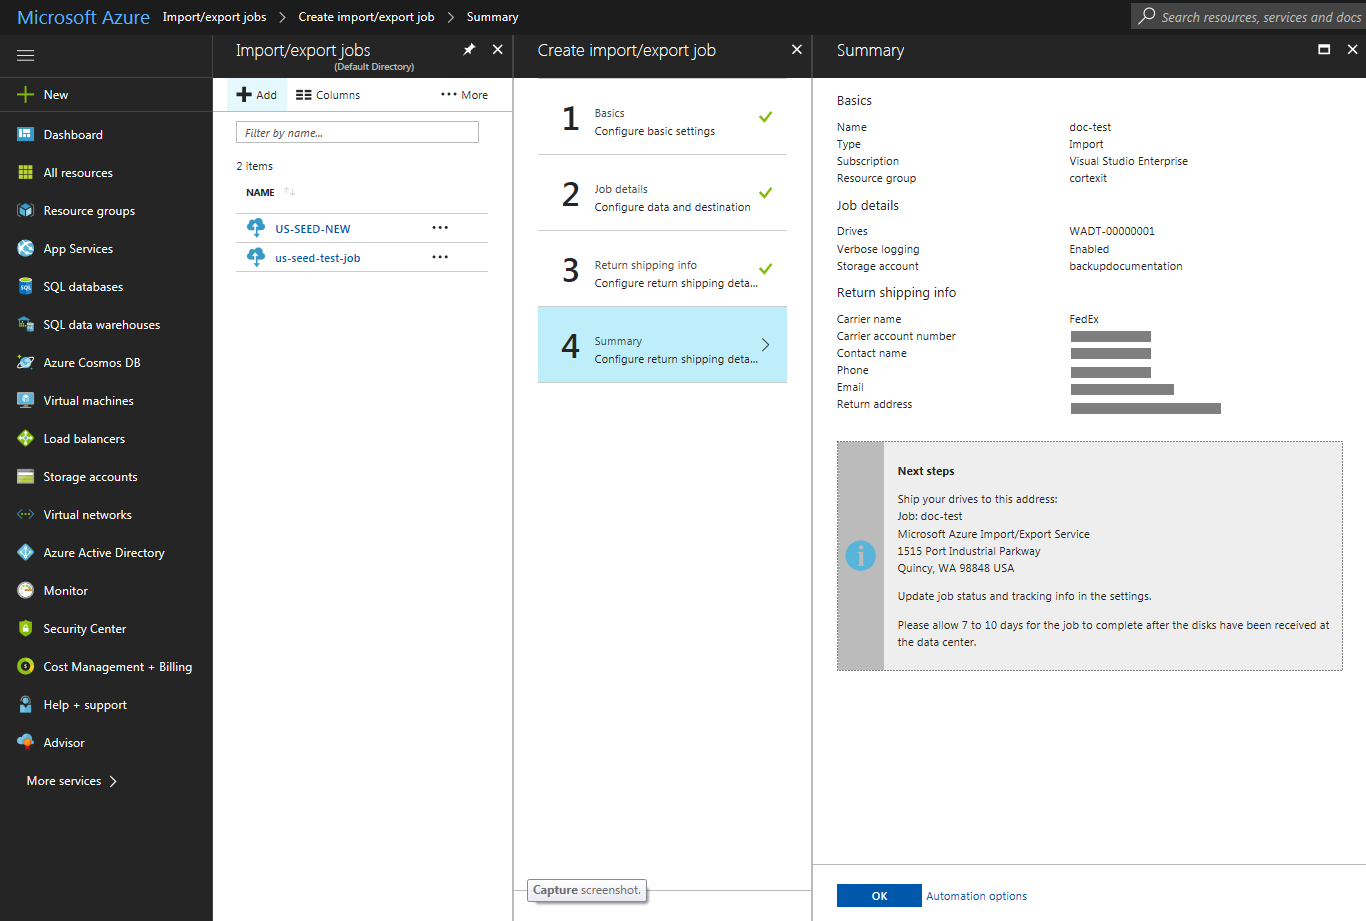
- Fill in the Summary page
- Ship the drive to the Azure data center
-
Update the Import job as shipped
- Select More services from the left menu.
- Search for 'import'.
- Select Import / Export jobs.
- Select the orange banner - Update job status and tracking info once the drives are shipped.
- Select the check box Mark as shipped.
- Enter the Carrier and Tracking number.
- Select Save
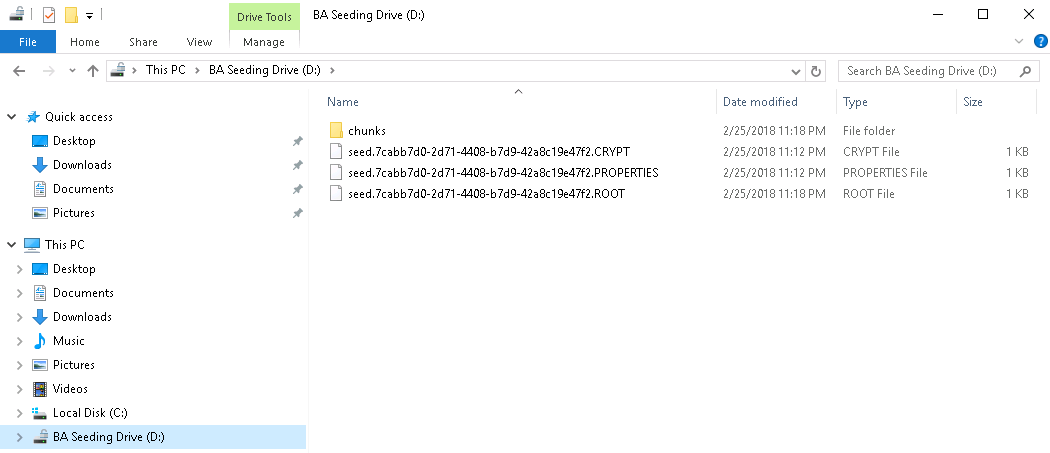
Check that the BackupAssist Seeding Tool has copied the data to the removable drive. The data will appear on the drive as folders and files, and include a chunks folder.
The drive will have been encrypted with BitLocker so you will need to provide the password you specified when the Seeding Tool initiated the encryption process.
To learn more, see the BitLocker Encryption guide
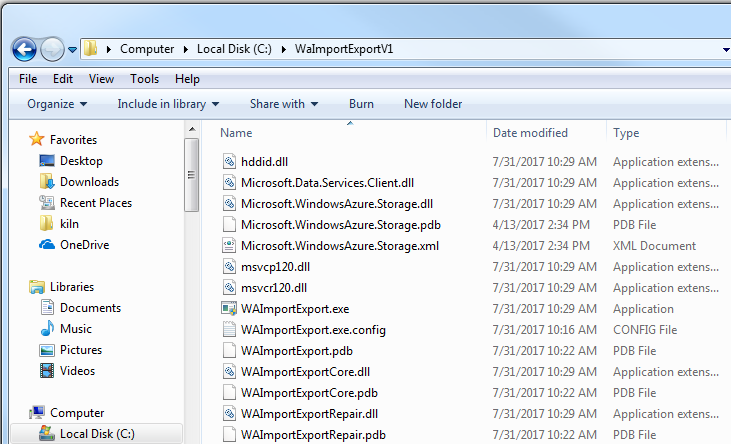
Download the WaImportExportV1 tool from here. Unzip the files to the default folder WaImportExportV1. E.g C:\WaImportExportV1
WaImportExport is run from the tool’s directory (e.g C:\ WaImportExportV1) using an elevated command prompt. To run WaImportExport, you first need to create a script by coping the below command line into notepad and editing it.
WAImportExport.exe PrepImport /j:JournalTest.jrn /id:session#1 /sk:== /t:D /bk: /srcdir:D:\ /dstdir:ContainerName/ /skipwrite
Script variables:
Script Example: WAImportExport.exe PrepImport /j:JournalTest.jrn /id:session#1 /sk:Frkxn+3lJokWS3PsdfBpaqYc/sKQCGg5JWHott1B9INuQdx3wg+ajuD6++DYe8bOkXk01tR69iABGXSk4w== /t:F /bk:100736-611036-212285-335559-032489-385463-055525-625342 /srcdir:F:\ /dstdir:us-seed-backup/ /skipwrite
Confirm the drive meets the requirements and continue.
Each time you run the command a journal is created. You will need to remove or rename the previous journal file from the C:\ WaImportExportV1 folder before you can run the command again. If you do not do this, you will get an error : "Last copy session#1 was not terminated normally"
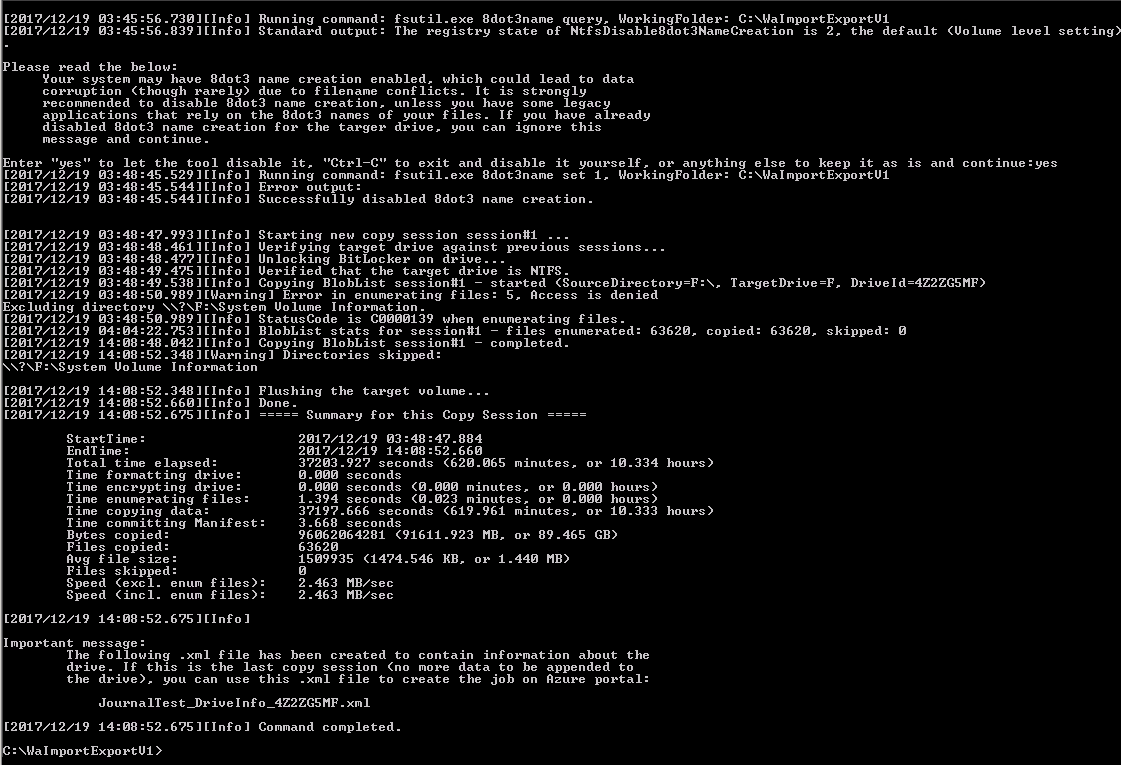
The script will run and add a manifest file to the portable drive and a journal file to the C:\ WaImportExportV1 directory. The journal file stores basic information about your job such as drive serial number and storage account name, and it is used in the next step to create the Azure Import Job.
Note: This script can take a long time to run if there is a lot of data. Our test ran for 11 hours with 300gb on a fully encrypted drive, so allow for this time. When the script is finished, it will return to the command prompt.
The next step is to go to the Azure portal and create a job that will be used to run the seed, and provide you with the shipping information.
To start an Import job:
A Create import / export job screen will open with 4 pages to fill in.
The first page is used to enter in the basic information for the Import job, such as giving the job a name.
The second page is used to provide detailed information like the storage account name, and to link the Import job to the Journal file that was created earlier.
Enter the details into the following fields:
The third step is where you provide shipping information that Azure will use to ship the drive back to you.
To fill in this section you will need an account with a shipping company to post the drive. The companies you can use will be in the drop down list and depend on where you are located.
Enter the details into the following fields:
The fourth page allows you to review and confirm the information provided. It will also show you what address to ship the drive to.
In the Summary section, an Azure data center shipping address will be provided. Ensure that the job name and the returning shipping information is correct.
Confirm the summary and then click OK.
A new import/export job will appear on the Import/export jobs page. You may need to press Refresh.
Select the new import/export job to open it. At the top will be an orange banner reminding you to update the job's status once the drive has been shipped. Select the orange banner to display the shipping status fields. When you ship the drive, you will need to come back to this page and enter the details into the job.
Pack the SATA drive and its components (e.g power supply, power cable, interface cable) using a suitable box and packaging for shipping. Send the drive to the Azure data center using the shipping information provided in the summary page. Allow 7 - 10 days for the job to complete after the drive has been received.
Go back into the import/export job you created in the Azure portal. Select the orange banner across the top of the overview page and update the job status.
To view or update an import job:
The job progress can be tracked on the portal dashboard.
Note: If the tracking number is not updated within 2 weeks of creating the job, the job will expire.
Backing up to the seeded destination
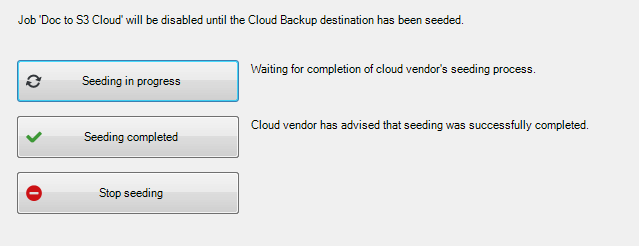
When you are ready to run the Cloud Backup job, double-click on the job. This will open a dialog prompting you to re-enable the job so that you can run it.
Run the Cloud Backup job, either manually from the Manage screen or at a scheduled time. The backup job will check the data on the destination and run incrementally, only backing up data that has changed.
After the destination has been seeded, it is possible to restore from the seeded data, before a backup has even run.
To learn more, see Cloud Backup
