Files and applications can be quickly and easily recovered using a local or cloud backup. In most cases, you would use the local backup because it's faster to recover from, and use the cloud backup if the local backup was unavailable or compromised in some way.
If you need to perform a bare-metal recovery, see the Bare-metal recovery page.
If you need to recover individual mail items, see the Exchange Granular Restore page.
Application recoveries
When recovering applications, it is important to have a clear understanding of what and how applications are recovered. This section explains the options available so you can achieve a predictable outcome.
Considerations:
- BackupAssist ER creates application-consistent backups of selected VSS applications.
- When you recover an application to its original location, you should set it to overwrite and replace the files. This process is explained in step 10.
- BackupAssist ER will stop SQL and Exchange servers before the data is recovered. The relevant services may need to be manually restarted after the recovery.
How to perform a file or application recovery
Follow these steps to recover files, folders and applications:
- Open BackupAssist ER.
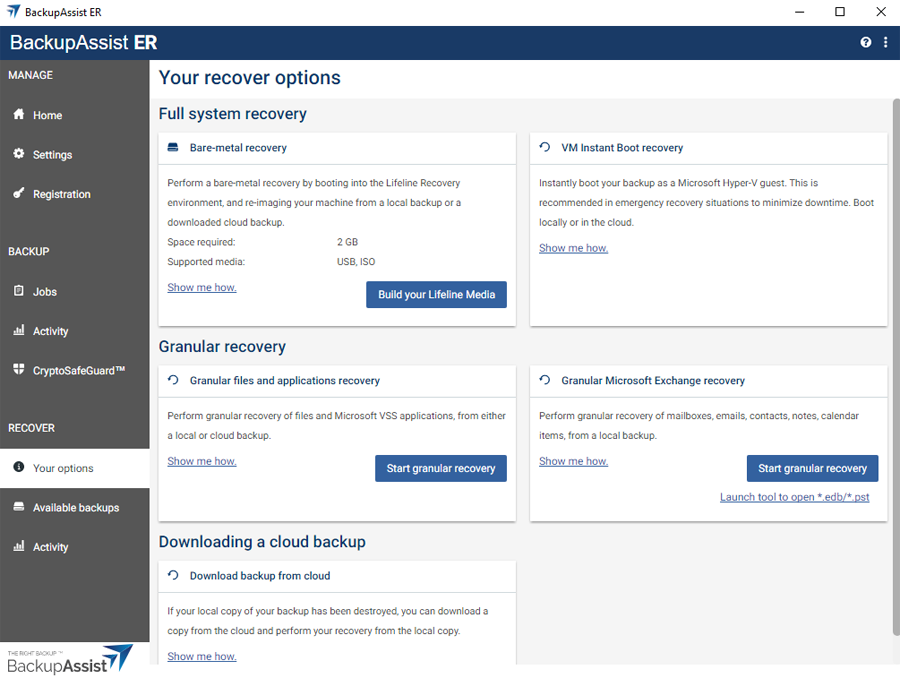
- Click the Your options menu.
- Click the Start granular recovery button on the Granular files and applications recovery card.
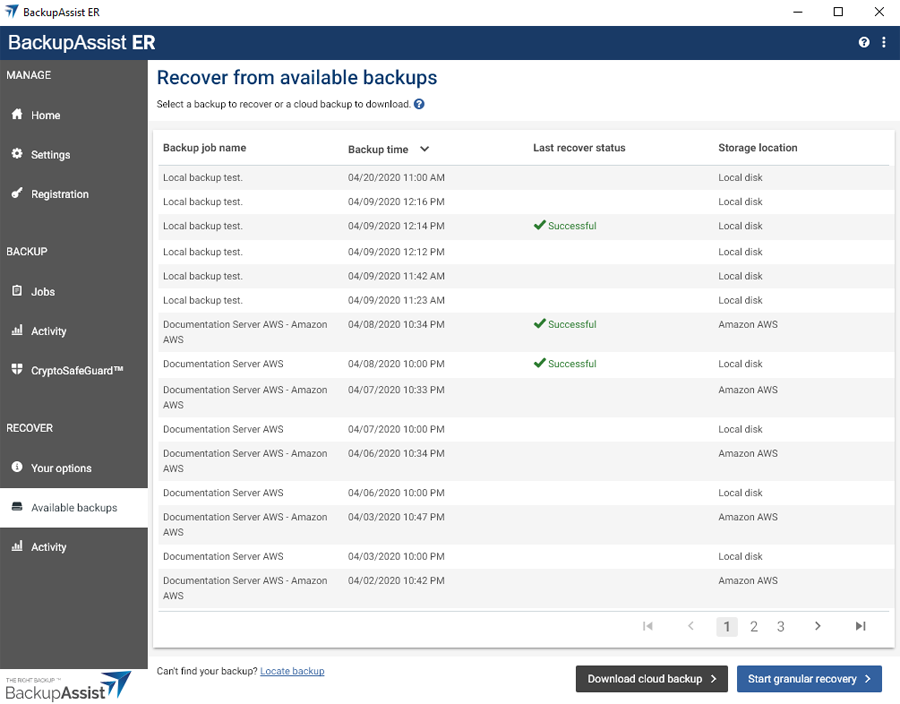
- Choose the backup that you want to recover from.
- Click the Start granular recovery button.
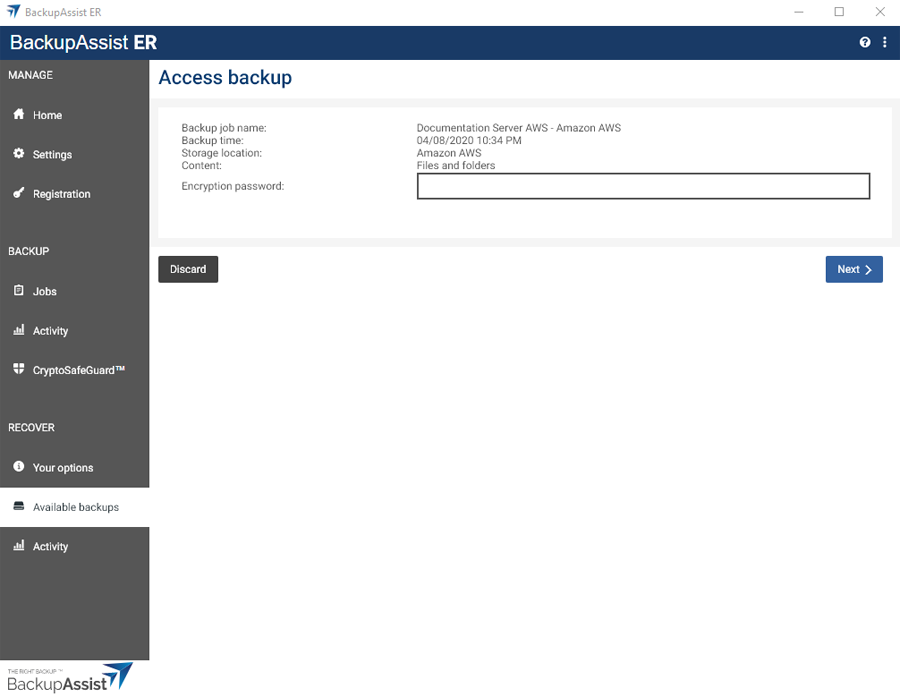
- Enter the Encryption password into the field provided.
- Click Next.
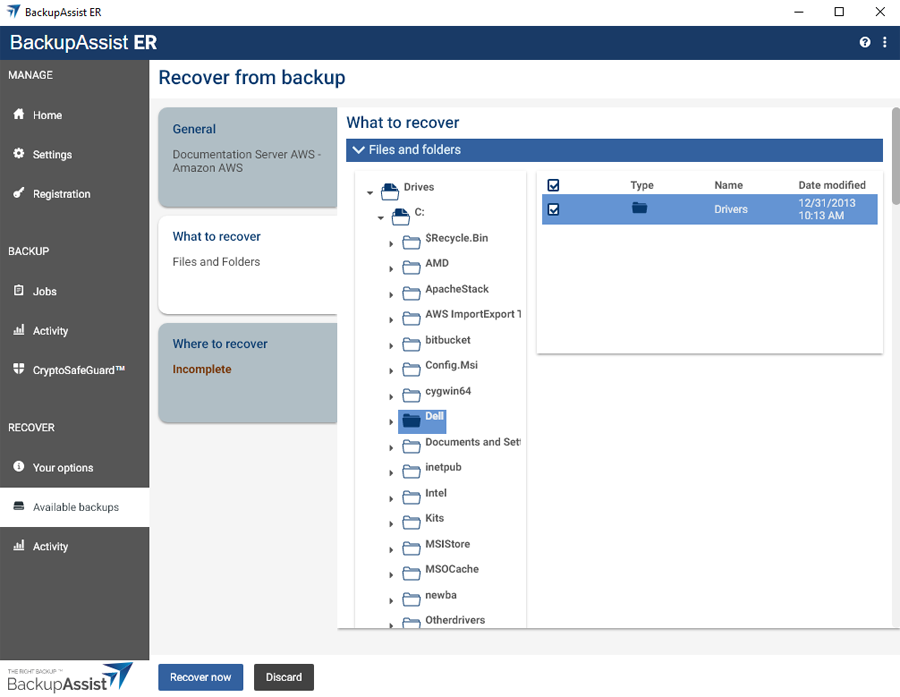
- Click the What to recover tab.
- Select the data you want to recover.
- Click the Where to recover tab.
- Review and update the Location options.
- Restore data to – Choose Original location or Specific location.
- Overwrite behavior
- Overwrite existing files – restored files will overwrite files with the same name.
- Do not overwrite existing files – restored files will not overwrite files with the same name. This means those files will not be restored.
- Only overwrite older files – if a source file has changed since the backup was made it will not be overwritten.
- Restore NTFS security attributes – Selected by default so the security attributes a file had when it was backed up will be retained when the file is recovered.
- Take ownership of files as <logged in user> – Gives the user account that logged into Windows to run BackupAssist ER ownership of the recovered files.
- Throttle speed – Selecting this option displays the Throttle speed field. You can use this field to set the average data transfer speed. This allows you to manage the impact the recovery may have on other network users.
- Click the Recover now button.
The Recover from available backups screen will open.
Each time a cloud backup job runs it creates a local and cloud backup. The Available backups screen shows the local and cloud backups as separate, selectable recovery options.
In the example below, the Documentation Server AWS backup job has many Local disk and Amazon cloud backups to choose from. The Storage location column shows what is a cloud and what is a local backup.
If the backup is encrypted, the Access backup screen will open.
This is the password you entered in the General tab when the backup job was created.
This will open the Recover from selected backup screen and display 3 tabs.
The General tab displays information about the backup you selected.
Use the expandable drive folders to select the files and applications that you want to recover. Selecting a folder displays its contents in the right pane, so you can select specific files.
Recovering SQL and Exchange
Backups of SQL servers and Exchange servers will display expandable sections specifically for those applications. Select the tick box next to the application that you want to recover, and all the files needed by the application will be selected for you.
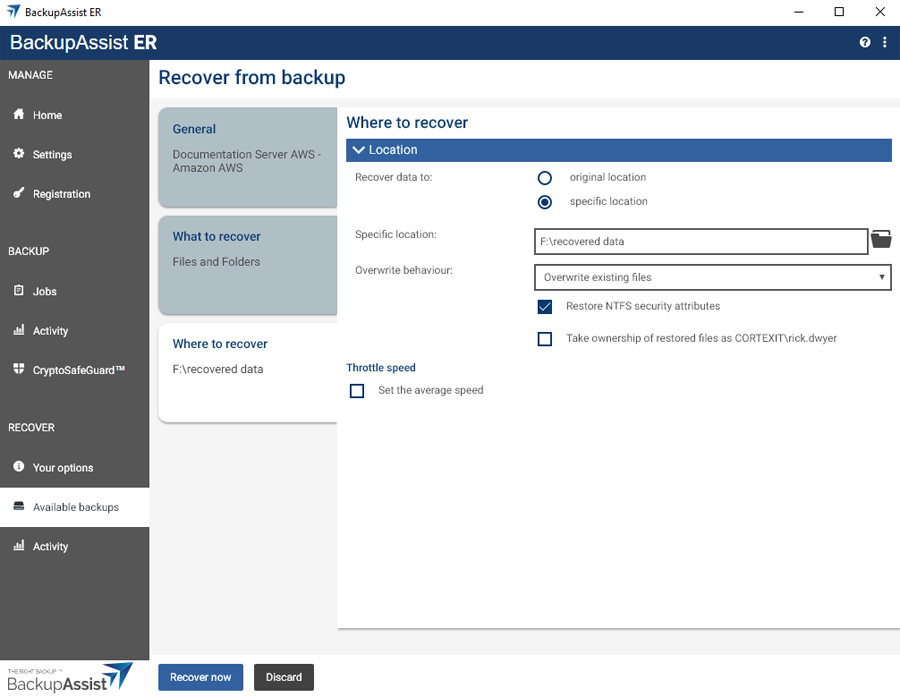
The following Location options are available:
Specific location is used to recover the data to a convenient location that will not interfere with the original data. You will need to provide a path for this location..
Original location will recover the data to the location it was backed up from. The Overwrite behavior settings determine how files with the same name are managed.
Use the drop-down field to select one of the following overwrite settings:
Warning: Special consideration should be given to the overwrite behaviors when recovering an Exchange Server or SQL Server. In most cases, the recovery would be run to replace the existing files.
The Activity screen will open so you can view the progress.
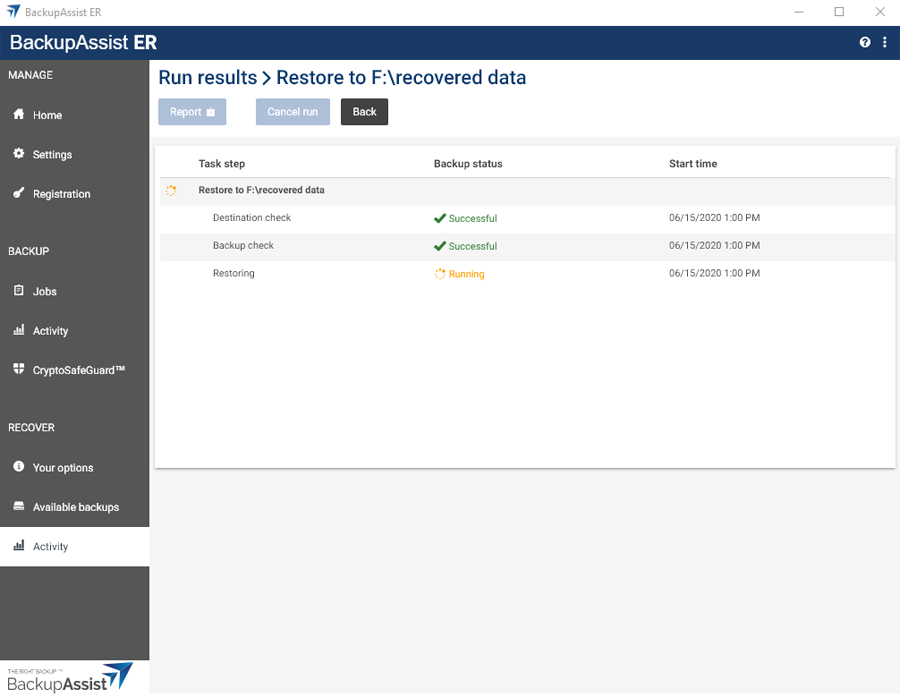
When the recovery has finished, the result will be displayed on the screen.
The Report button will become active and can be used to open the recovery report.