 Belgium
 Canada
 Germany
 Italy
Italy France
 Spain
Spain United Kingdom
Experiencing permissions issues with Exchange mailbox backups?
With BackupAssist you can create backups of your entire Exchange Server Information Store database, from which you can perform a complete restore of your Exchange Server, including your public folders. Restoring the entire information store, however, is time consuming and can be excessive if all you really need to do is recover a single deleted email. This is why many BackupAssist users take advantage of the BackupAssist Exchange Mailbox Add-on, which gives you the ability to back up individual mailboxes and public folders to separate PST files, from which you can easily restore individual or group emails, calendars, tasks, notes, contacts or entire mailboxes.
A key to running successful mailbox backups with BackupAssist can lie with using the right backup user identity. This article outlines how to correctly configure the backup user identity for mailbox backups, which will help you avoid many of the frustrating permissions issues that can prevent mailbox backups from running successfully.
How the backup user identity in BackupAssist works.
Backups executed by BackupAssist run as a specific Windows user on the machine where the software is installed. BackupAssist simulates a login using a valid Windows username and password and the backup process will then run as if the user logged into the machine and performed the backup manually. The access level of the backup user identity can therefore determine what data can be backed up as well as to what destinations. So, for instance, if you are attempting to back up files that require certain permissions to access, you will need to specify a relevant Windows username and password that has access to the restricted files as your backup user identity. Two types of user can be specified for this purpose:
- A backup user identity: a valid Windows user name and password (domain or local account).
- The local system account: a built-in account in Windows machines used to execute local processes.
For most installations, we recommend that you specify a backup user identity. This is particularly important for Exchange mailbox backups, because certain privileges are required to access the Exchange Server and back up mailbox data.
Permissions issues with Exchange mailbox backups.
If the BackupAssist user identity does not have the appropriate permissions to execute mailbox backups you will often see permissions errors in the backup report, some of which include:
- BA1877 - A general error occurred while backing up one or more mailboxes
- BA1883 Insufficient privileges
- BA4399/BA1999 - Exbackup failed when preparing to backup one or more mailboxes
- BA4320/BA1920 - Exbackup failed when preparing to backup one or more mailboxes
Setting up a Windows user for Exchange mailbox backups
We recommend that you create a new user that is to be used exclusively for performing backups. We do not recommend using the Windows "Administrator" account for this purpose because it has a number of inherent "deny access" permissions that prevent access to the Exchange Server. The following guidelines outline how to setup a user that will work for most installations of BackupAssist, and should eliminate the mailbox backup permissions errors outlined above.
1. Creating a new user in Active Directory
Carry out the following steps to create a new user in your Active Directory.
- Note: the screenshots included below are from SBS 2008, but the process is essentially the same for Server 2008, Server 2003 and SBS2003.
- Navigate to Start menu > Administrative Tools > Active Directory Users and Computers:
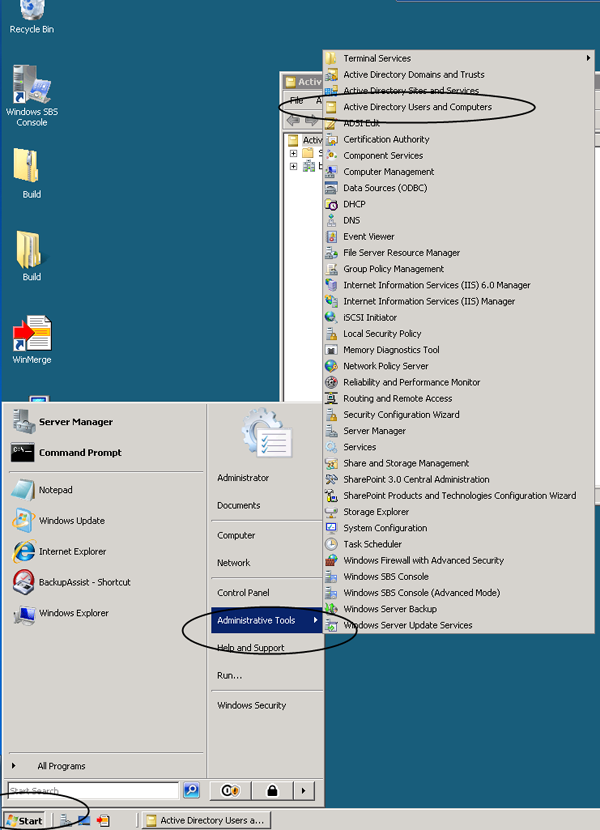
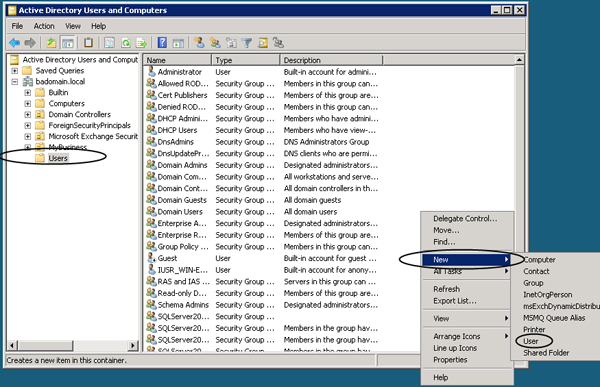
- From the left pane, select Users and then from the Action menu select New > User:
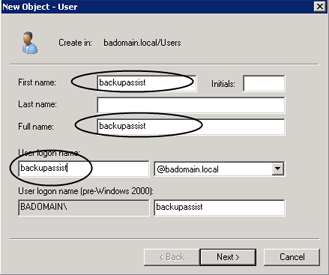
- In the user configuration window, enter the details for the new user and click Next.
- We recommend using a logon name that is clearly associated with your backups:
- Assign a password to the user and change the options as indicated below, making sure that the Password never expires option is enabled.
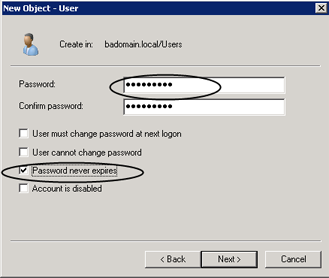
- Click Next and then Finish to create the new user.
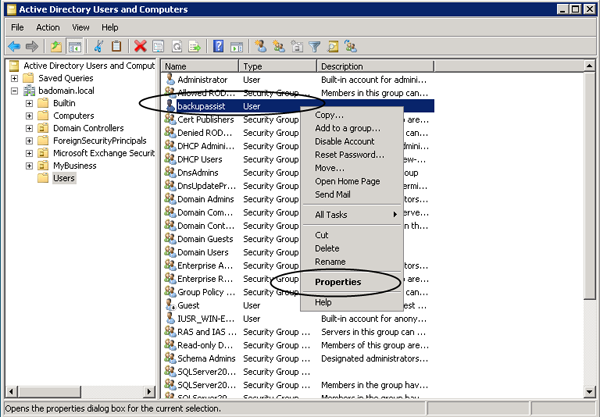
- You will then be returned to the Active Directory Users and Computers window. Select the newly created user, right click it and select Properties:
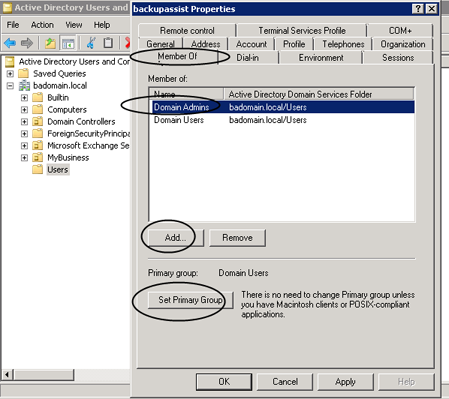
- Select the Member Of tab and click the Add button.
- In the 'Enter the object names to select' field input Domain Admins and click the Check Names button.
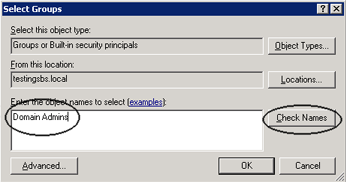
- Repeat steps 8-9 to assign the following group memberships:
- For Exchange Server 2003
Domain Admins, Backup Operators, Administrators - For Exchange Server 2007
Domain Admins, Backup Operators, Administrators, Exchange Organizational Administrators - For Exchange Server 2010
Domain Admins, Schema Admins, Administrators, Organization management
- For Exchange Server 2003
- Once you have completed these steps, while still in the Properties window, select the entry for Domain Admins and click the Set Primary Group button.
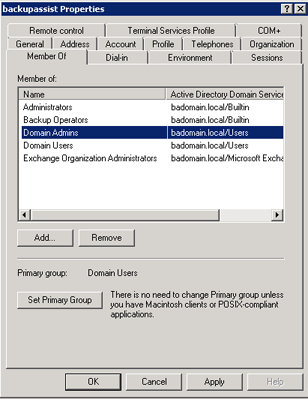
- The user should now be setup similar to the following:
2. Creating a mailbox for the new user
The user also needs to have its own mailbox that is visible to other users for mailbox backups to run correctly. To create a mailbox for the new user:
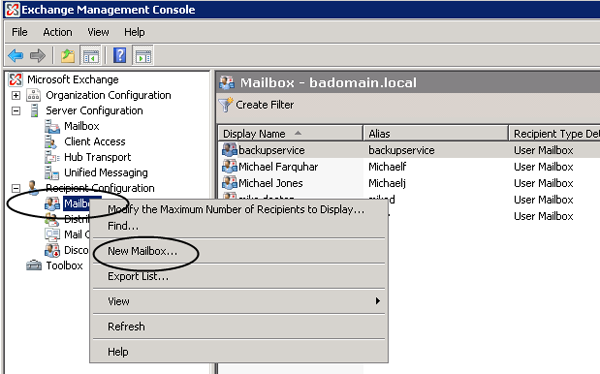
- Go Start menu > All Programs > Microsoft Exchange Server > Exchange Management Console.
- Right-click Mailbox under the 'Recipient Configuration' sub-group and select New Mailbox:
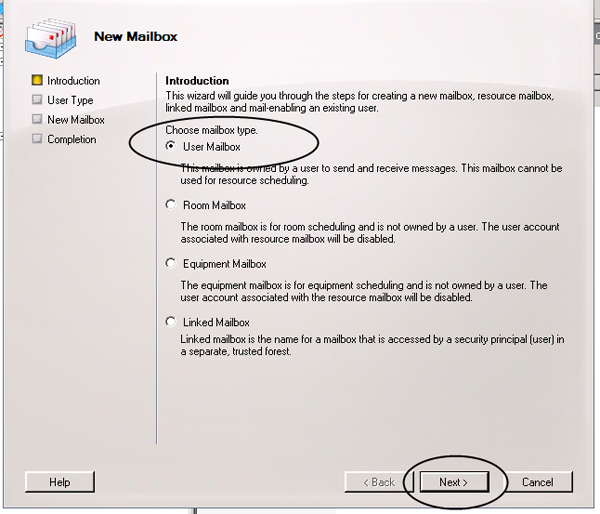
- Choose User Mailbox as the mailbox type and click Next:
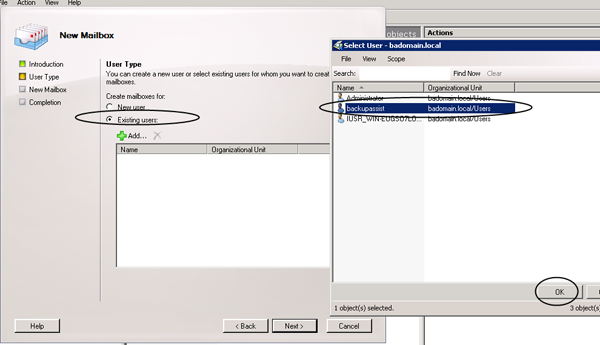
- Select the Existing users radio button, click Add, then select the user you just created and click OK:
- Click Next and specify the appropriate Exchange Storage Group in which to create the mailbox:
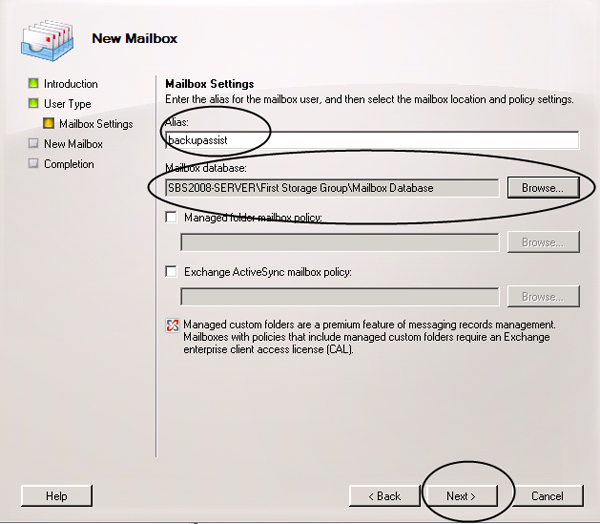
- Click Next, review the mailbox creation settings and then click Next to create the new mailbox.
An additional step for Exchange Server 2010:
- Go to Start menu > All Programs > Microsoft Exchange Server 2010 > Microsoft Management Shell
- Run the following command, replacing [username] with the new user that you created:
Get-MailboxDatabase | Add-ADPermission -user [username] -AccessRights GenericAll

3. Modifying the backup user identity in BackupAssist
To use the newly created user as the backup user identity in BackupAssist:
- In BackupAssist, select Backup User Identity from the top Settings menu.
- Select the radio button for 'Provide a backup user identity' and enter the username, password and domain for the user you created for backup purposes:
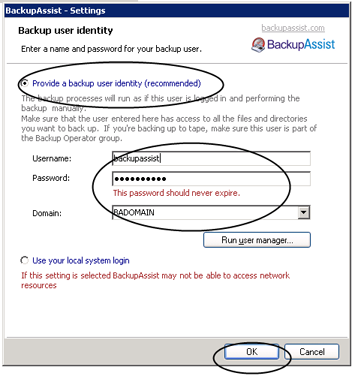
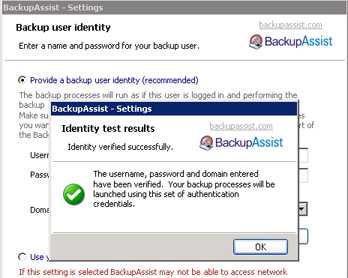
- Click OK and you should see a message indicating that BackupAssist was able to successfully simulate a login using the credentials you supplied.
Troubleshooting further mailbox permissions errors
Following the above steps - creating a new user in Active Directory, creating a mailbox for the new user, and modifying the backup user identity in BackupAssist - should eliminate most of the permissions-related errors that prevent mailbox backups from running successfully. In some instances, however, despite making these changes, you may encounter the following error:
- BA12 - BackupAssist cannot write to its own temp directory, this is probably due to a permissions issue with the Backup User Identity.
This issue can be resolved by altering the security settings on the directory that you are using to store PST mailbox backups (by default this is the C:\ProgramData\BackupAssist v6\Temp or C:\Documents and Settings\All Users\Application Data\BackupAssist v6\Temp folder):
- In a Windows Explorer window, navigate to the mailbox backup directory.
- If you are unsure where the mailbox backup directory is located, look within the Destination tab while editing an Exchange Mailbox job in BackupAssist, or the Exchange servers tab while editing any other job that has mailbox backups configured.
- Right-click the mailbox backup directory and select Properties.
- Select the Security tab and click the Edit button
- Click the Add button, input the name of backup user in the bottom field and click Check Names to verify:
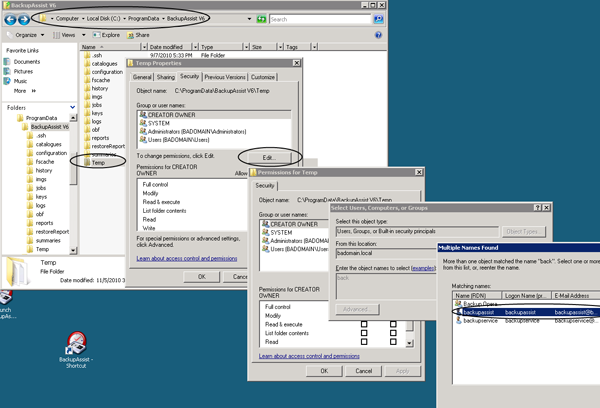
- Click OK once the correct user has been added.
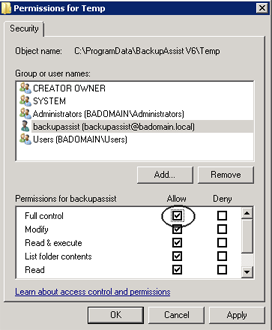
- Select the added user from the list and enable the Full control option in the Allow column and click OK.
We hope this article has helped resolve your permissions issues with Exchange mailbox backups. If you continue to have problems or have any questions about this article, please email us at support@backupassist.com and we'd be more than happy to help.
Kind regards,
The BackupAssist Team

