 Belgium
 Canada
 Germany
 Italy
Italy France
 Spain
Spain United Kingdom
Exchange Server Backup
Basic Exchange Server Backup and RestorationContents
- Online Backup of Exchange Server
- How to Set Up BackupAssist for Online Backups of Exchange Server
- Step 1: Find your storage groups
- Step 2: Enter the details into BackupAssist
- Step 3: Perform a backup
- Step 4: Examine your backup logs
- How to Restore your Backup of Exchange Server
Important Notice
The information and instructions contained within this document are specific to BackupAssist v3.x.x. While some of this information will be valid for other versions of BackupAssist we do not support the application of any steps or suggestions on versions other than v3.x.x
Documentation specific to BackupAssist v4 will be available very soon and we appologize for any inconvenience.
Online Backup of Exchange Server - a feature of Windows Backup (ntbackup)
The Windows Backup program includes facilities to perform live, online backups of Exchange server. This means that the Exchange Server does not have to be stopped to perform the backup.
BackupAssist leverages this feature of Windows Backup, whilst also working around several bugs in ntbackup to deliver a reliable solution.
How to Set Up BackupAssist for Online Backups of Exchange Server
Step 1: Find your storage groups
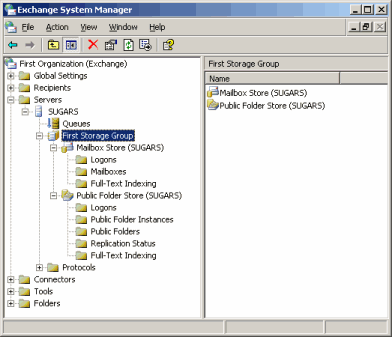
Exchange Server Manager
Launch the Exchange System Manager from the Start menu, and expand the Servers tab as shown in the screenshot. You'll find one or more storage groups listed below the name of your server. In the example, there's one storage group called First Storage Group, under the server named SUGARS.
Step 2: Enter the details into BackupAssist
Run the BackupAssist Administration Console, and locate the Options tab. Then check the Perform online backup of Exchange Server checkbox (as shown in the following screenshot), enter in the name of your Exchange Server, and add the storage groups to backup.
In the example screenshot, the server name SUGARS and storage group First Storage Group have been entered in.
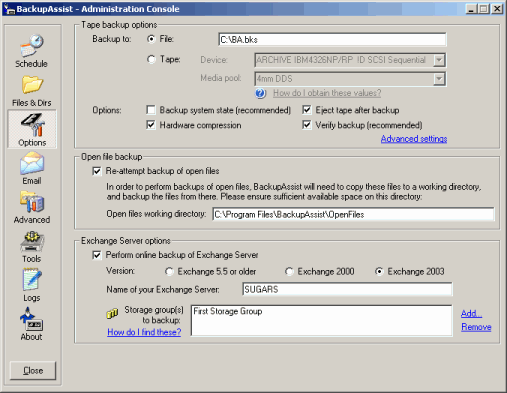
BackupAssist Options
Also note that for this example, we choose to backup to a file called C:\BA.bks.
Step 3: Perform a backup
The next step is to either perform a test backup, or to wait for your scheduled daily backup. BackupAssist will backup Exchange Server during the second phase of the backup. During the backup process you'll see a screen like this:
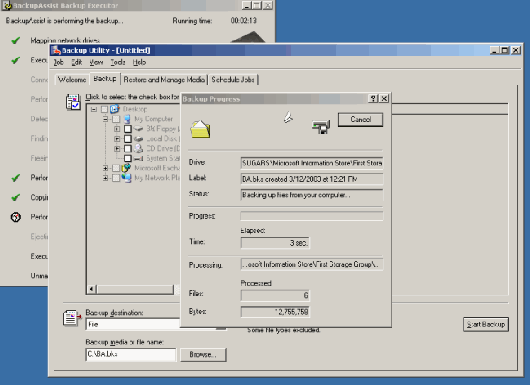
NTbackup Backup in progress
In the example, the drive called SUGARS\Microsoft Information Store\First Storage Group is being processed. This corresponds to a live backup of your Exchange Server.
Step 4: Examine your backup logs
The final step to ensuring your Exchange Server was backed up is to examine the backup logs.
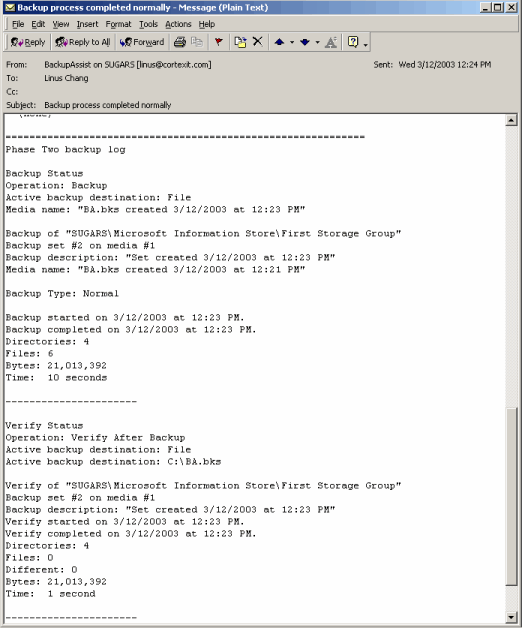
Backup Logs
As shown above, the backup of SUGARS\Microsoft Information Store\First Storage Group resulted in 21,013,392 bytes from 4 directories and 6 files being backed up.
The subsequent verify shows the same number of bytes and directories, but as a "quirk" with ntbackup, the file count is 0. Your restoration should still work - this appears to be a problem with ntbackup's report log, rather than the backup itself.
How to Restore your Backup of Exchange Server
In this example we go through three steps to perform the restoration. This example follows on from the backup process described in Chapter 1.
We assume that your system is functioning properly - that all your files and registry have been restored where needed - and you need to get your Exchange Server Information Store working again.
Step 1: Dismount your Exchange Server Stores
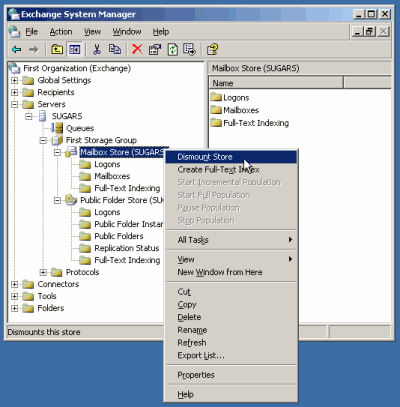
Exchange server manager
Run the Exchange System Manager from the Start menu, and navigate down to find your server and storage group (as shown in the screenshot). Then on your Mailbox Store and Public Folder Store (and any other stores that may be listed), right click and select "Dismount Store".
Once dismounted, your stores will have an icon with a red arrow pointing down, as shown in the screenshot below. This indicates that they have been dismounted.

Exchange server manager
Step 2: Run Windows Backup, and perform the restoration
Start Windows Backup as shown in the screenshot below.
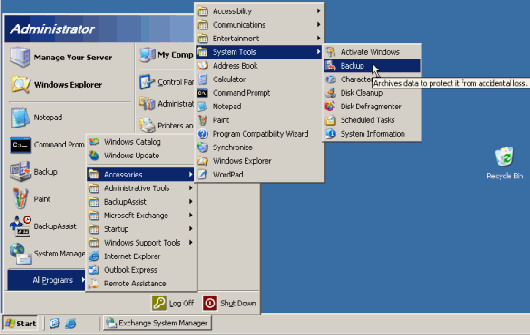
Launch Windows Backup
You should then click the "Restore and Manage Media" tab, and locate the file or tape that you wish to restore from. Expand the tree under that media until you find the Exchange Server Information Store listed, and select it.
In the example screenshot, we are restoring from a file called "BA.bks" and the Exchange Server is SUGARS.
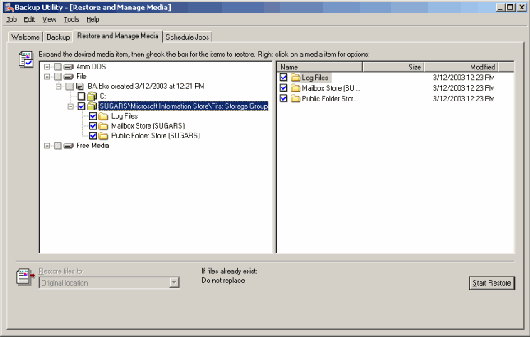
Ntbackup Restore Tab
Click the Start Restore button. You'll be asked several options, as shown below. Because we are restoring to the same Exchange Server, the Restore To field is filled with "SUGARS" The temporary location for log and patch files should be any directory with enough free space to perform the restore to (Windows Backup will create the directory if it doesn't arleady exist.)
Since we are restoring from a full backup, we also check the last two checkboxes on the window, and then click OK.
If you are restoring an incremental or differential backup, you should refer to the Additional Resources listed at the start of this white paper.
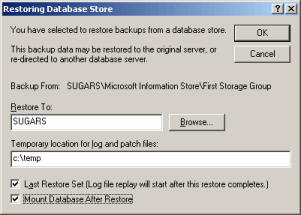
Restoring Database Store
Step 3: Check the logs
Once the restore is complete, you should see the following window. Click on the Report button to view the logs.
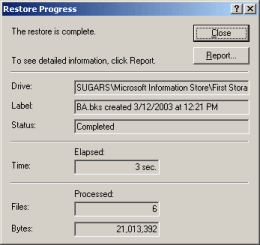
Restore Complete
The backup log will show the results of the restore process, as shown below:
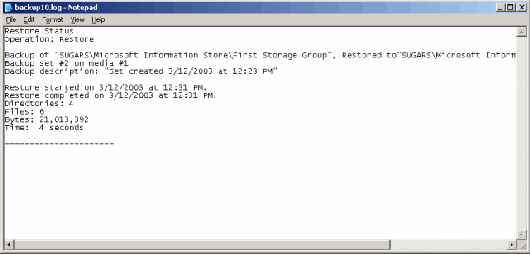
Restore Logs
At this stage, you may also choose to reboot your server.
Your Information Store should now be restored and mounted, and operational. Congratulations!

