Belgium
 Canada
 Germany
 Italy
Italy France
 Spain
Spain United Kingdom
Network Backups
Backing Up Workstations Using Mapped Network Drives and BackupAssistContents
Important Notice
The information and instructions contained within this document are specific to BackupAssist v3.x.x. While some of this information will be valid for other versions of BackupAssist we do not support the application of any steps or suggestions on versions other than v3.x.x
Introduction
BackupAssist can be used to backup workstations and remote computers via a network share. On your workstation, you should share the directories that you want to backup, so that remote computers can access them. There are two ways to do this:- Use the UNC naming convention to select files and directories - eg. \\Server\ShareName
- Use mapped network drives to access the remote share.
Recommended for Windows 9X / Windows ME machines
Using UNC Paths
If you are running on a domain, and your backup user is a domain user and domain administrator, then you should have no problems connecting to your workstation.On the other hand, if you are using a peer-to-peer workgroup, then you will need to authenticate to each workstation before each backup. To setup BackupAssist to do this:
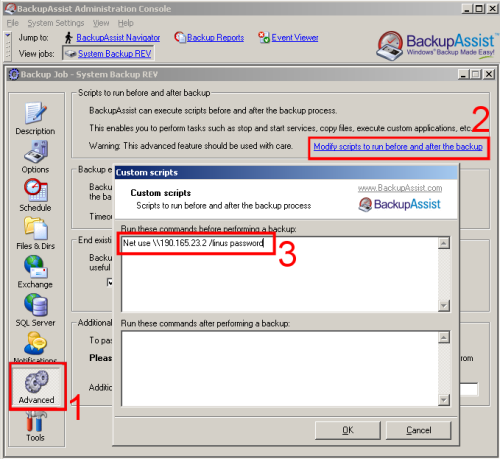
- Go into your backup job, and click Advanced.
- Click Modify scripts to run before and after the backup
- Type in the following: Net use \\computer /user:username password
Where:
server is your computer (workstation) name.
username is a user on your workstation.
password is the password for that user.
Hint: Using an IP address for your computer name will make the process more reliable because it removes the dependency on your DNS or WINS server for name resolution.
You can then choose the network shares you want to backup from the Files & Dirs tab in BackupAssist. Navigate to Network Places, and navigate down until you find your workstation share.
Using Mapped Network Drives
- In Windows Explorer, map your workstation share as a drive. In the example below, the SNAP server is mapped as Y:. Hint: Using an IP address for your SNAP server makes the process more reliable, and removes the dependencies on the DNS or WINS server for name resolution.
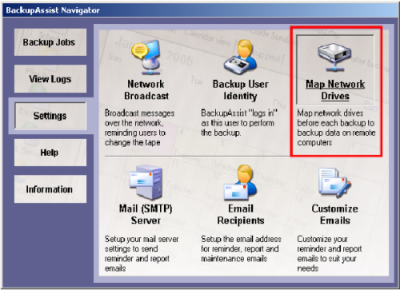
- In BackupAssist, go to the Navigator > Settings > Map Network Drives as shown. Now add your newly mapped drive to the list of mapped network drives. Be sure to use a valid username and password for your SNAP server.
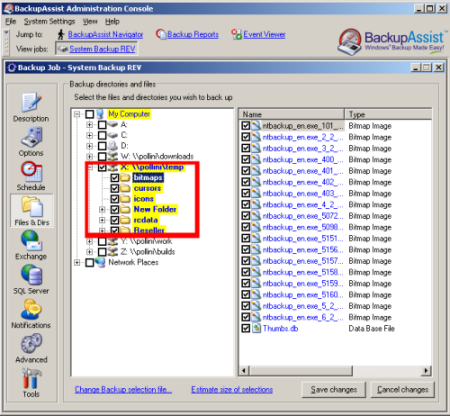
- Now go to the backup job in BackupAssist, and the Files & Dirs tab. Select the data you want to backup from your SNAP server. In the example, the entire X: share has been selected for backup by clicking on the checkbox (highlighted in red). Your backups will now include the data on your workstation.