 Belgium
 Canada
 Germany
 Italy
Italy France
 Spain
Spain United Kingdom
BackupAssist v7 Installation & migration
BackupAssist makes data protection simple by performing automatic, scheduled backups of Microsoft Windows Servers and Workstations. It provides solutions for different storage media, and can restore and recover everything from individual files to complete applications and servers, including Hyper-V, Exchange, SQL and SharePoint.
Not sure which licenses you need? See the BackupAssist Licensing Guidelines for help.
Online Guide
Downloading BackupAssist
BackupAssist v7 is available for download from our website. This is a fully functional 30 day trial version of BackupAssist (including all Add-ons). If you let your trial expire, you will not be able to run backup jobs, restore or recover your data or systems with BackupAssist. Don't delay - purchase BackupAssist today.
To download BackupAssist v7:
1. Go to our website's Downloads page
2. If you are a new customer, select Download from the New Installation tab.
If you are an existing customer, select Download from the Upgrade / Update tab.
3. If you selected Download from the New Installation tab, you will be taken to the trial registration page. Enter the details required and select Download BackupAssist.
If you are an existing customer and selected Download from the Upgrade / Update tab, you will skip this step.
4. When the BackupAssist v7 download begins, you will be prompted to confirm the default download location or select a new one. Select or confirm your download location, and a file named setupBA_7.x.x.exe will be downloaded.
BackupAssist v7 install file contents
The BackupAssist v7 install file contains the following components:
- Microsoft .NET Framework v4 full version
If the full version of Microsoft .NET Framework v4 is not already installed on the destination machine, it will be downloaded and installed as part of the BackupAssist installation process.
Beta versions of the .NET Framework v4 should be removed manually prior to installation.
The client version of .NET Framework v4 will be upgraded automatically to the full version.
Older versions of the .NET Framework will be retained.
- The CertIT VHD Bus Driver
To ensure a complete install, it is important that the installation of this driver is accepted.
Important: System Protection backups and restores, and the Hyper-V Granular Restore Console, MAY NOT work without this driver.
- The BackupAssist application
If BackupAssist v7 is installed on a machine with BackupAssist v6, then version 6 will be uninstalled and your v6 settings will be retained.
- If an older version of BackupAssist is detected, you will be asked if you wish to migrate the settings and backups from the older version to the new installation.
- Once BackupAssist and its components are installed, the installer will ask to restart your computer. After the restart, BackupAssist can be run and configured.
System Requirements
- Installation file size: 140MB
- Required RAM: 1024MB (total machine RAM)
- Display: The Windows Display setting should not be above 100%. Doing so will enlarge and oversize the BackupAssist fonts.
- Supported Operating Systems can be found here. Scroll down to the bottom for the current list.
Installing BackupAssist
Once you have downloaded the BackupAssist v7 installation file, you can install BackupAssist onto the computer that will be used to run your backups. You will need to install BackupAssist using an account with the required permissions to that computer.
A reboot will be required after BackupAssist has installed if you are installing onto a computer that does not have an earlier version of BackupAssist, or if any RealSCSI, system or framework files were installed.
1. Once you have downloaded the BackupAssist install file, the file will either run automatically, prompt you to run it or save to the selected destination-depending on your web browser and your web browser's settings.
Run or double-click the setupBA_7.x.x.exe file. You may be prompted to confirm that you wish to run this program, if your computer has security policies enabled.
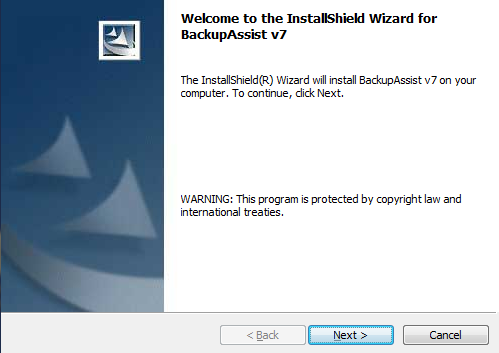
2. The installation wizard will start and begin preparing the BackupAssist files. Once the files are ready, you will be asked to confirm that you would like to install BackupAssist v7.
Click Next
3. The next screen will ask you to read the BackupAssist End User License Agreement. Once you have read the agreement, if you would like to proceed, select I accept the terms of the license agreement.
Click Next
4. The next screen will ask you to confirm or change the installation destination.
If you would like to install BackupAssist to a location different to the one shown, use the Change button and browse to the required location and then select OK.
Click Next
5. The next screen will ask if you would like to perform a Typical installation or a Custom installation. Typical is recommended. Select the type of installation you would like to perform.
Click Next
6. The next screen will give you a chance to go back and modify your selections.
Click Install
BackupAssist will now begin to install onto your computer.
7. During the installation, you will be warned that a VHD driver may be required.
Select OK and the installation will resume. The VHD driver is not installed at this point.
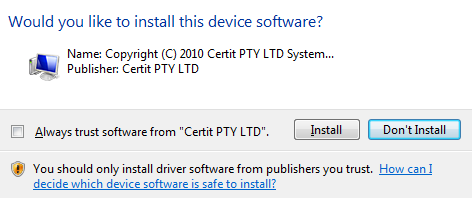
8. If the installation needs to add a RealSCSI VHD driver or any framework files, you will be asked to accept the installation of these files. To ensure a complete install, it is important that the installation of the VHD driver is accepted.
Important: System Protection backups and restores, and the Hyper-V Granular Restore Console, MAY NOT work without this driver.
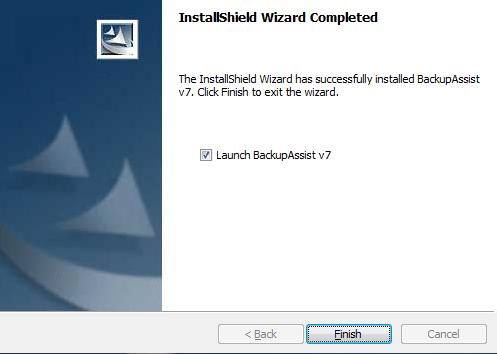
9. Once BackupAssist v7 has been installed, a completion screen will be displayed.
If you did not update any framework, VHD or system files, you will be given the option to Launch BackupAssist v7 after you click Finish.
Click Finish
- If you left Launch BackupAssist v7 ticked, BackupAssist will now start.
- If BackupAssist installed any VHD, system or framework files, BackupAssist will request confirmation to reboot your computer when you select Finish.
Congratulations, BackupAssist v7 is now installed.
Migrating BackupAssist
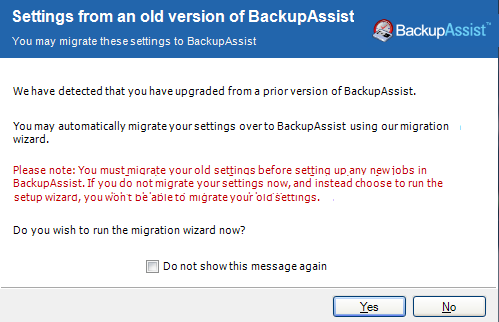
When you run BackupAssist v7 for the first time, it will check if you have upgraded from an earlier version of BackupAssist, and give you a chance to migrate your settings and backup jobs.
To migrate from earlier version of BackupAssist:
- Start BackupAssist using the desktop shortcut or by selecting Start > All Programs > BackupAssist v7 > Launch BackupAssist Console.
- If you are upgrading and wish to migrate your BackupAssist settings and jobs, select Yes.
- Select Begin migration, and the migration process will start.
- Once the migration has completed, select Finish.
If settings and backup jobs from an earlier version of BackupAssist are detected, the "Settings from an old version of BackupAssist" message will be displayed.
If you select Yes, you will be presented with the BackupAssist migration screen.
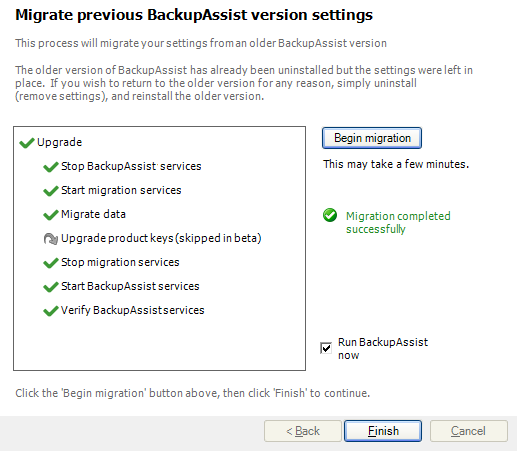
Please note that if you’ve run BackupAssist for a considerable time, the migration process may take some time (30 – 45 minutes).
BackupAssist will now start using the settings and backup jobs that you migrated.

