 Belgium
 Canada
 Germany
 Italy
Italy France
 Spain
Spain United Kingdom
How to perform Exchange Server
mailbox backups from a Hyper-V Host.
This page describes how to protect Exchange Mailboxes using the Exchange Mailbox Protection Add-on, which is an older BackupAssist solution. The Exchange Granular Restore Add-on is the recommended tool for protecting mail items in Exchange 2013, 2010 and 2007. It uses standard backups and cannot be used with backups created by Exchange Mailbox Protection (Exchange Mailbox Protection Add-on).
BackupAssist can be configured to perform mailbox backups1 of an Exchange Server from an instance of BackupAssist running on a Hyper-V Host machine. If the Hyper-V Host is not a member of the domain that the Exchange Server is a part of, a few additional steps are required to run mailbox backups successfully. This article outlines the required steps.
1 A BackupAssist license and an Exchange Mailbox Add-on license are required to run mailbox backups.
Step 1: Create a domain user with the appropriate backup rights.
You need to create a Windows domain user that has sufficient permissions to back up mailboxes from the Exchange Server. Instructions on how to create such a user account are available here: http://www.backupassist.com/education/articles/setting-up-a-user-for-exchange-mailbox-backups.html
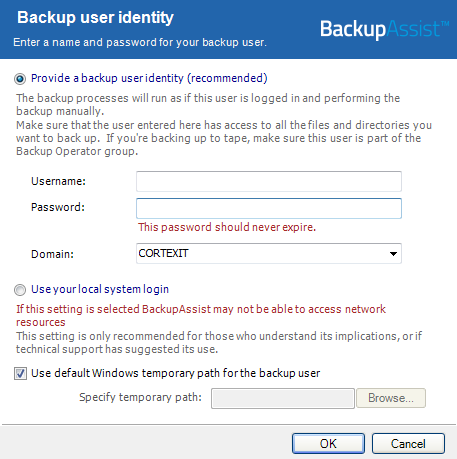
Step 2: Configure a Backup User Identity on the Hyper-V Host
Once you have created a domain user with the appropriate permissions, you need to create a user on the Hyper-V Host as well. This user should have the following properties:
- The same username and password as the user created for the domain in Step 1.
- Be a member of both the Administrators and the Backup Operators groups.
Once you have created this user on the Hyper-V Host you need to enter it as the Backup User Identity by navigating to Settings > Backup User Identity in the BackupAssist console.
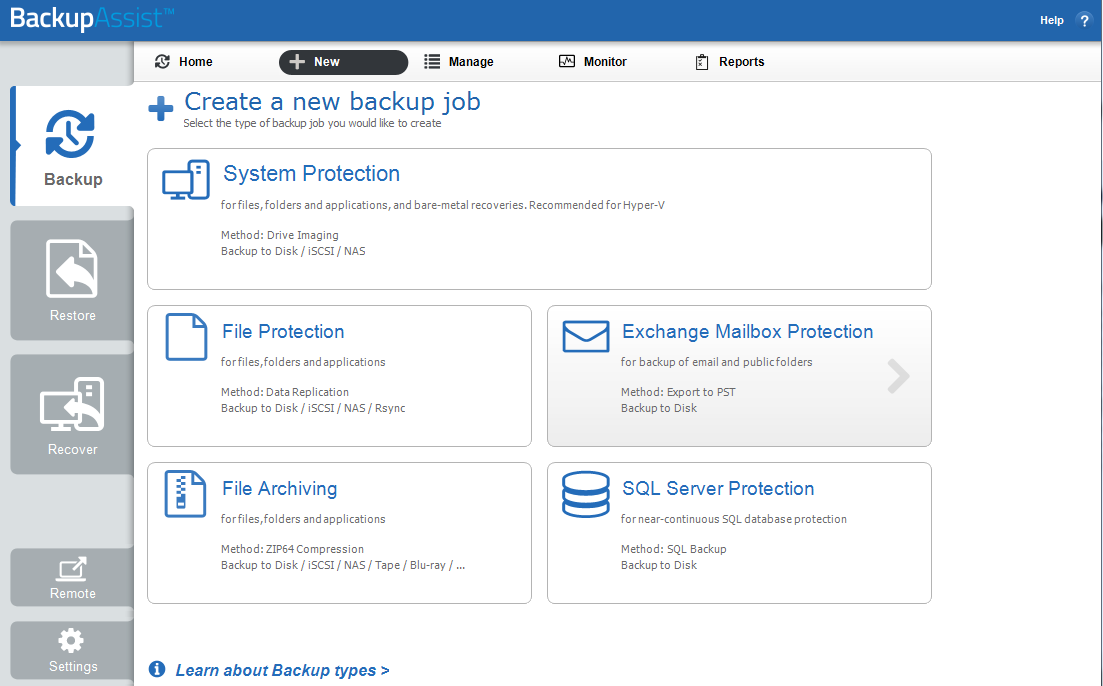
Step 3: Create a mailbox backup job in BackupAssist
- Launch the BackupAssist console and select 'New job'
- Select 'Exchange Mailbox Protection' as your protection type.
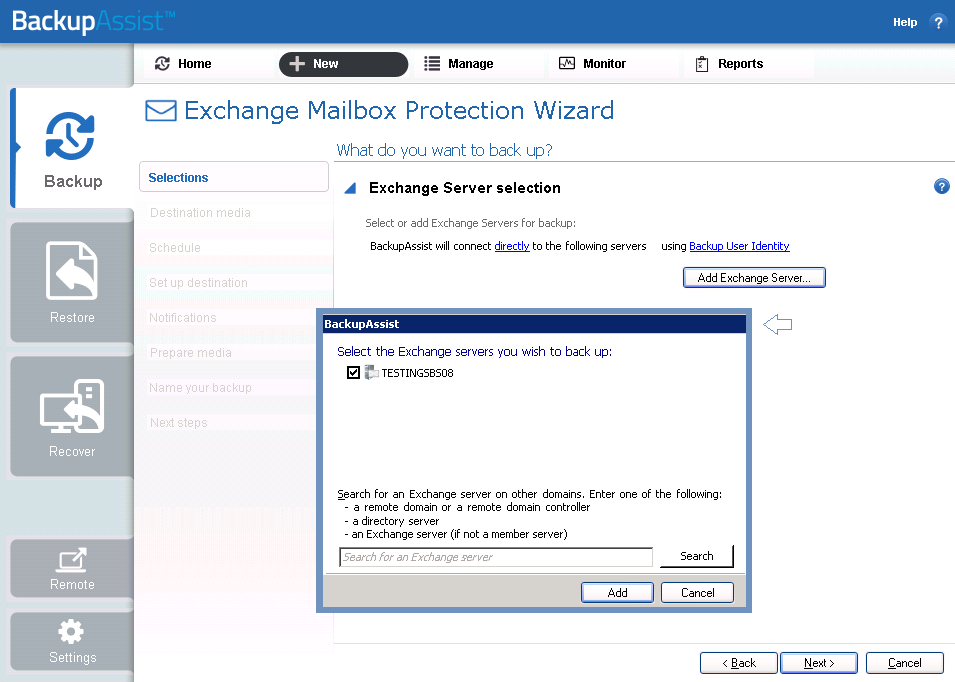
- On the 'Selections' page click on 'Add Exchange server', click Next
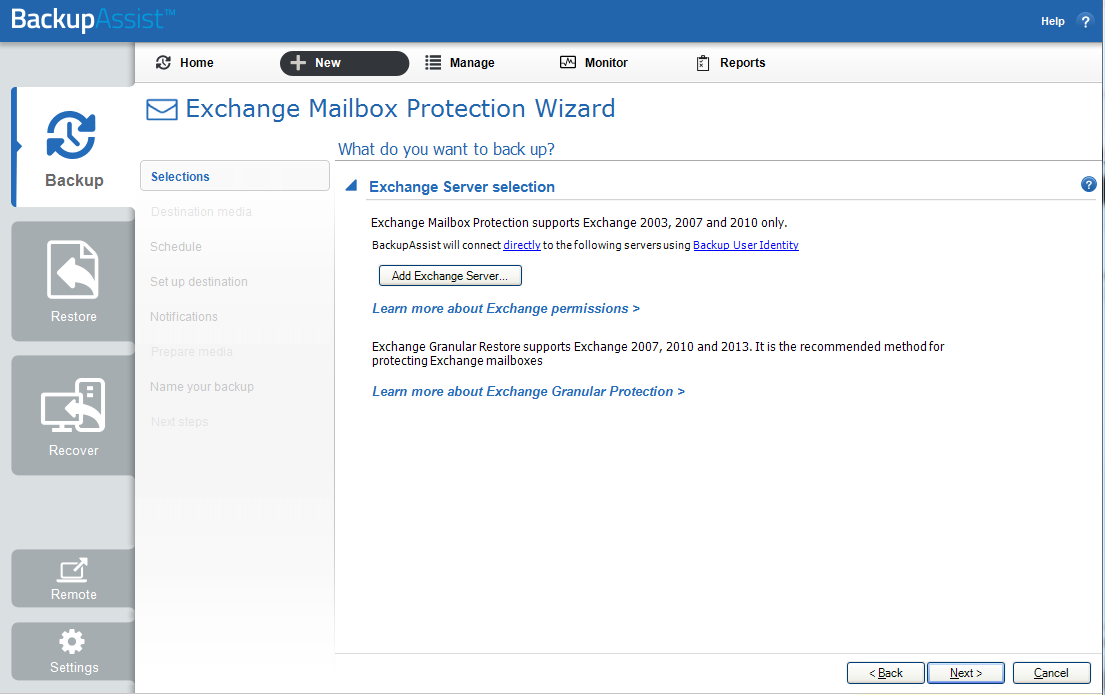
- A message may appear to indicate that no Exchange Servers were detected in the current domain.
This is normal if the Hyper-V Host is part of a workgroup and not a member of the domain on which the Exchange Server is located. To search for your Exchange Server, enter the IP address of the Exchange Server in the field at the bottom of the window and click Search.
Provided that the backup user identity you have entered in BackupAssist exists on both the Hyper-V Host and the Exchange Server itself, and has the same credentials, the Exchange Server should be detected. -
Once the appropriate Exchange server has been detected, select it from the list and click Add.
- Enable the Backup individual mailboxes checkbox and the Backup Public folders checkbox if you also want to back up your Exchange Server's public folders.
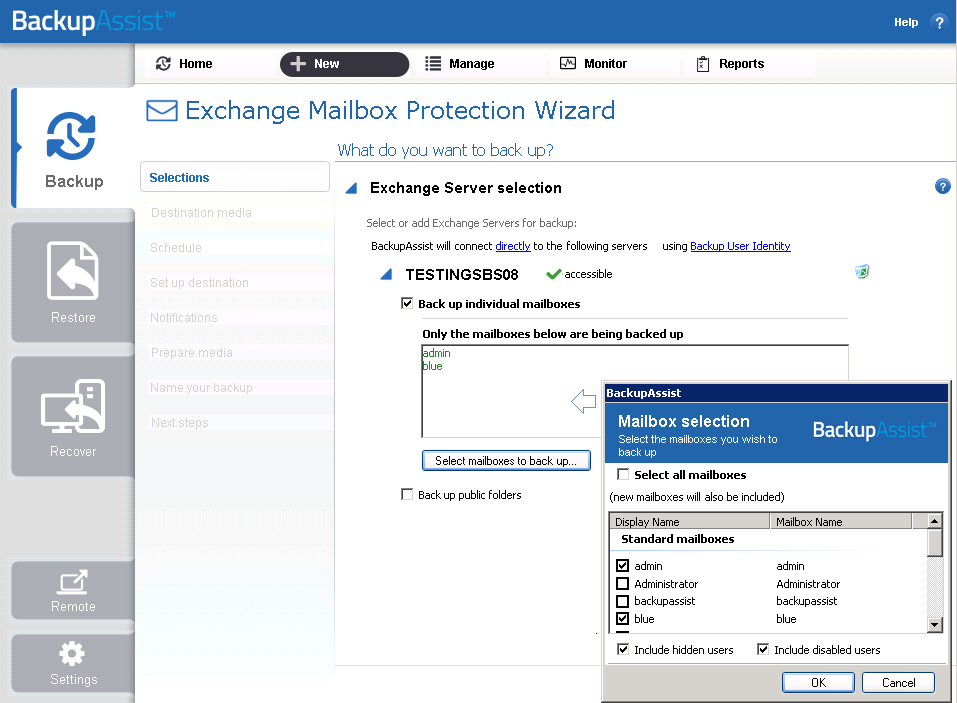
- By default all mailboxes will be selected for backup. If you want to prevent any mailbox from being backed up click the Select mailboxes to backup button and deselect the relevant mailboxes.
- Click Next, name your job and then select your backup scheme.
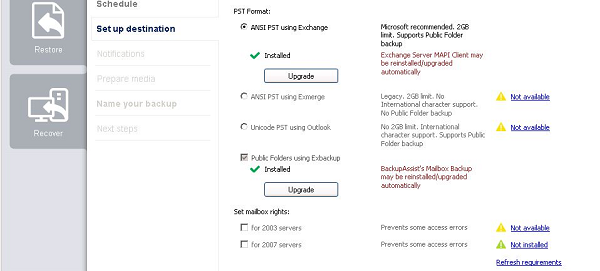
- Choose where you want your Exchange mailbox backups to be stored (in .PST format) and what grouping method you wish to use.

- Select ANSI PST using Exchange as your PST format and click next.
If you have a 32 bit version of Microsoft Outlook installed (2003 or greater) on the Hyper-V Host, you will need to choose the Unicode PST using Outlook option. If, however, a 64 bit version of Outlook is installed, you must uninstall Outlook and use either the ANSI PST using Exchange option or install a 32 bit version of Outlook.
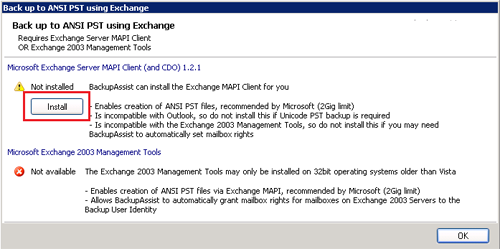
If a program that is required to perform the mailbox backups is not installed, click the Install now button to add the required component (e.g. the Exchange MAPI client):
- Finalise the job name and description and click on Finish.
For more details on grouping methods please refer to page 5 of our Exchange Mailbox Whitepaper.
After the job wizard has completed, you can modify the backup schedule or any job setting by selecting the job from the Edit menu in BackupAssist. You may now like to run a test backup of your mailboxes by selecting Run now from the Quick actions menu.
We hope this article has helped you with setting up Exchange mailbox backups from a BackupAssist installation running on a Hyper-V Host machine. If you have any questions about this article, please email us at support@backupassist.com and we'd be more than happy to help you.
Kind regards,
The BackupAssist Team

