
How to Set up your Tape Drive for use with BackupAssist
Introduction
BackupAssist will use any standalone tape device that is supported by the Windows operating system. This article explains how to ensure that BackupAssist will run with your hardware.
Other tape drive solutions
If other backup software products are installed, they may prevent BackupAssist from working. Many products including Veritas BackupExec, CA Arcserve and Yosemite Tapeware will actually uninstall the standard Windows drivers for your drive, and install their own. This prevents other software from working. Please uninstall these products before using BackupAssist.
Installing the Windows Drivers for your tape drive
Most drives will be automatically detected by Windows and installed. However, you should also ensure that the latest versions of the drivers are installed – most drives come with a CD of Windows Drivers. Please install these drivers from this CD. Alternatively, you can download the latest versions of the drivers from the manufacturer’s websites.
Verify Your Setup
To verify your setup, check that your drive is listed in the Device Manager by following these instructions.
Please note: The screenshots were created on Windows XP, and vary slightly across operating systems.
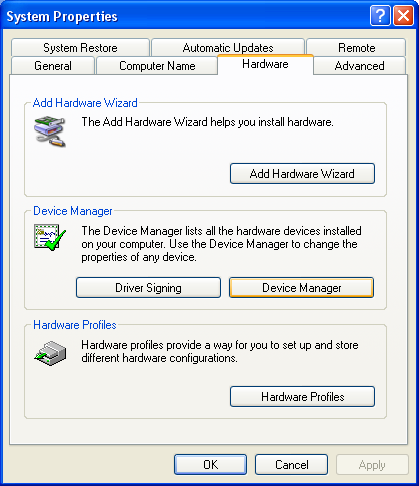
- Go into Control Panel > System
- Click the Device Manage button on the Hardware tab, as shown
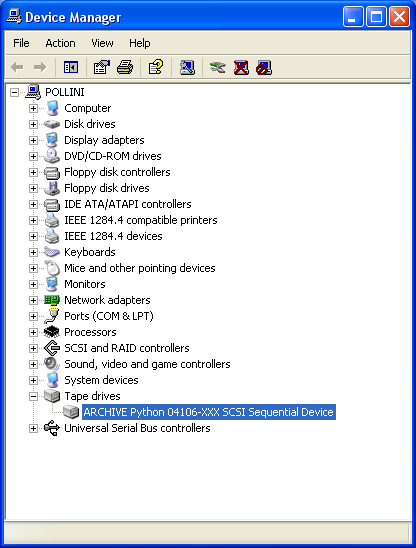
- Expand the tree to show your drive.
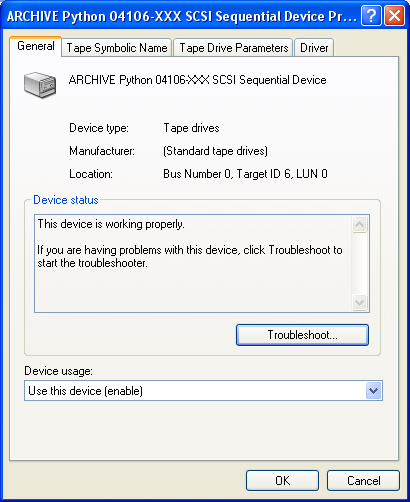
- Right click on the drive and select Properties. You will see a window that should state that your tape drive is working properly.
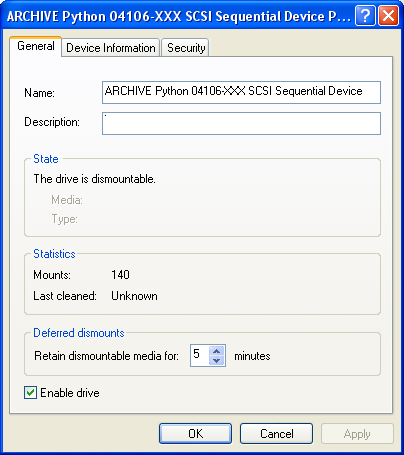
Ensure Your Tape Drive Is Enabled
The next step is to enable your drive. Some software packages will disable your tape drive, so following these steps will enable it again.
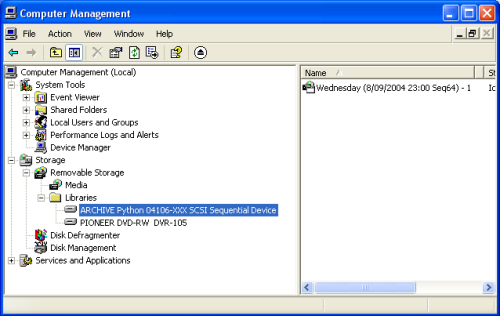
- Go into Control Panel > Administrative Tools > Computer Management
- Expand the tree called Storage > Removable Storage > Libraries. Your tape drive will now be visible, as shown in the screenshot below.
- Right click on the drive, and select Properties. Ensure the Enable drive checkbox is checked, as shown in the screenshot below.
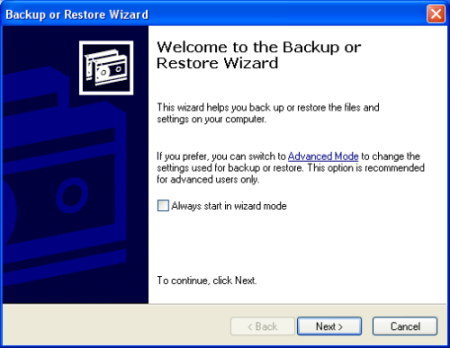
Run Windows Backup
The final step is to run the Windows Backup program and ensure that your tape drive is detected.
- Do this by going to the Start Menu > Accessories > System Tools > Backup
- If the Backup or Restore Wizard appears, click on Advanced Mode as shown below.
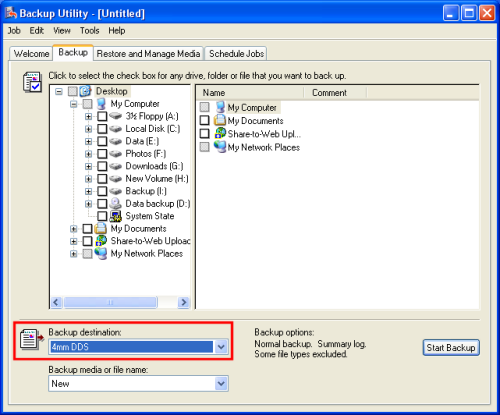
- Click the Backup tab as shown below, and under Backup destination, your tape drive format should appear. In the example, a DDS 3 tape drive has been installed, so the Backup destination is 4mm DDS.
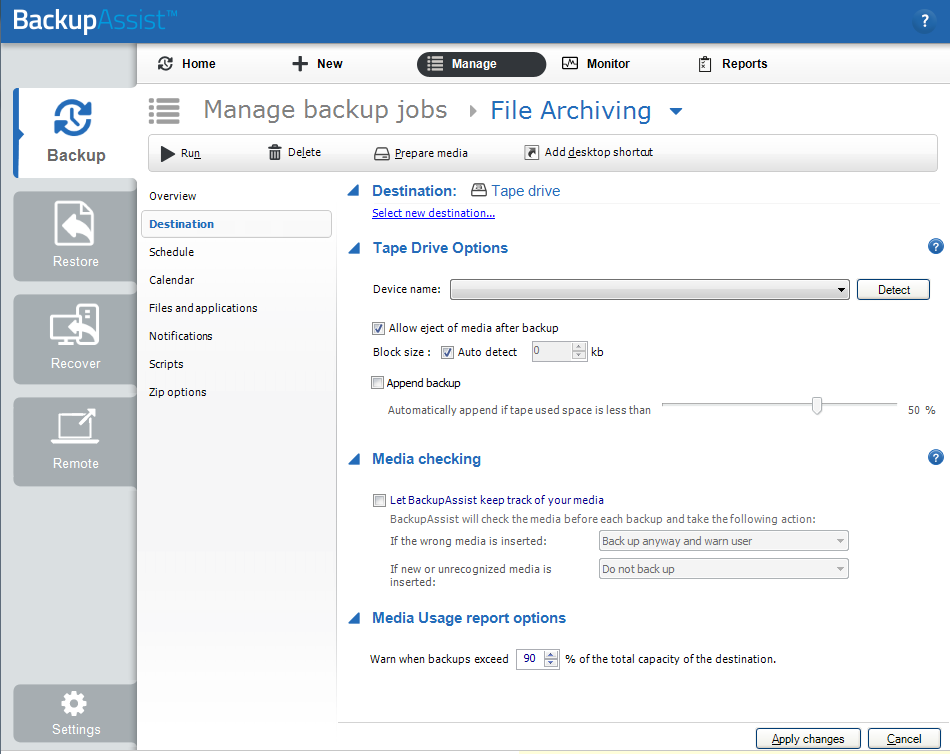
Setting up BackupAssist
Now that you have confirmed that your drive is working, BackupAssist should automatically detect your hardware.
Under the Destination option when Editing a job, the device should be automatically detected. Select the Detect button if the device has not appeared.
Visit BackupAssist to learn about our Tape Archiving add-on.


