 Belgium
 Canada
 Germany
 Italy
Italy France
 Spain
Spain United Kingdom
 BackupAssist Settings
BackupAssist's main menu contains useful tools, and settings that apply to the application as a whole.
The Settings tab contains additional configurations that can be applied to each backup job. This whitepaper explains these options and how to use them.
Online Guide
The BackupAssist menu
The BackupAssist menu is available from all screens and can be used to perform specific tasks, provide user assistance and enter configurations that applyto your backup jobs.
File
Import settings
This option will prompt you to browse to the location of a saved settings file (created using Export settings). Once the file has been located, and OK selected, your current installation of BackupAssist will import the settings. This import will include your backup jobs but not the reports and history of your back ups and restores.
Export settings
This option will prompt you to export the settings of your BackupAssist installation. It will save the settings as a file that will contain your current backup jobs and configurations.
Jobs
This menu provides quick access to your backup jobs. Selecting a backup job from this menu will take you to the Edit view of the Manage screen, and add a menu item next to Settings, called Job settings. The Job Settings menu can also be used to access the configurations of the backup job you selected.
View
This menu provides a shortcut to all of the BackupAssist functions and tabs in one click. It also provides access to the BackupAssist Events log. The Events log is a list of all messages that have been sent to your Window's event log by BackupAssist.
Settings
This menu provides access to the options available in the Settings tab. Refer to the Settings tab section of this whitepaper for an explanation of the options and configurations available.
Help
This menu provides access to the following BackupAssist help services:
Welcome
Selecting Welcome will take you to the BackupAssist Welcome Screen. The Welcome Screen will give you an introduction to BackupAssist's features and explain how they work.
Help
The Help menu will take you to the help files contained within BackupAssist. The HTML help files contain extensive information about the tools and features available.
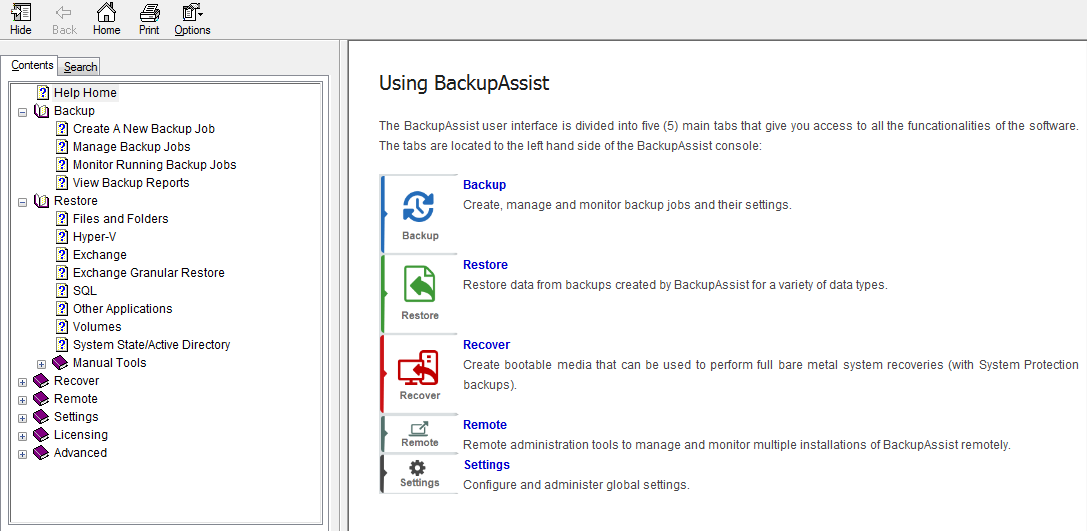
HTML help can also be opened using the blue help icon on the top left of BackupAssist. If a help icon appears within a screen, it will take you to the help section that refers specifically to that screen.
Feedback and Support
Selecting this option will open a window with two options:
- Help file - This link will take you to the HTML help files (shown above) in BackupAssist.
- Contact support - This opens an email submission for BackupAssist Support. The email has an option to attach a diagnostic file containing system information, BackupAssist's settings and error message details. If support is required, we request that you use this tool to submit your support request so that our technical team can better assist you.
Troubleshooting tools
- Cleanup Service - This is a technical support tool to be used on consultation with BackupAssist Technical Support. The tool will be used if there are problems with backup jobs starting.
Licensing
This menu item lists the BackupAssist products you have and how many days are left for each license. It provides links to purchase licenses online and activate a product by entering a BackupAssist key.
About
This menu item will display the version of BackupAssist that is currently installed. There is also a link to email BackupAssist Support. If you are using a trail version of BackupAssist, you will be shown how many days you have left with a link to purchase a license.
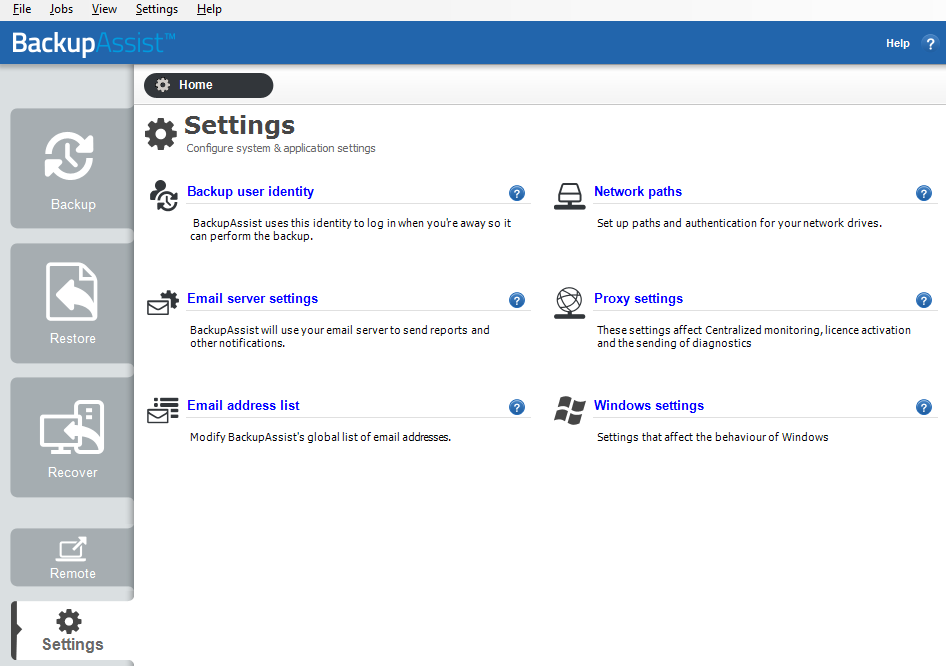
The BackupAssist Settings tab
The Setting tab is used to configure settings that are used by your backup jobs. These configurations can be used by any backup job that you create.
The Backup user identity and Email server should be configured before you create a backup job.
Backup user identity
Backup jobs require an administrator account with read access to the data source, and full read-write access to the backup's destination. It is recommended that a dedicated backup account is created for this purpose. The account's details are entered here and your backup jobs will be launched using these credentials.
The account's permissions will be validated both when the backup user identity is entered and each time the job is executed. If no account is specified or the account has insufficient permissions, the backup job will fail and note the error in the backup report.
- Username , Password and Domain fields are used to enter the credentials of the account that you want BackupAssist to use.
- Use your local system login should only be selected if requested by the BackupAssist technical support team, or if you are having difficulties using a backup user identity. A local user account may not have the required access, and if a user/local account is disabled or locked your backup job will fail.
To configure a Backup User Identity in BackupAssist:
- Select the Settings Tab and select Backup user identity.
- Select Provide a backup user identity (recommended). The local system account should only be selected if requested by the BackupAssist technical support team.
- Enter the username and password for the account to be used as the Backup User Identity.
- Either type the domain name for the user directly or select it from the domain drop-down menu. If the account is not a member of a domain, you can simply select the computer name of the machine or leave the domain field blank.
- Click OK
A video explaining the creation of a backup user identity can be found on our, Videos Webpage.
Email server settings
BackupAssist can email backup reports after a backup job has been run. To send these emails, BackupAssist must be provided with the details of an SMTP mail server. These details are entered here.
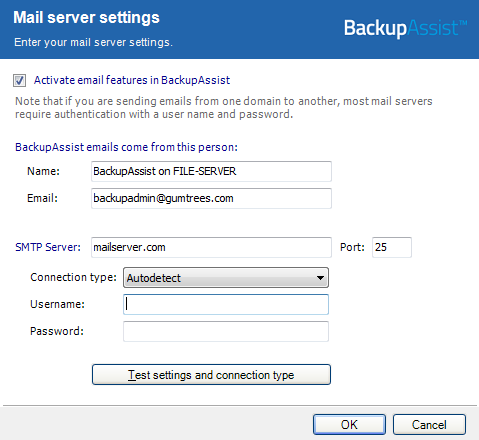
To configure mail server settings in BackupAssist:
- Select the Settings Tab.
- Select Mail Server Settings.
- Check Activate email features in BackupAssist.
- Enter a name in the Name field and email address in the Email field to denote who the emails that BackupAssist sends come from.
- Enter the name of your mail server in the SMTP Server field (eg. mail.domain.com). It can be a good idea to use the server's IP address, because it removes the dependency on DNS. If your DNS server is down, your mail will still be sent if you use the IP address of the mail server.
- Enter the mail server port number in the Port field. Most servers run on port 25, but some ISPs will block this port and run their mail server on a different one.
- Choose a method for connection to your mail server in the Connection type drop-down menu.
- Enter a valid username and password that has permission to send email using the specified SMTP server. These are the credentials used by the BackupAssist email account.
- Click OK
These details provide the sender information for the emails sent by BackupAssist. When you receive BackupAssist emails, they look as if they were sent by this person within your email client. The email address does not need to be valid, but depending on your mail server, you may need to specify one that is of the same domain (eg. @backupassist.com) as the mail server.
BackupAssist provides a number of methods for communicating with your mail server. If you are unsure which method applies to your mail server click Test settings and connection type and BackupAssist will determine the most appropriate. AutoDetect will attempt all possible connection types.
Email address list
This option is used to define and store the email addresses of potential notification recipients. The list will be used to populate the recipient selection screen when configuring an email notification for a backup job. Any email addresses entered during the creation of a new notification (while creating a backup job) are automatically added to this list.
To configure an Email address list in BackupAssist:
- Select the Settings Tab.
- Select Email address list.
- To add a new email address, input the email address directly in the Add new address field.
- Email addresses should be entered in the form Name (emailalias@domain.com) For example below: Support (support@backupassist.com)
- You can, however, simply enter the email address (john@backupassist.com) if you are not concerned about who the email is addressed to.
- Select the type of emails that can be accepted by this address in the Send as drop-down menu
- HTML: emails sent will include HTML formatting for display. Email reports in BackupAssist are much more readable when HTML formatting is used.
- Plain: emails are sent in plain-text. Some email browsers do not support HTML so it is recommended that you use Plain for such email addresses.
- Click Add once you have input the appropriate email address and type.
- The new email address will now be displayed in the global list and be available for any notifications created in the future.
To edit an email address, select the email address in the list and click Edit. You can edit the name, email address and type. Changes made to the email address will be applied to all notifications using that email address.
To remove an email address, select the email address in the list and click Remove. The email address will be removed from the list and no longer available to any notifications created. The email address will also be removed from any notifications that use the address as one of its recipients.
Network paths
This option allows you to provide access credentials to networks, domains and drives that the default account (Backup user identity) does not have access to. Enter or browse to the location and add it to the Path list. The Edit option will allow you to enter an authentication account that is different to the default account. When you create a backup job to a remote location, that location will be added here.
Having multiple connections to a resource using the same logon credentials can generate a Windows error, such as a BA260 error. It is therefore recommended that you avoid having mapped shares on the computer running BackupAssist, that are the same as the paths configured within BackupAssist.
To configure a network path in BackupAssist:
- Select the Settings Tab.
- Select Network Paths.
- Add new UNC path: Input the network path directly or Browse for it. If browsing, you will be taken directly to My Network Places. Network paths must be entered in their UNC form \\Servername\Sharename (eg. \\SBS-SERVER\accountdata)
- Click Add once you have input the appropriate network path.
- BackupAssist will attempt to connect to the network path using the username and password of the backup user identity. If the backup user identity cannot access the network path, you will be asked to supply a different username and password that has access.
- The new network path will be displayed in the global list and be available for selection in any job.
- Click OK.
To edit a network path: Select the path in the list and click Edit. You can now edit either the network path itself, or the username and password used to access it. Changes made to a network path will be applied to all jobs using that selection.
To remove a network path: Select the path in the list and click Remove. The network path will be removed from the list and no longer available to any jobs for data selection. Jobs that use the network path as part of their file selection will no longer backup this data.
Proxy settings
This option is used to configure proxy settings so that BackupAssist can access the internet for tasks such as posting Centralized Monitoring reports, license activation and sending diagnostic emails.
The proxy settings defined in your web browser (or your machine's group policy) are the default proxy settings. A specific proxy server can be entered here for BackupAssist to use.
To configure a Proxy setting in BackupAssist:
- Select the Settings Tab.
- Select Proxy settings.
- Select where you would like BackupAssist to take its Proxy setting from.
- Click OK
Default settings (recommended for most users): BackupAssist will use Internet Explorer proxy server settings defined either within the domain's Group Policy or the logged-in user's Internet Explorer configuration. If no proxy settings have been configured for Internet Explorer then a proxy server will not be used.
The Default settings applied to BackupAssist web requests will be taken from the following sources:
The Internet Explorer configuration of a Windows user: Defined by the logged-in user under Internet Explorer's "Internet Options > Connections > LAN Settings"
A Group Policy setup on the domain: These settings are defined within the Group Policy Management tools > Group Policy Object Editor, under "User Configuration > Windows Settings > Internet Explorer Maintenance > Connection > Proxy Settings". Proxy settings defined within a Group Policy can be configured to override the logged-in user's Internet Explorer configuration.
No proxy: No proxy server will be used to connect to the internet to perform web requests. Use this setting if you are sure that a proxy server is not required to perform web requests, or if you suspect that the domain's Group Policy contains proxy settings that BackupAssist should not be using.
Specific proxy: Manually specify the address and port number of your proxy server, as well as the credentials required to authenticate to it. If your proxy server requires a more advanced configuration we recommend that you choose the Default settings option and configure your proxy server within Internet Explorer or within the domain's Group Policy.
Windows settings
The Windows settings screen allows you to manage a selection of BackupAssist settings specific to Windows. Changes made here apply to all BackupAssist jobs that use the Windows setting.
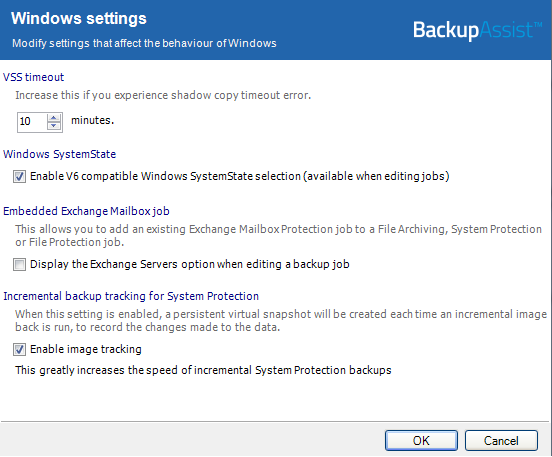
VSS timeout
This option sets the maximum amount of time allowed for Windows to take a VSS snapshot, when a backup job begins. If the snapshot is not created within the time specified, then the backup will not take place. On slower machines, increasing this setting can improve the success rate of backups.
Windows SystemState
In previous versions of BackupAssist, Windows SystemState was called System State and it was available during the creation of a backup job. The Windows SystemState option is now selected by editing a backup job after it has been created.
To learn more see the SystemState section below.
Embedded Exchange Mailbox job
BackupAssist allows you to edit existing backup jobs using the Backup tab’s Manage screen. When you enable this option, an additional configuration will be added to the Manage screen called Exchange Servers. This option allows you to add an Exchange Mailbox Protection backup to an existing backup job. This feature applies to the older product, Exchange Mailbox Protection. Exchange Granular Restore is our recommended mailbox protection technology.
Incremental backup tracking for System Protection
System Protection creates a full backup the first time it runs. Subsequent backups are incremental. To create an incremental backup, BackupAssist scans and compares the data to be backed up and the data in the destination image to see what data changed.
The process can take a long time, but when Enable image tracking is selected, System Protection backups record the changes to the data using a virtual snapshot. This means the backup job only needs to look at the snapshot to see what data changed. The result is significantly faster backups, therefore Enable image tracking is enabled by default.
To learn more, visit our article on making faster incremental image backups.Windows SystemState
In previous versions of BackupAssist, Windows SystemState was called System State and it was available during the creation of a backup job. The Windows SystemState option is now selected by editing a backup job after it has been created.
A Windows SystemState backup contains some of the important files, registry values and settings that are used by the Windows operating system. It does NOT back up the operating system itself. This means a Windows SystemState backup can be used to restore the settings your computer had at an earlier point in time, but it will not allow you to recover your computer. A Windows SystemState backup can be helpful if your computer is encountering errors and you want to restore your settings to an earlier point in time, before the errors occurred.
If you select, Enable v6 compatible Windows SystemState selection, Windows SystemState will appear as a selectable option when you modify an existing backup job. To modify a backup job:
1. Select the BackupAssist Backup tab, and then select the Manage menu.
2. Select the backup job that you want to modify, and then select Edit from the menu.
3. Select Files and applications from the left pane. SystemState will appear the top of the data pane.
This table shows what backup jobs can include Windows SystemState and how this setting is applied.
|
File Archiving, File Protection and System Protection backup jobs |
File Archiving zip-to–tape backup jobs |
File Protection Rsync backup jobs |
During the creation of a new backup job |
NO |
NO |
NO |
By editing an existing backup job |
YES, if enabled |
YES |
NO |
Backup jobs created in earlier versions of BackupAssist (that included System State) will have the setting enabled by default in BackupAssist v8.
Zip-to-tape backup jobs will not need to enable this setting, to select Windows SystemState.
Because Windows SystemState requires a functioning computer, and can only restore Windows settings, we recommended that a System Protection, bare-metal backup is used for all recovery scenarios.

