We have previously posted two articles on P2V explaining how it can help, and how to use BackupAssist for P2V. This final article looks at the specific steps you can take to perform a P2V recovery with BackupAssist and Hyper-V.
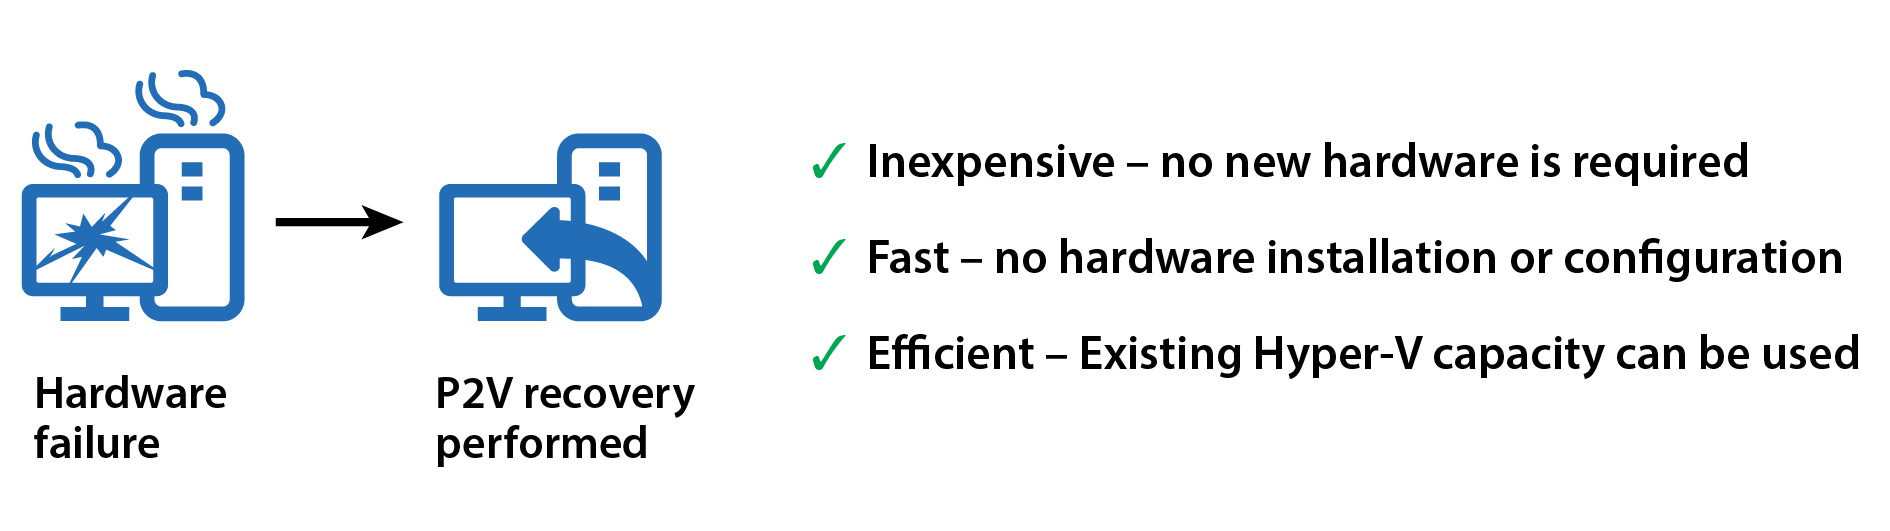
For a P2V recovery, instead of recovering to new hardware, you recover the physical server to a virtual machine. This means you do not need to source and install new hardware. You just create a VM on your host server and recover the physical server’s operating system, applications and data onto the virtual machine.
BackupAssist P2V recovery steps
Let’s look at the steps required to perform a P2V recovery using BackupAssist and Microsoft Hyper-V.
Recovery Requirements
- A Microsoft Hyper-V Server
- A BackupAssist System Protection bare-metal backup. If this backup is on a USB drive, you will need to share the USB drive when it is attached to the Hyper-V Server.
- A bootable RecoverAssist media. The bootable media cannot be on a USB device. This is due to USB pass through limitations with Hyper-V.
The following steps explain how to use a System Protection bare-metal backup, and a RecoverAssist bootable media, to recover a physical server on a Windows Hyper-V guest.
Create a Hyper-V guest
1. Open the Hyper-V Manager console on your Hyper-V Server.
2. Select New Virtual Machine, from the action menu.
3. Allocate memory to the VM, and click next.
4. Configure the network adapter for the VM, and click next.
Note: The memory and network settings will vary from system to system.
5. Create a new virtual hard drive and click next.
Note: Make sure the size of the virtual drive is equal to or greater than the size of the hard disk that the backup was made of.
6. Select, Install an operating system from a boot CD/DVD-ROM.
7. Click Next and Finish.
If you receive the following error, “An internal error occurred” or “the network path was not found’, the following solution may help. http://www.backupassist.com/blog/support/how-to-restore-a-server-2008-image-backup-to-a-new-hyper-v-vm-from-nas
Perform a recovery on the new Hyper-V guest
8. Using the Hyper-V Manager, right click the virtual machine and select Connect…
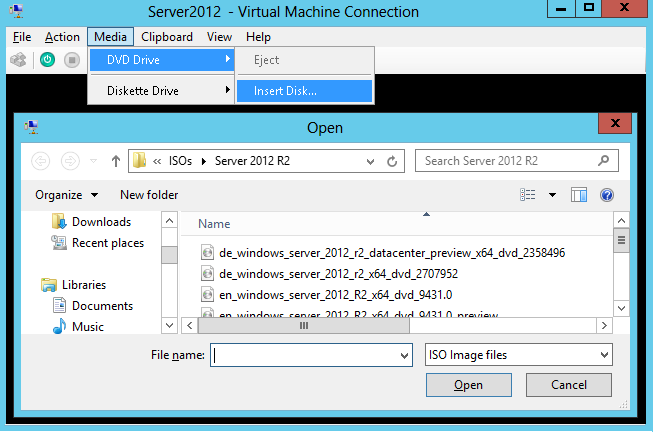
9. Insert the bootable RecoverAssist media and configure the guest to use it.
For a bootable ISO media:
a) Use the Media menu to select Insert Disk…
b) Browse to the ISO file and select it.
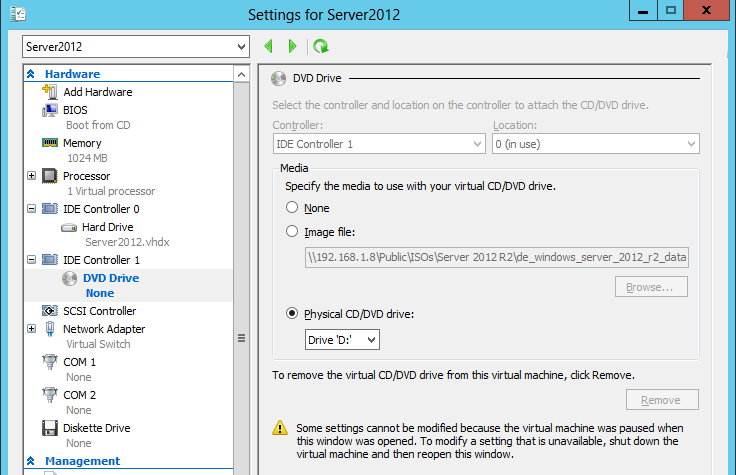
For a bootable optical media
a) Use the Hyper-V Manager’s Hardware menu to select the optical drive.
b) Configure the guest’s Settings to capture the host’s optical disk drive.
10. Select the Start icon at the top of the guest (VM) menu. This will boot the Hyper-V guest.
11. During the guest’s start-up, select the space bar to boot from the attached media.
12. RecoverAssist will boot the VM and load the RecoverAssist menu.
Note: The first three options in the RecoverAssist menu are used to select the location of the backup.
13. Select the backup location type, and provide the backup location information when prompted.
14. Once the backup has been located, select Finish.
15. Confirm the backup you wish to recover from, confirm the full recovery and select Finish.
The VM will then reboot with the full functionality of the physical server.
For more information in the RecoverAssist process, see our RecoverAssist user guidesuser guide.
Have you had to perform a P2V recovery?
Tell your story in the comments, tweet @BackupAssist or post to Facebook.
Share this article and improve global IT skills.