Introduction
Just in case you’re not familiar with why you should back up your SharePoint documents, here’s a brief explanation.
Microsoft are responsible for the availability and uptime of their service, while you’re responsible for the data on it. It’s like how a mechanic is responsible for keeping your car well serviced and free from breakdowns, but it’s you that will wear the consequences if you crash the car, or your careless employees leave it unlocked and a thief steals it.
Microsoft will help you keep past versions of files with their versioning feature, and there is a recycle bin for deleted files. But anything outside the 93 day recycle bin retention period is lost forever… and Microsoft’s service doesn’t make it easy to do a point-in-time restore or protect against events like your tenant being deleted.
The good news is that there are free tools that enable you to keep backups. Using these tools correctly will mean you’ll minimize the chance of losing data in the event of a cyber-attack or user accident.
We’ll examine two free tools and give you a step-by-step guide on getting your SharePoint documents safely backed up. And we’ll also contrast the free options with a paid (but inexpensive) option.
TL; DR Comparison of three SharePoint Backup Options
| OneDrive client app (free) |
BackupAssist 365 free option |
BackupAssist 365 paid option |
|
|---|---|---|---|
| Vendor | Microsoft | Cortex Cyber | Cortex Cyber |
| Method | Sync SharePoint documents to a local file system | Download SharePoint documents to a local file system on schedule | Download SharePoint documents to a local file system on schedule |
| Store backups on local hard drive | Yes | Yes | Yes |
| Store backups on network share | No | Yes | Yes |
| Reporting | None | Daily reports | Daily reports |
| Keep historical snapshots | No | No | Yes |
| Encryption in transit | Yes | Yes | Yes |
| Encryption at rest | No | No | Yes |
| Security issues | Severe issues – local corruptions get synced to the cloud | One-way sync cannot corrupt cloud copy | One-way sync cannot corrupt cloud copy |
| Runs unattended | Requires user to be logged in | Yes | Yes |
Method 1: Use the OneDrive client app to sync Office 365 and SharePoint Online
First things first: the OneDrive app provided by Microsoft is not a backup tool, but it can be used in conjunction with other backup tools to provide robust and comprehensive protection for documents in SharePoint.
The idea is to:
- use the OneDrive app to download and sync your cloud-based Document Libraries to a local hard drive, and then
- use your favorite backup software to back up your local hard drive. We recommend doing backups to offline or offsite storage.
Important note: if you skip Step 2, you’re not actually keeping reliable backups. Although you have a 2nd copy of your data offsite, a simple sync doesn’t provide historical snapshots of your data and remember that deletions and corruptions due to ransomware on your local machine will be synced up to the cloud.
But most businesses will already have an on-premises backup solution, so using the OneDrive app is a free way to get your data down from the cloud so it can be incorporated into your on-premises backups.
(If you don’t already have an on-premises backup solution, then we recommend you skip directly to Method #3, below, for a backup solution that gives you historical snapshots of your SharePoint document libraries.)
How to set up the OneDrive client
- If it’s not already installed, download it from here.
- Go to the web browser and log into Office 365 / Sharepoint and navigate to your site.
- Click on the document library you want to sync. (The default one is just called “Documents”). Then click “Sync” as shown.

- Open the OneDrive app
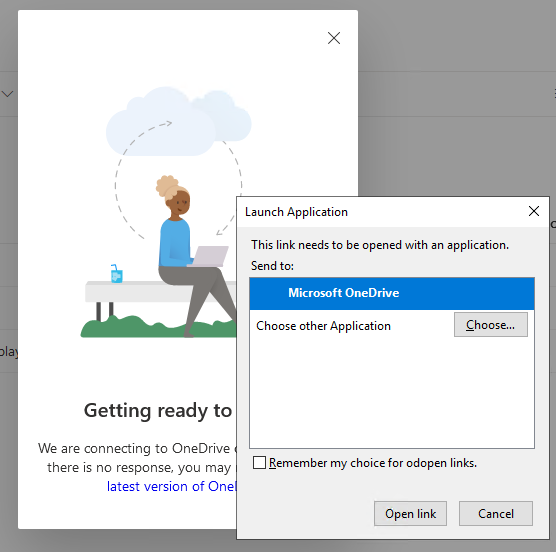
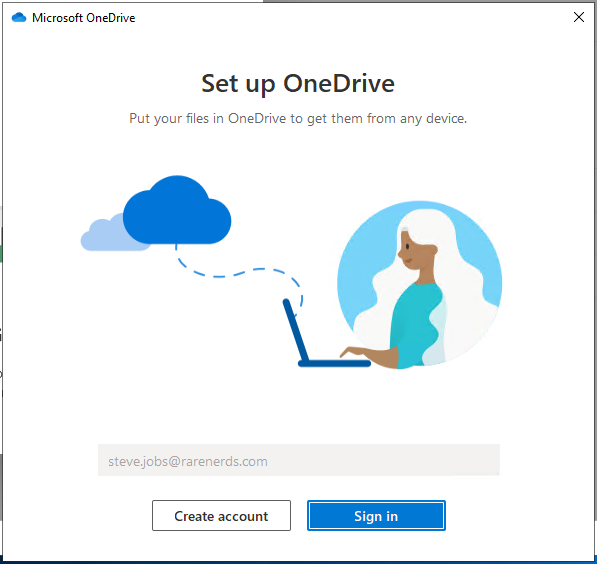
- You’ll then need to sign into the app
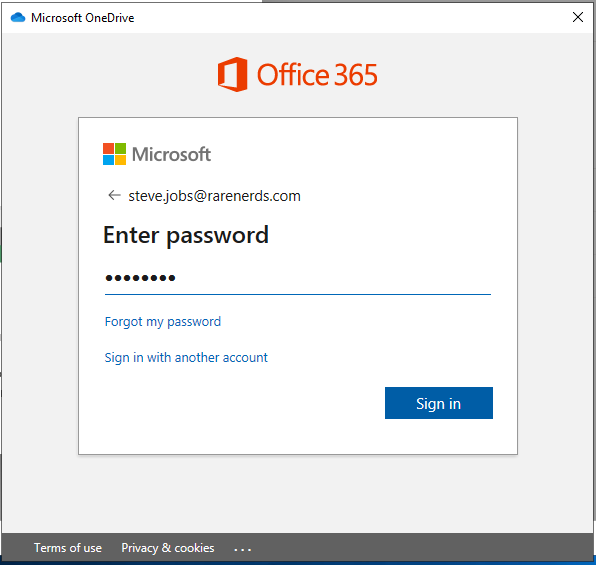
- Enter the password
- Choose where to sync your SharePoint Document Library to.
- Complete the on-boarding and your sync should start.
- Repeat steps 3 to 8 for additional document libraries
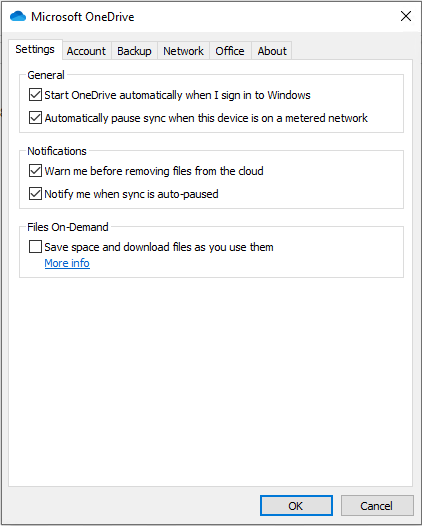
- By default, OneDrive app won’t download your files. You’ll need to click on the system tray icon to bring up a popup menu. Then choose “Settings”, and then click the “Settings” tab in the top left. You must uncheck the checkbox that reads “Save space and download files as you use them”.
- Make sure to include the destination directories in your on-premises backup solution
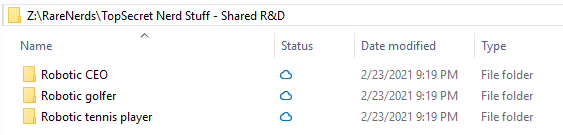
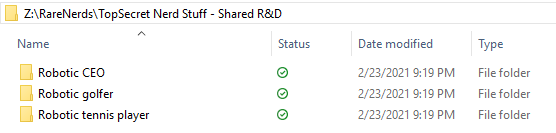
You can check that your data has synced by looking in Explorer. At first the target will display blue cloud icons, changing to green ticks once syncing is complete.
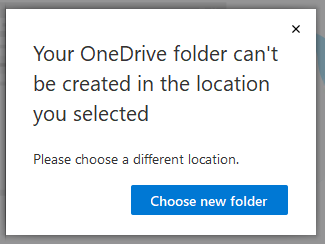
If you try to choose a network share as your destination, you’ll get a message like this:
The OneDrive app functions when someone is logged into your computer, so that can be a problem on unattended machines, especially if Windows Update logs out the user and reboots your computer.
And finally, there are some security issues with this option.
- A corruption on the local machine will be synced to the cloud.
- You need to log in to Office 365 / SharePoint as a licensed user. If you change your password, the sync will break, and you’ll need to log in again.
- You’ll need to manually grant access rights to the user that’s logging into the OneDrive app. This means if you have a SharePoint site that has restricted access, you’ll need to grant rights to the OneDrive app user, which may breach security policies that you’re trying to enforce.
Method 2: Use BackupAssist 365 free functionality to back up Office 365 and SharePoint Online
An alternative to using the free OneDrive app is the backup product known as BackupAssist 365. It has both a free and paid mode. The good news is that even the free mode solves all the limitations of the OneDrive app.
BackupAssist 365 is a fully fledged backup solution from Cortex Cyber. It provides backups of mailboxes, OneDrive for Business and SharePoint in Office 365. Although backing up Mailboxes and OneDrive for Business requires a paid license, backing up SharePoint can be completely free when you use just the basic functionality.
Highlights of using BackupAssist 365 in free mode include:
- Perform a one-way sync from your SharePoint Document Libraries in the cloud, to your local storage of choice.
- Get daily backup reports, so you know that the backup worked.
- Any corruptions or ransomware infections on the local machine will not automatically corrupt your data in the cloud – unlike the sync app.
- No limit to the size of data backed up – whether 1 MB or 1 TB, it’s not a problem.
If your aim is to keep a local mirror of your SharePoint libraries (i.e. download your cloud data to a local storage system) and include the mirror in your on-premise backups, then the free functionality in BackupAssist 365 is a compelling option.
How to set up BackupAssist 365 for backing up Office 365 / SharePoint Online
- Download BackupAssist 365 from www.backupassist.com/365/downloads and install the software.
- Activate the 30-day trial mode by entering the evaluation license key that was emailed to you.
- Set up a SharePoint task by clicking “Setup task”, and then clicking on “SharePoint”.
- Follow the steps to set up the SharePoint backup.
- Note – when it comes to logging into SharePoint, it can be tempting to use the regular admin login. However, mixing user logins with automated software processes is not a good security practice.
- It’s recommended that you create an additional “backup user” login in Office 365. The backup user does not require an Office 365 license but does require “SharePoint admin” and “Application Admin” roles. Further information is available within the software.
- You have some advanced options that must be enabled at the time of setup if you want to use them. If you intend to use the free functionality in BackupAssist 365, you’ll want to keep these settings turned off. (Otherwise, see Method #3, below.)
- Versioning – this feature keeps a history of backups. Turn this off if you want to use BackupAssist 365 for free.
- Encryption – this will encrypt the contents of every file and directory name in your backup. Turn this off if you want to use BackupAssist 365 for free.
- You can set a schedule – it is best to start your backups after the workday finishes. According to Microsoft recommendations, running backups during regular business hours may result in the backups being throttled. However, the developers at BackupAssist 365 say they play well with SharePoint even when backups are run during the day.
- Run the backup.
- You can also set up email reports to receive daily notifications of backup success. We recommend doing this.
If you seek additional functionality such as versioning, point-in-time restores, and encryption at rest, the next option will work well for you!
Method 3: Use BackupAssist 365 with advanced paid functionality to back up Office 365 and SharePoint Online
The first two options discussed so far will provide adequate backup coverage where you use another product or backup system to “back up the local copy”.
For example, you may use a product to do a “disk to disk to cloud” (D2D2C) backup of your on-premise server. So your primary aim is to pull down your cloud data to your on-premise machine, and then use the D2D2C to backup provide you with version history.
However, if you choose to run a standalone backup system for your SharePoint data, or you just want even more robust backups, the paid functionality in BackupAssist 365 will provide the important features of versioning and data security.
Three additional features of the paid functionality are:
- Keep historical snapshots of backup data – such as daily snapshots.
- Accurate point-in-time recovery for documents.
- Secure your backup data using encryption.
The setup procedure is the same as for Method #2, but you can enable these two advanced options when configuring your backup task for the first time:
- Versioning – this feature keeps a history of backups. Each backup is like a snapshot of your SharePoint document library, and versioning enables you to keep many historical snapshots. This enables you to do point-in-time restores in the future.
- Encryption – this will encrypt the contents of every file downloaded, as well as the file and directory names. If you turn on encryption, your data will be inaccessible outside of BackupAssist 365… and of course, you should use a strong encryption password and keep that safe.
Which option is best for backing up SharePoint? Can I get away with the free option?
Let’s look at the pros and cons of each solution – and then you can see if you form the same conclusions as we do.
Pros / cons of the free OneDrive app approach
| OneDrive app pros | OneDrive app cons |
|---|---|
|
|
Pros / cons of the free BackupAssist 365 approach
| BackupAssist 365 pros | BackupAssist 365 cons |
|---|---|
|
|
Pros / cons of the paid BackupAssist 365 approach
| BackupAssist 365 pros | BackupAssist 365 cons |
|---|---|
|
All the benefits of the free BackupAssist 365 approach, plus:
|
|
Our logical conclusions are:
- If all you need is a local mirror of your cloud hosted SharePoint, then choose the free functionality in BackupAssist 365.
- If you need a fully featured backup solution for cloud hosted SharePoint, including historical versioning and point-in-time restore, then choose the paid functionality in BackupAssist 365.
- The free OneDrive sync app has a number of security issues that are difficult to overcome – for example, a local ransomware corruption can get synced to the cloud, and cause further issues. However, the app does enjoy support from Microsoft, which may be a consideration if you are restricted in which vendors you can purchase from.
Conclusions
With many businesses using SharePoint as a cloud-based file collaboration and sharing platform, backing up SharePoint Document Libraries is a critical part of any cyber risk mitigation plan.
By using some tools like the OneDrive app or BackupAssist 365, it’s easy to protect against cyber-attack or human errors.