
Our previous article looked at how to create a Hyper-V guest backup. In this article, we look at how to restore a single guest.
Important considerations
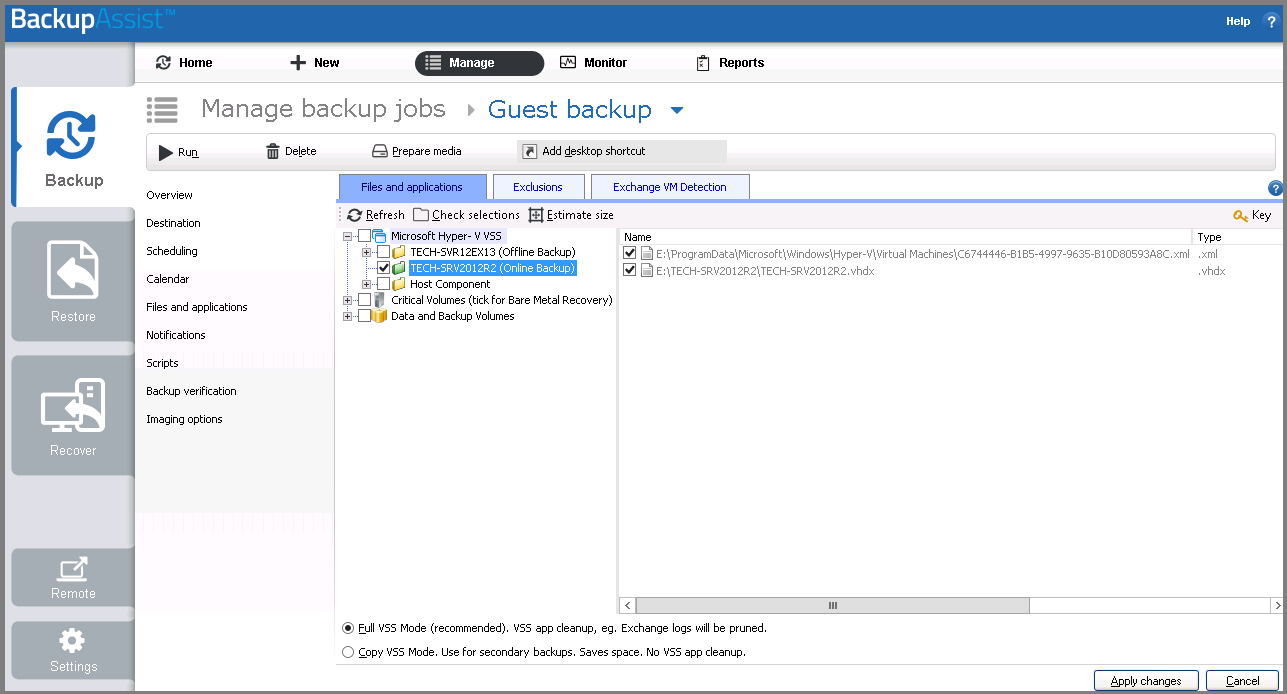
When you create a backup job to back up Hyper-V guests, it is important that the guests are selected under the Microsoft Hyper-V VSS section of the backup job’s Selections screen. This ensures that both the VHD and the required configuration (XML) files are backed up.
If you do not select the guests using the Hyper-V Server’s VSS section, BackupAssist will not be able to restore the guest and the VSS writer will not be able to make an application-consistent backup of the guest and any VSS applications inside it.
For a best practice guest backups:
- The VHD and configuration files of all guests to be backed up should be on the same volume.
- That volume should only contain data that is to be backed up.
- You should back up the whole volume.
Note: You can restore a guest without using its configuration file(s) by creating a new guest and using a backup of a guest’s VHD. However, you still need to configure the backup job correctly using the Hyper-V Server’s VSS section so that the backup is application-consistent.
For details, see the Hyper-V guest backup article
Methods for Restoring a Hyper-V guest
There are two methods used to restore a guest .
Restoring the guest to its original location
This method will use the BackupAssist Restore Console to overwrite the existing guest and replace it with the restored guest.
Important – The existing guest will shut down if a restore starts. We recommend that you shut down the guest manually before the restore starts, to ensure a clean shut down.
Restoring the guest to another location
This method will use the BackupAssist Restore Console to restore the Hyper-V guest to another location. The restored VHD file can then be used to create a new guest.
This method can be used if you do not want to overwrite an existing guest, or if you want to restore the guest to another Hyper-V Server.
How to restore a Hyper-V virtual machine
To restore a Hyper-V virtual machine using BackupAssist 10 and later, see our current Hyper-V restore guide.
This section explains how to restore a Hyper-V guest.
To restore a Hyper-V guest:
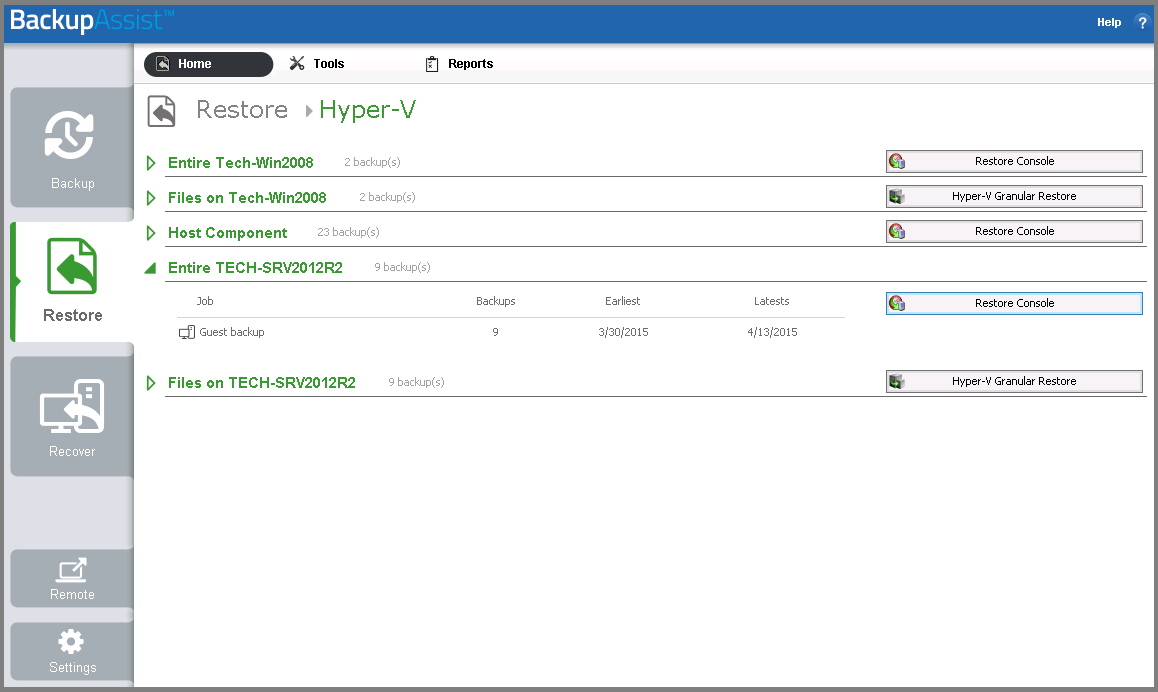
- Open BackupAssist and select the Restore tab.
- Select Hyper-V.
This will open a list of all Hyper-V backups created on this server. There will be an option to restore the full guest using the Restore Console. If you have the Exchange Granular Restore (EGR) Add-on, you will also have the option to restore files from within the guest using EGR.
- Select the Restore Console button next to the backup containing the guest that you want to restore.
The Restore Console will open.
- Use the Browse tab to select the backup.
- Use the Browse tab’s calendar to select the date that you want to restore from.
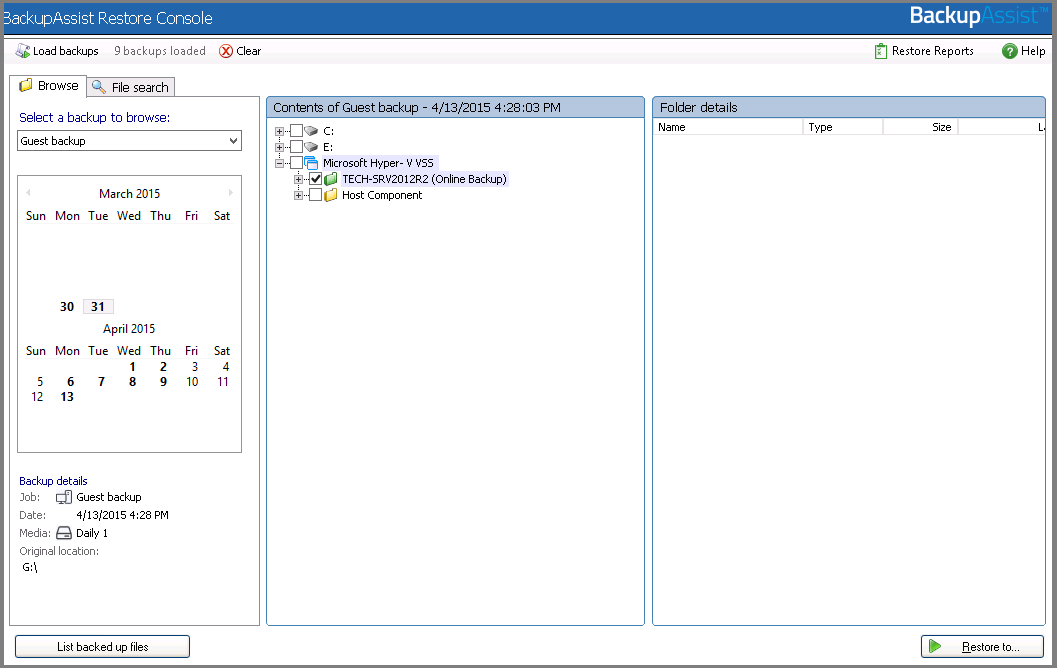
- Put a tick next to the guest machine that you want to restore.
- Select Restore and a new dialog will open.
- If you are restoring the guest to its original location – ensure that the Restore to field displays Original location, and that the Restore options field displays Overwrite existing files.
- If you are restoring the guest to a different server to the server it was backed up from, or wanting to restore the VHD to create another guest on the same server- use the Restore to field to specify the location that you want the VHD file to be restored to.
- Select Restore
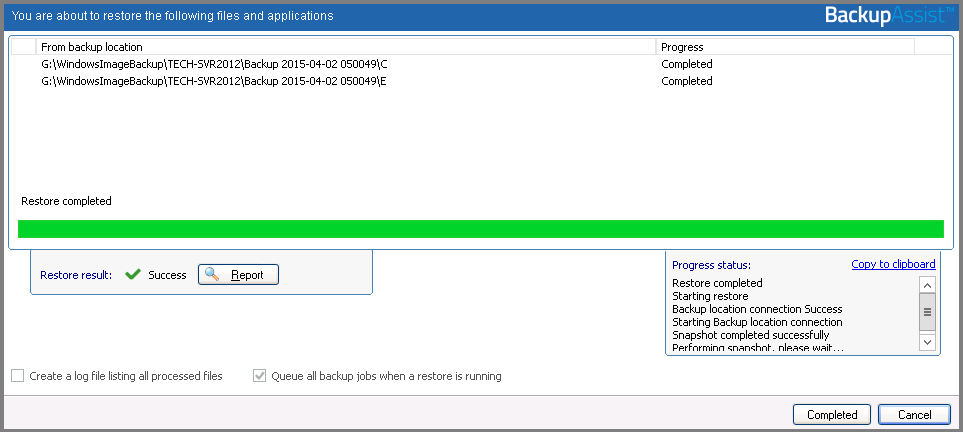
- Once the restore has been completed, proceed as follows:
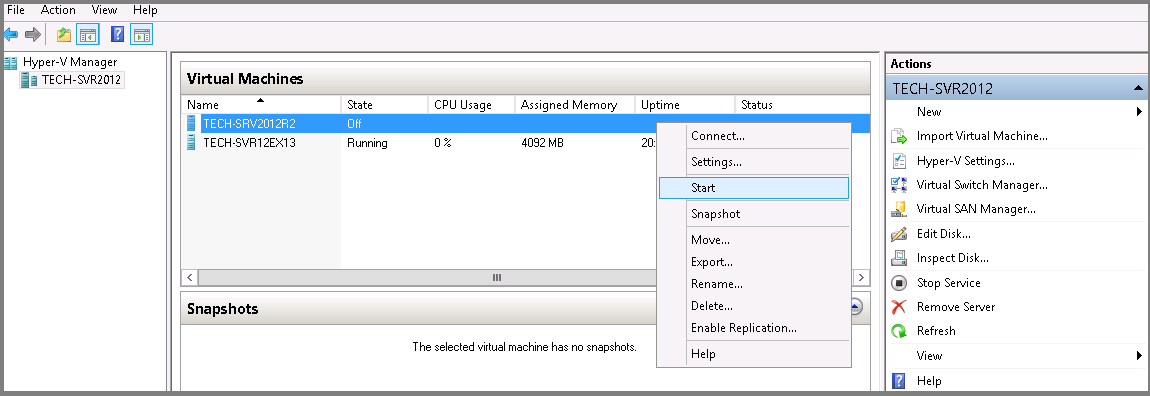
- If you are restoring the guest to its original location, you will now need to open the Hyper-V Manager and start the guest.
- If you’re using the restored VHD to create a new guest, you can now create the new guest.
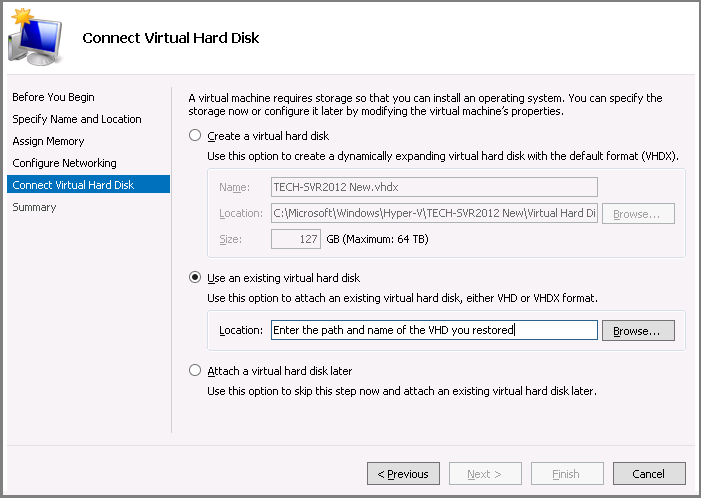
On the Connect Virtual Hard Disk step, you can use the restored VHD to create the new guest.
Important: We recommended configuring the guests so that their VHD and configuration files are on the same volume. To do this, the volume where the guest is to be stored should be selected in both the Specify Name and Location step as well as Connect Virtual Hard disk step.
To learn more, see our Hyper-V best practices article.
Any other questions about Hyper-V guest restoration come to mind?
Leave them in the comments, tweet @BackupAssist or post to Facebook.
Share this article to make guest restoration easier for everyone.