The importance of backing up data is well understood, but the best approach is often uncertain. Many I.T. professionals choose system image backups not only to ensure the highest level of data security, but also because they provide powerful flexibility for achieving all your backup and recovery needs.
Understanding System Image Recovery
Creating a system image gives you an exact snapshot of the entire hard drive. This includes the operating system, applications, files, and settings at a specific point in time. The purpose of system image recovery is to recover the entire system in case of critical events or disasters, such as hard drive failures, system crashes, software corruption, or malware infections. By utilizing a system image backup, users can recover their computer systems to a known working state.
Benefits of Using System Image Recovery
Full System Recovery
A full system recovery allows the recovery of the entire hard drive, including the operating system, installed applications, system settings, and user data.
Save Time
Recovering a system using a system image is often faster than reinstalling the operating system, applications and configuring settings individually.
Data Integrity
A full system recovery will ensure that your applications, settings, and files will work seamlessly, just as they did when you last used them.
The Difference Between System Image Backups and Other Backup Methods
Understanding the various backup methods will help you select the right method for your situation. A system image backup is the most flexible, as it allows you to recover everything from a single file to the entire system. Alternatively, file-level and application-level backup methods only allow specific recovery for files and application data.
One thing to be aware of is that given the complexities involved, system image backups (and their related recovery) involve more processes. For example, you would need to have access to a boot disk that you can boot into a recovery environment in order to carry out a full system recovery.
Why BackupAssist is a Great Choice for System Image Backup and Recovery
Simple User Interface
Access BackupAssist’s user-friendly interface to easily create and restore system image backups.
Reliability and Data Integrity
Ensure the reliability and integrity of system image backups with BackupAssist Classic’s Test Restore feature. This feature conducts backup verification and integrity checks, giving you confidence in the recovery process.
Fast and Efficient Backup and Recovery
The BackupAssist advanced imaging engine is a highly efficient backup program that works at the disk block level. It only ever creates one single full backup, and all subsequent backups are incremental backup. This means that only new data is backed up – saving time and storage space.
Customizable Recovery Options
Choose from various options that allow you to tailor your recovery strategies according to your specific needs. From the same image backup, you can recover files, emails, applications, databases, virtual machines, and the entire system image.
Technical Support and Updates
Rely on expert technical support and regular software updates, ensuring that you have access to the latest features and security enhancements.
Versatile Compatibility
Use BackupAssist with a wide range of operating systems, including Windows, Windows Server, and virtual environments.
Powerful Disc-To-Disk-To-Cloud Capability
Store image backups in the cloud with BackupAssist ER. This means that you can carry out image recovery from anywhere and be more resilient to disasters.
Step-by-Step Instructions for Creating a System Image Backup Using BackupAssist
Follow these step-by-step instructions to create a system image backup using BackupAssist:
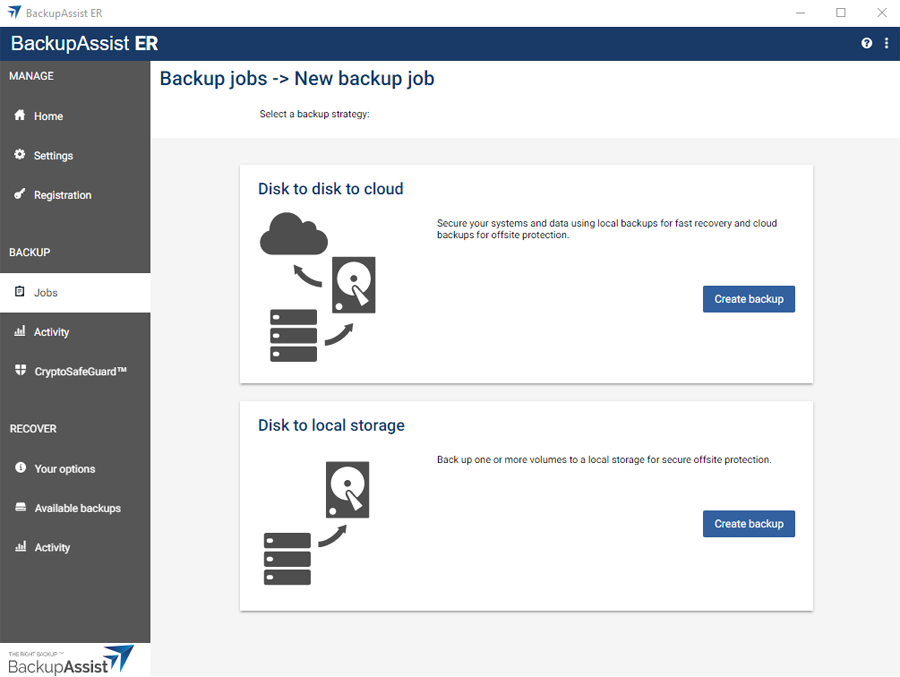
- Open the BackupAssist Classic or ER software on your computer, and create a new backup job.
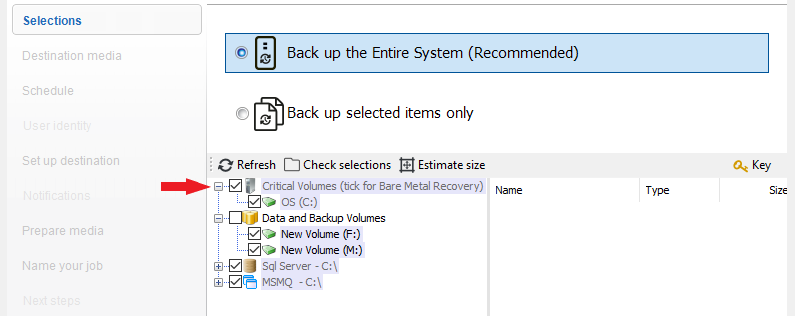
- Select which volumes to back up. Important – ensure you include volumes that are needed for an image recovery (follow the interface guidance).
- For Classic, select ‘Critical Volumes (tick for Bare Metal Recovery)’.
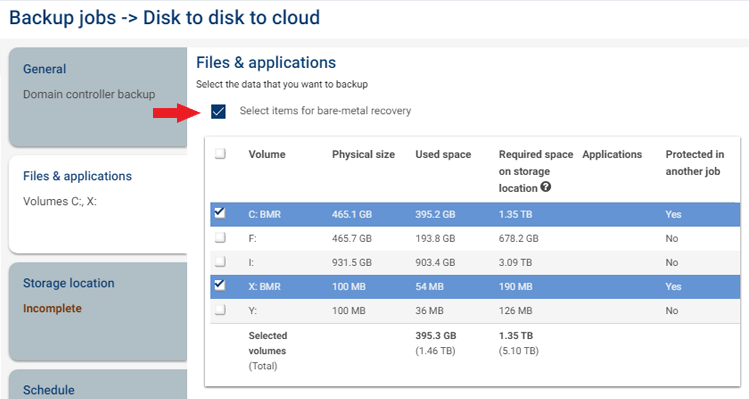
- For ER, tick ‘Select items for bare-metal recovery’.
- Select and configure the type of destination where you want to store the system image backup. This can be an external hard drive, network location, and (for BackupAssist ER) one of the leading cloud storage providers.
- Set the backup schedule according to your preferences. You can choose to perform backups daily, weekly, or even multiple times per day.
- The BackupAssist user interface allows you to configure other settings according to your requirements – including encryption and retention policies.
- Prepare (or check) your backup media according to BackupAssist’s instructions.
- Save the backup job and let BackupAssist perform the initial system image backup. The software will create a snapshot of your system and save it to the designated destination.
Click here to view our full online Help documentation for creating a system image backup in Classic.
Click here to view our full online Help documentation for creating a system image backup in ER.
Initiating System Image Recovery with BackupAssist
Follow these step-by-step instructions to initiate system image recovery using the BackupAssist recovery environment:
- Create your recovery environment media using BackupAssist Classic or BackupAssist ER. This can be a USB thumb drive (or an ISO file for a virtual environment image recovery).
- Insert the recovery media to the target system for recovery, update the boot order accordingly and boot your target system into the recovery environment.
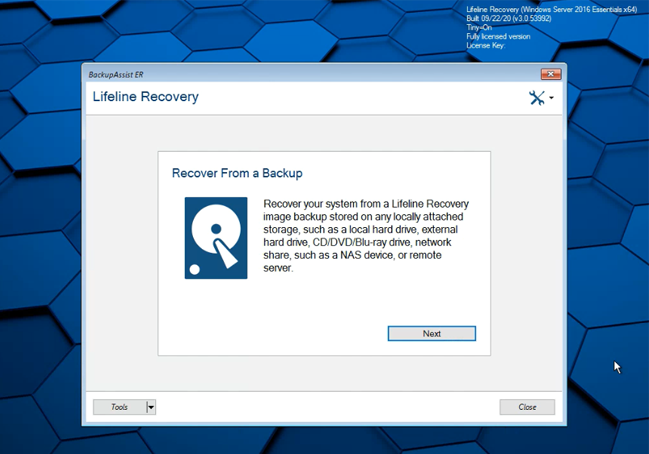
- Follow the RecoverAssist (for Classic) or the Lifeline Recovery (for ER) tools to locate the backup you want to recover.
- RecoverAssist in Classic:

- Lifeline Recovery in ER:
- Select the target disk location to recover the selected volumes to – ensuring that your disks are large enough – and start the recovery process.
- When the recovery process completes, follow the instructions to remove the recovery boot media and restart your computer.
- You will now boot into the recovered system.
Click here to view our full online Help documentation for system recovery in Classic.
Click here to view our full online Help documentation for system recovery in ER.
Conclusion
Backing up your hard disk with a system image is important for ensuring your company’s cyber-resilience. BackupAssist offers a thorough and user-friendly solution for creating and restoring files, applications, and even your entire system. With its key features, customization options, and compatibility with various Windows operating systems and virtual environments, BackupAssist simplifies the backup and recovery process, reduces downtime, and ensures your business’s resilience.